Planning your shifts
The Shift allocation (On site) planning screen includes multiple features with associated tasks to manage how shifts are allocated to your workers. Navigate to to access the planning dashboard.
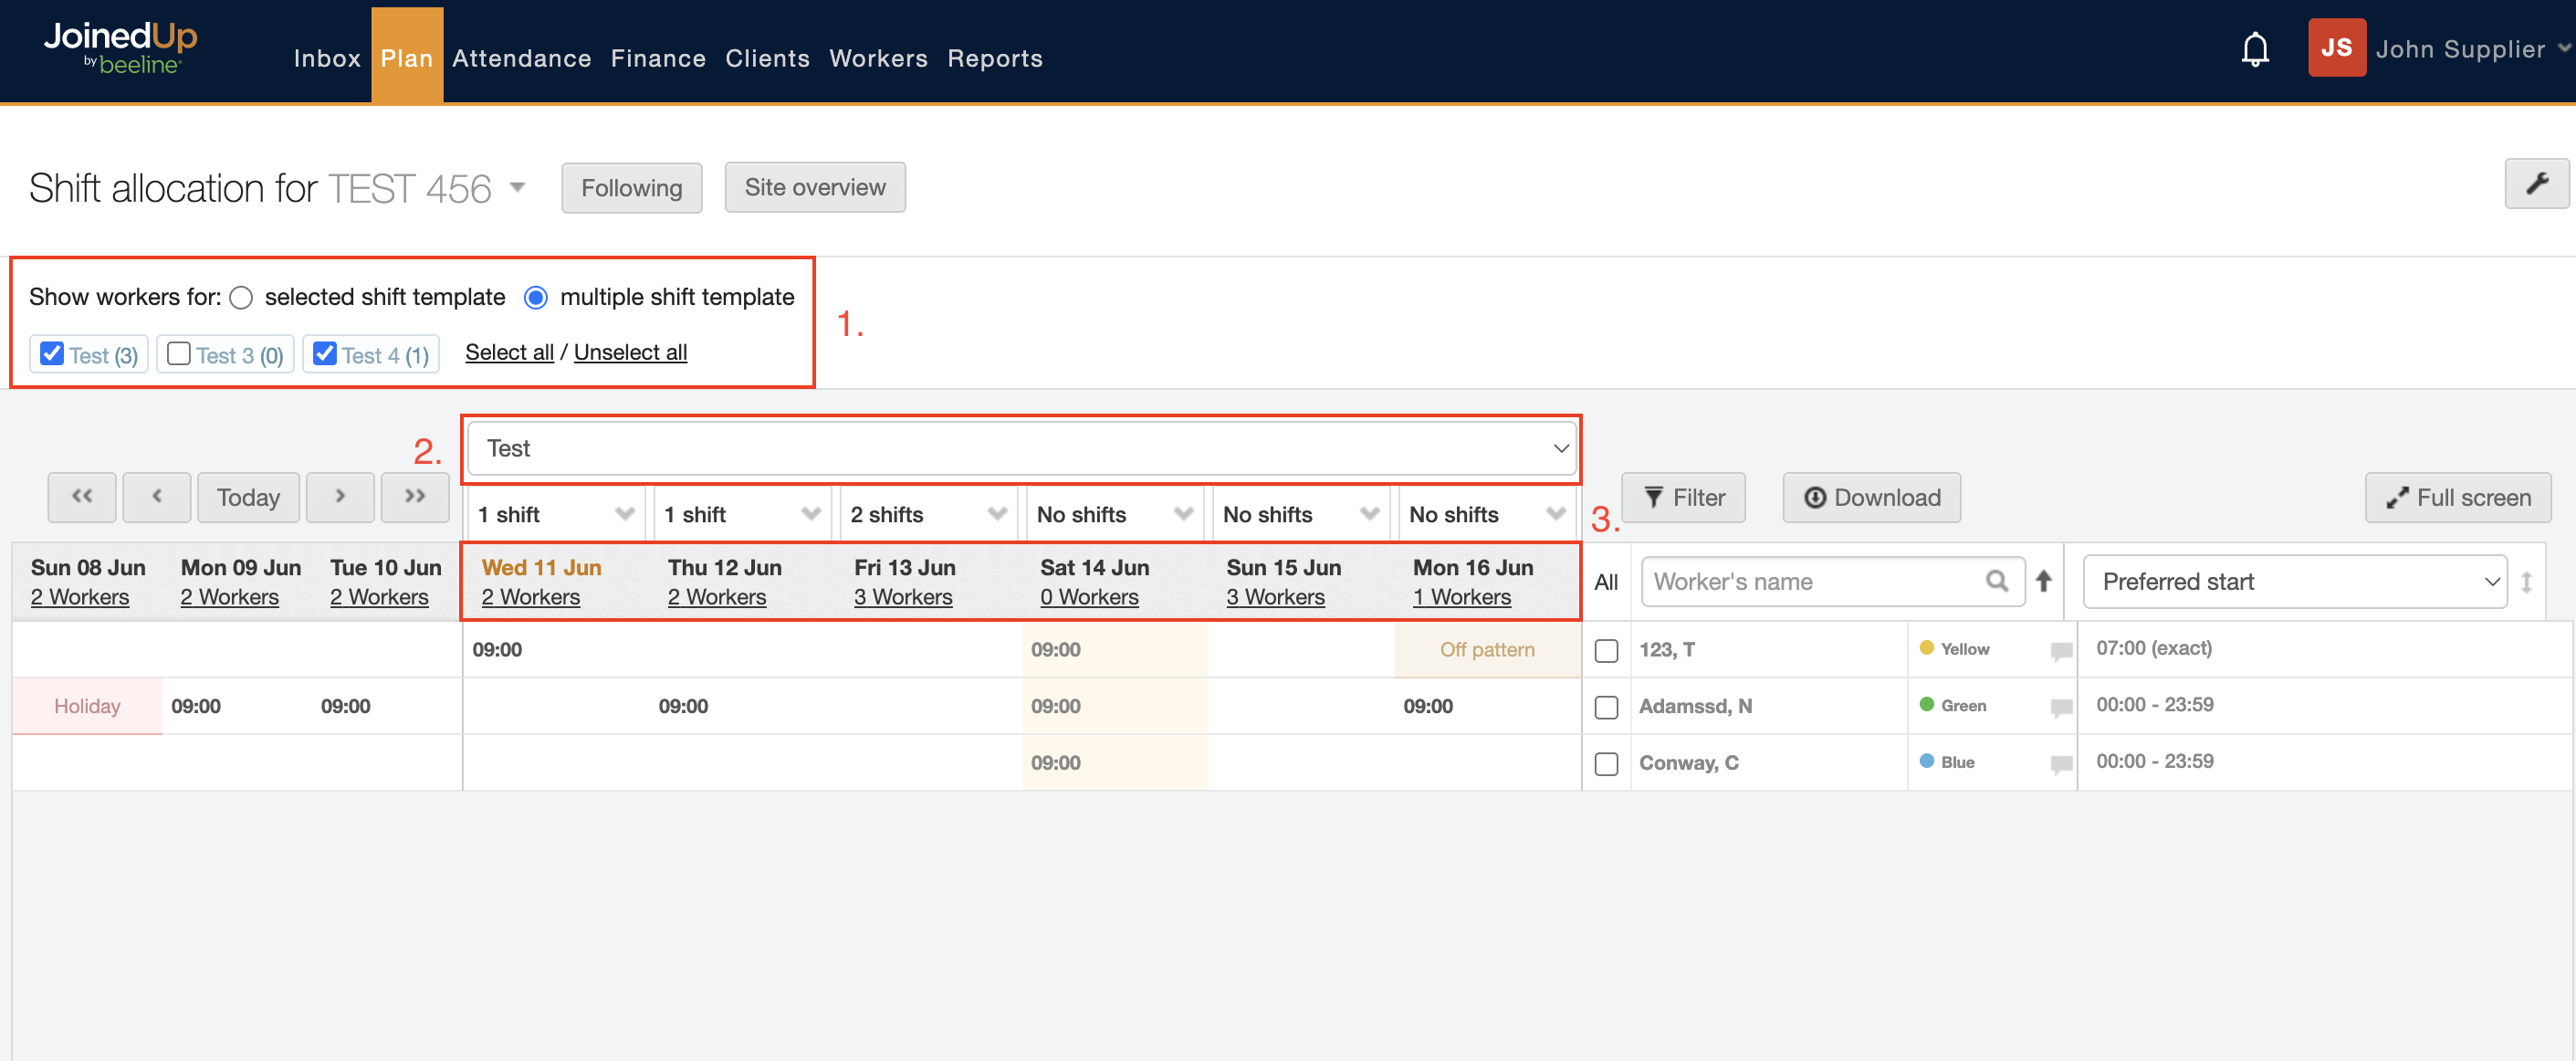
Match the numbers in the image above with the descriptions in the list below to learn more about booking or creating shifts from the Shift allocation (On site) screen.
-
Shift templates / Linked workers - Shows the shift templates valid for the site location displaying in the Shift allocation for… field. Shift templates include the rate cards. The number in parentheses after the shift template name indicates the number of workers linked to that shift template. Select or un-select the shift template tick box to filter which workers will appear on the planning list. There’s also a radio button to show only “selected shift templates” or “multiple shift templates”.
-
Shift template selector - Select the drop-down arrow to select the shift template to which you want to add shifts when you have selected multiple shift templates in section #1. Workers who are eligible (those linked to the shift template) will display in white. Workers displayed in grey are not linked to the selected shift template and therefore are not eligible for selection.
-
Work day & date - Each column with a displayed day and date represents a single day in a work week. “Today” will always be colour-coded orange. You can use the single and double arrow buttons on either side of the “Today” button to change the planning area display to a timeframe in the past or in the future—select “Today” to quickly reset the display to the present. Select the # workers link for a pop-up summary of Shifts and Workers stats.
-
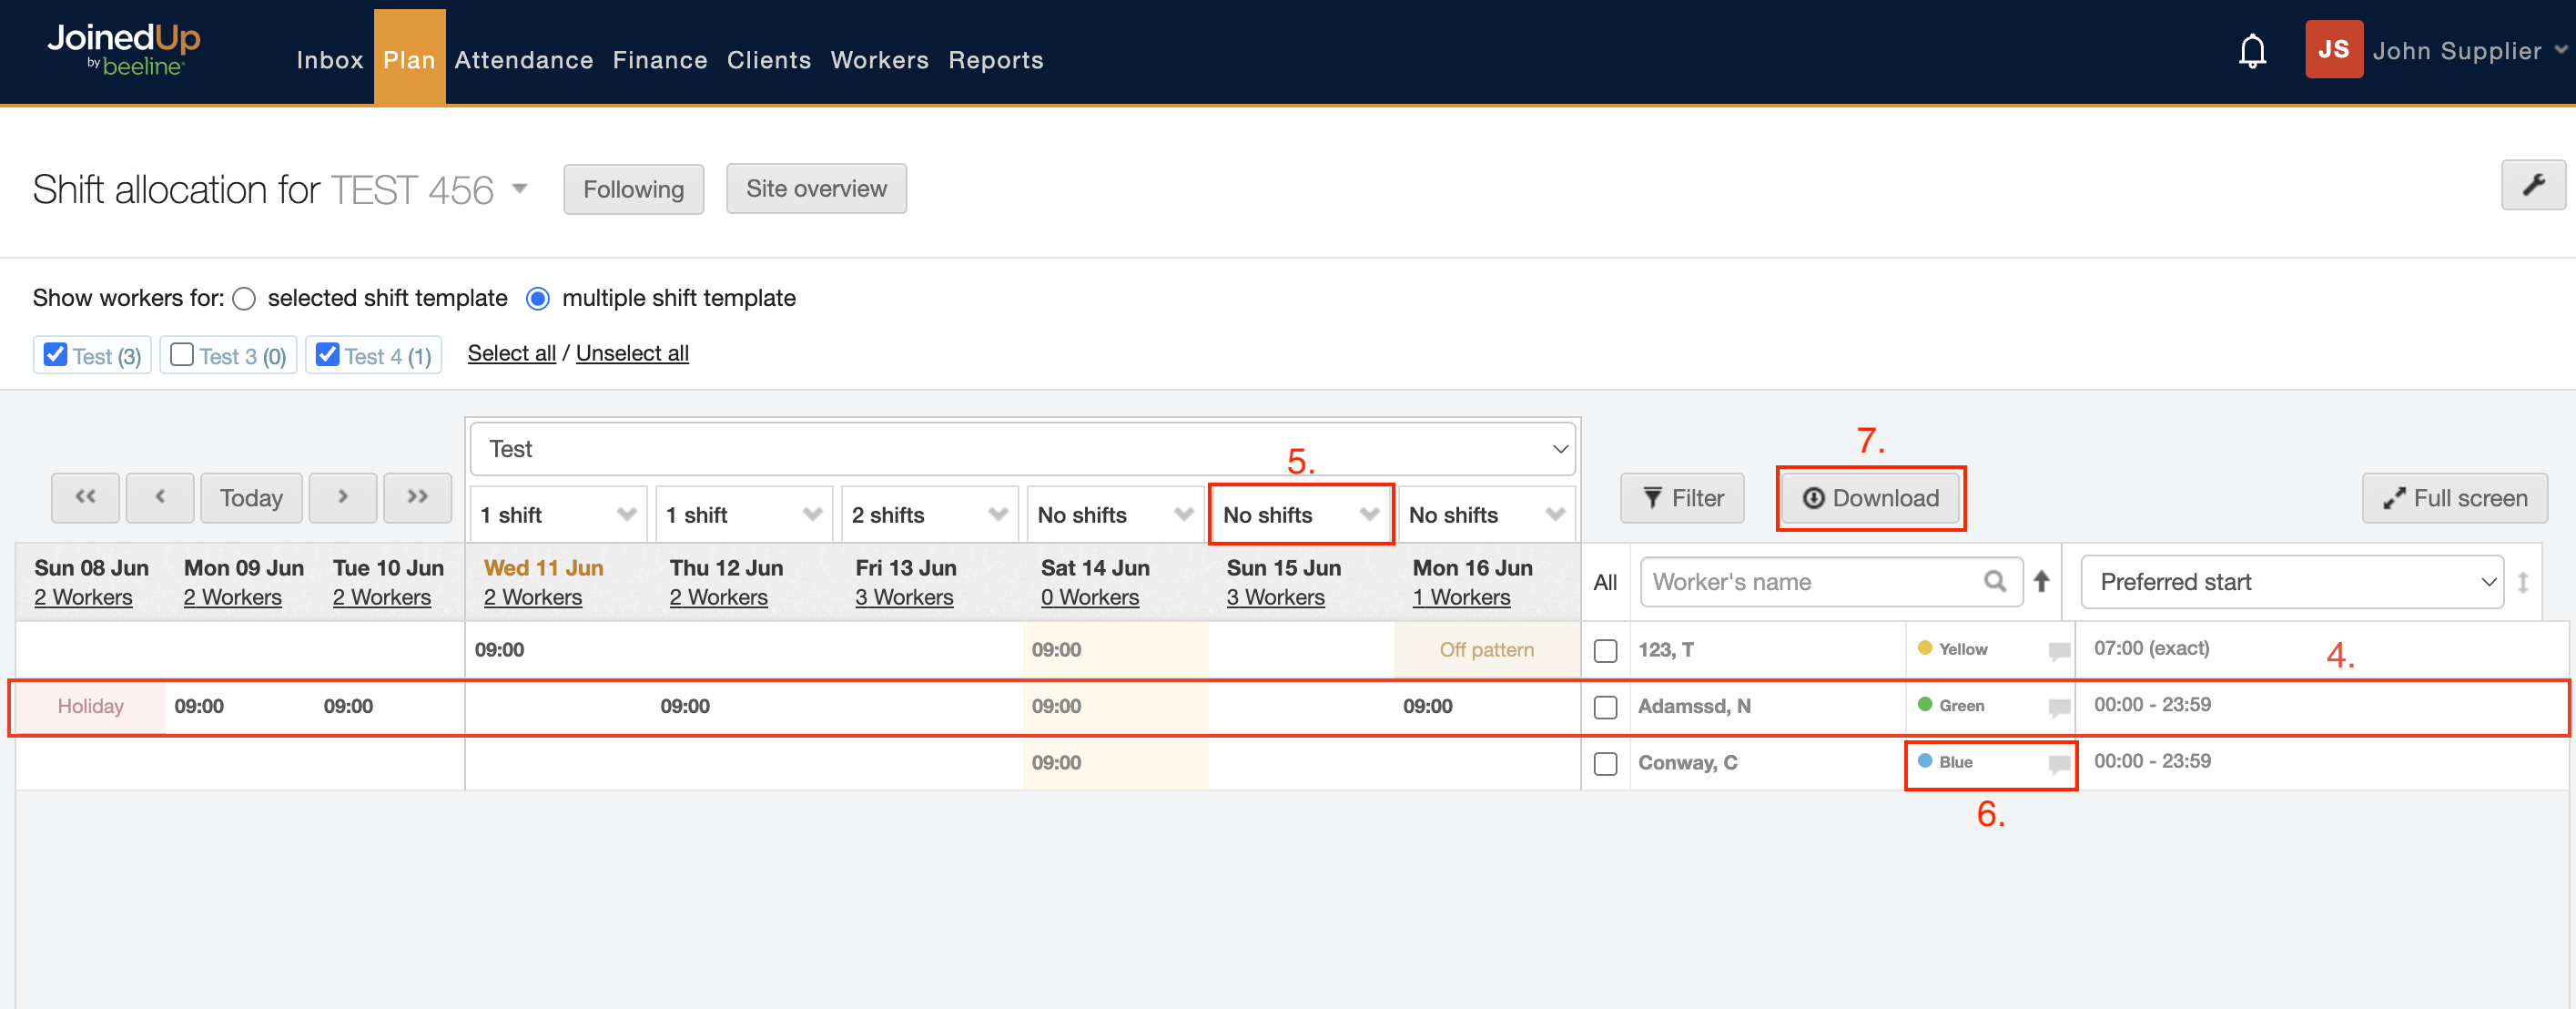
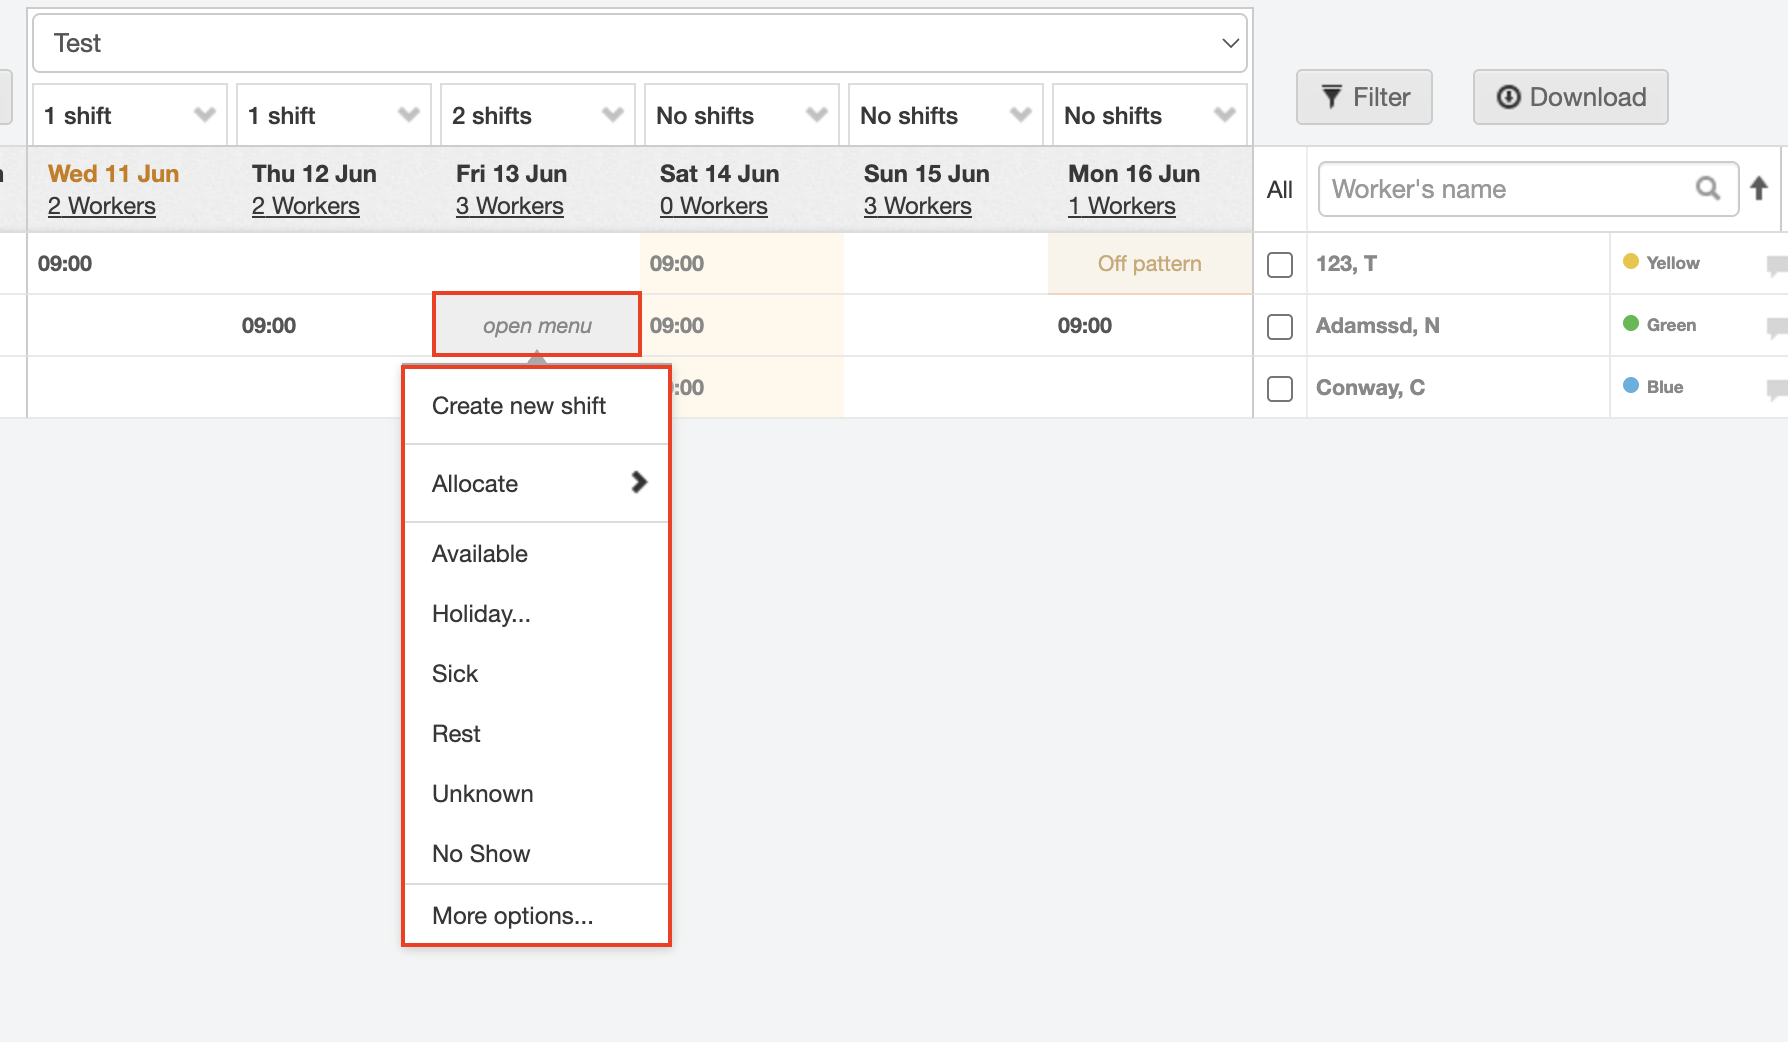
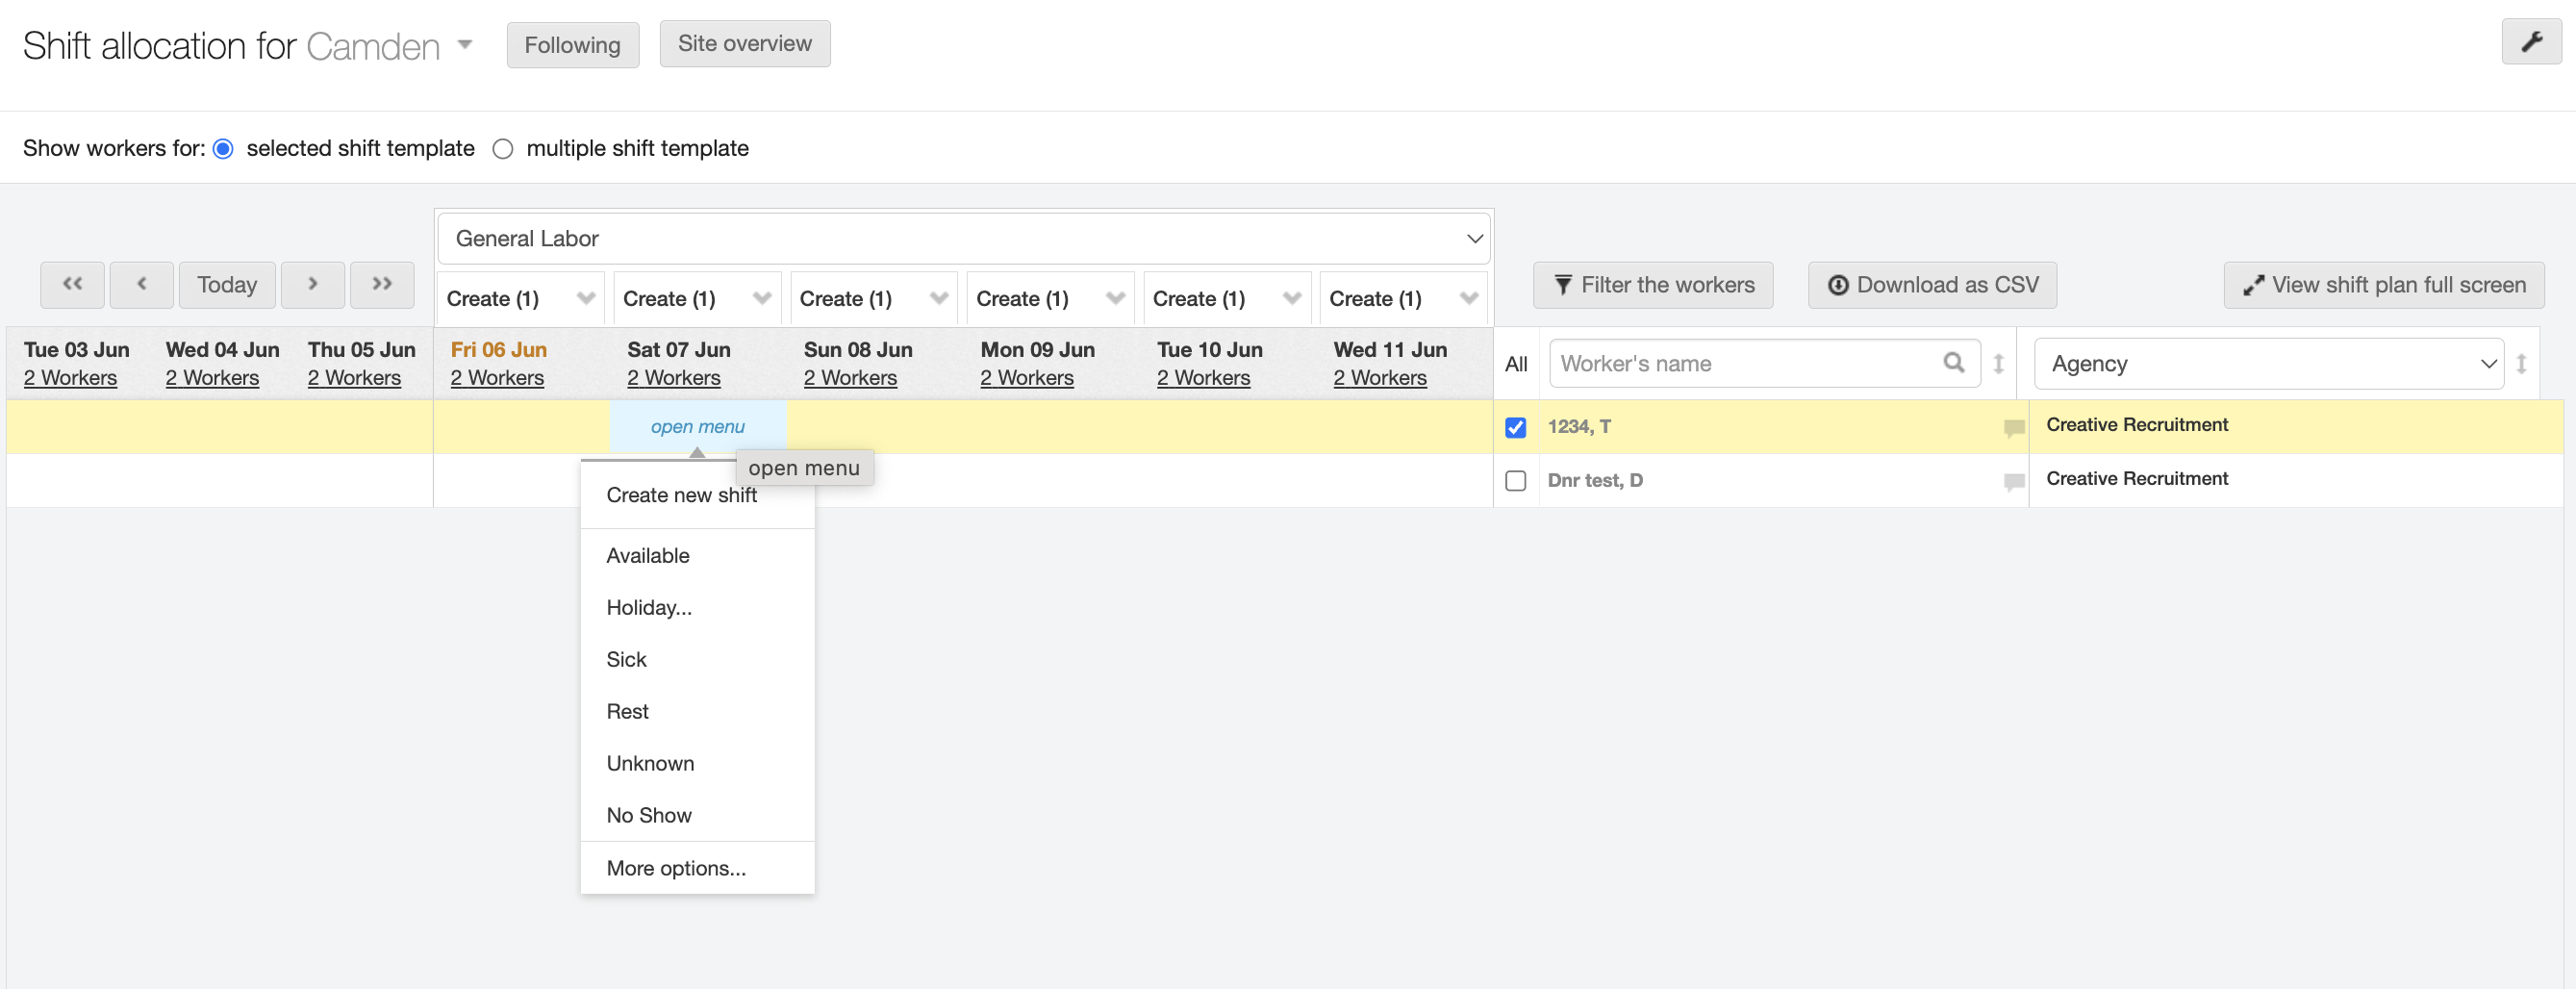
Worker - Each row represents a single worker, with the worker’s name displayed in a column on the right-hand side. You can create shifts for a single worker by selecting the cell where the worker’s “row” and the work date “column” intersect to reveal the open menu options.
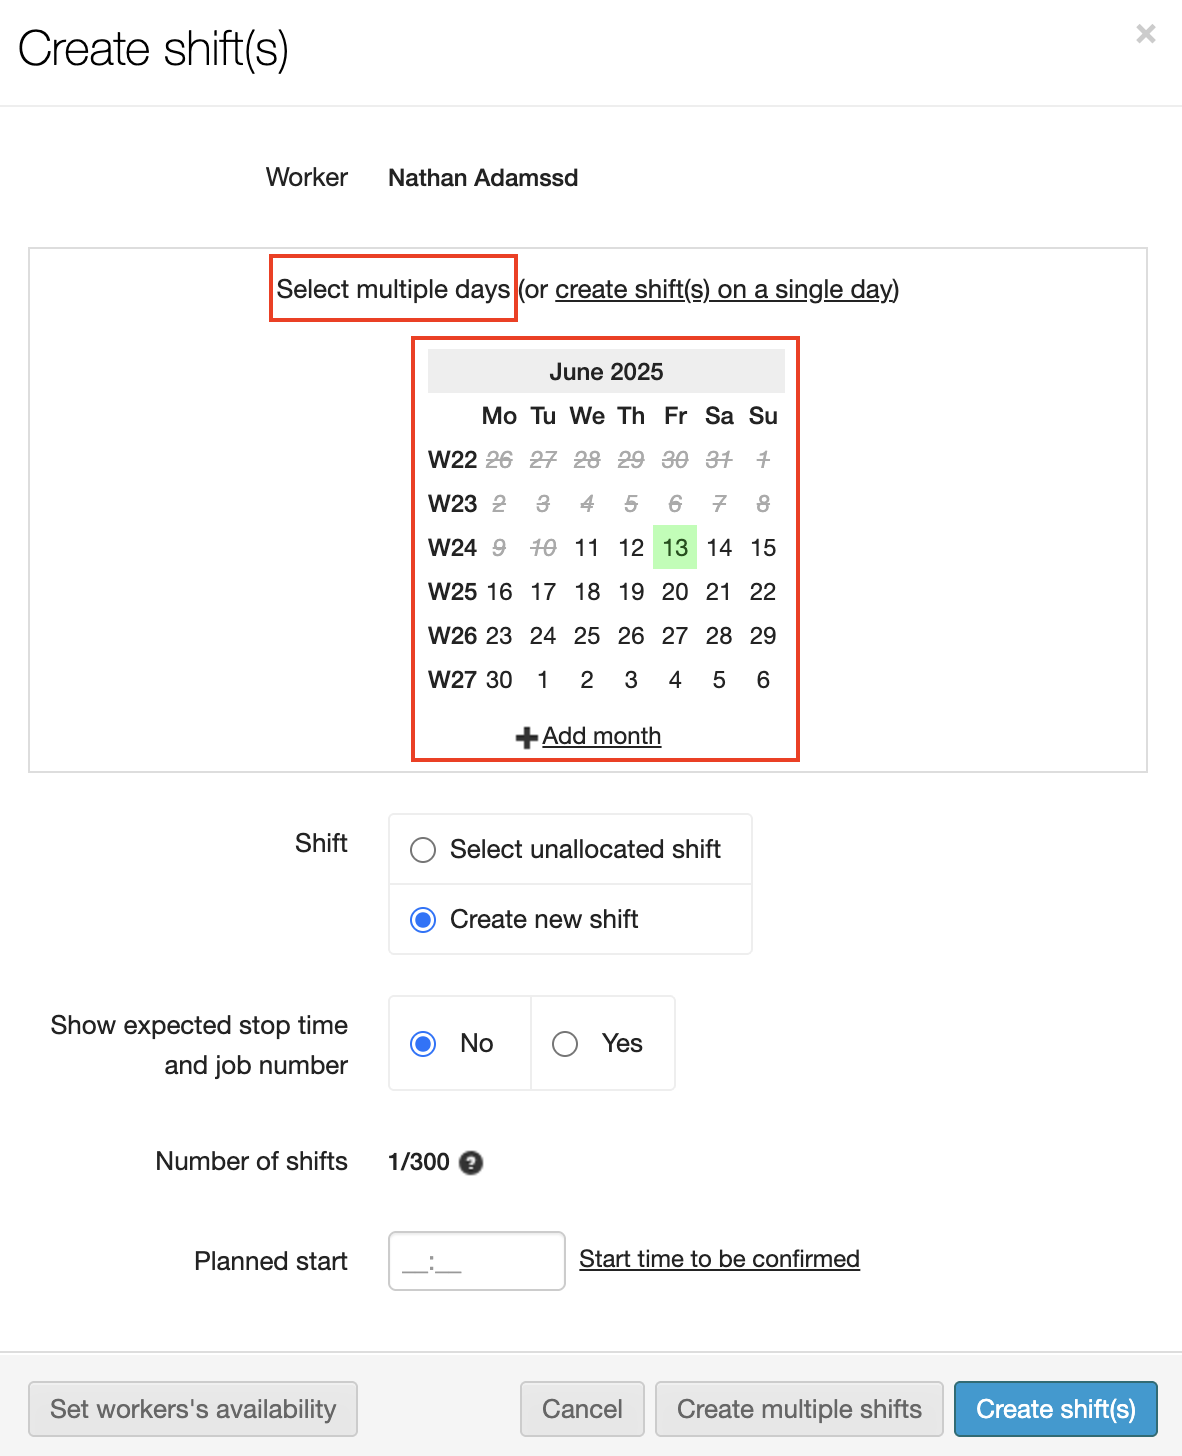
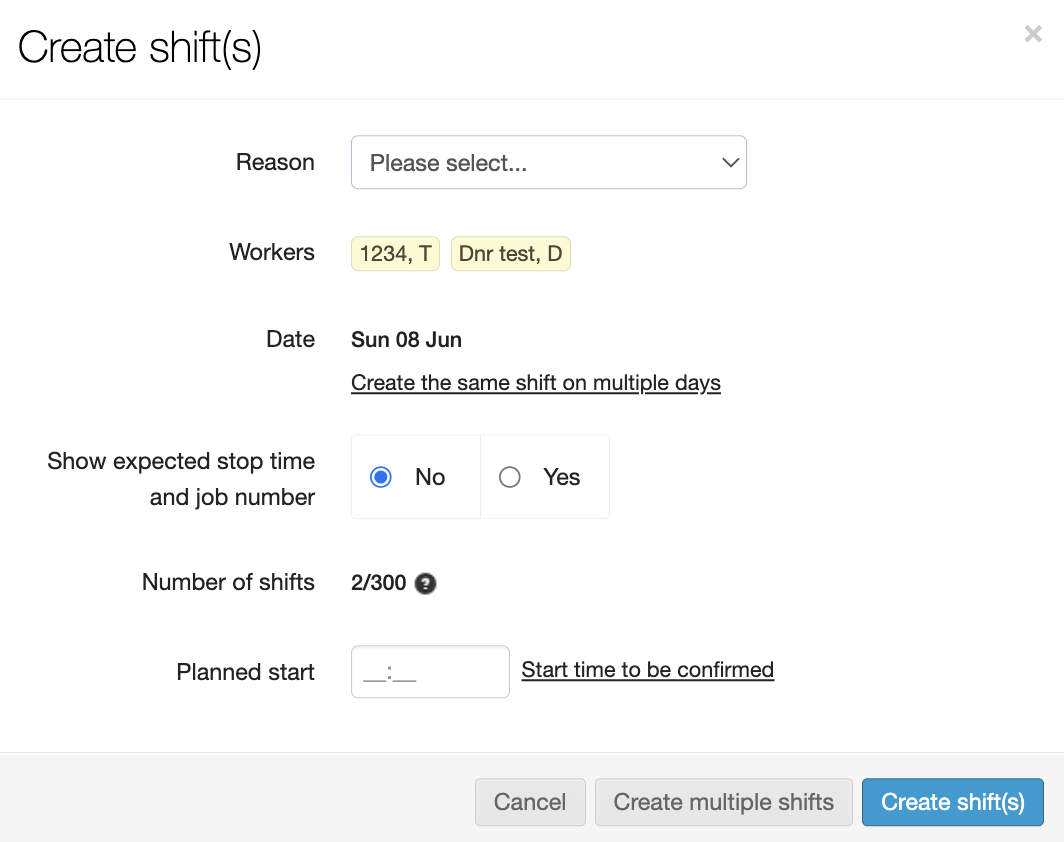
When you select the Create new shift option, a pop-up window opens where you can choose how many shifts you would like to create for this specific worker as well as a selection option to add the expected stop and job number (optional). If you choose Select multiple days, the window expands to display a calendar date picker as shown below. Enter the Planned start time (not shown in sample below) to activate the Create shift(s) button to save your changes and create the shift(s).
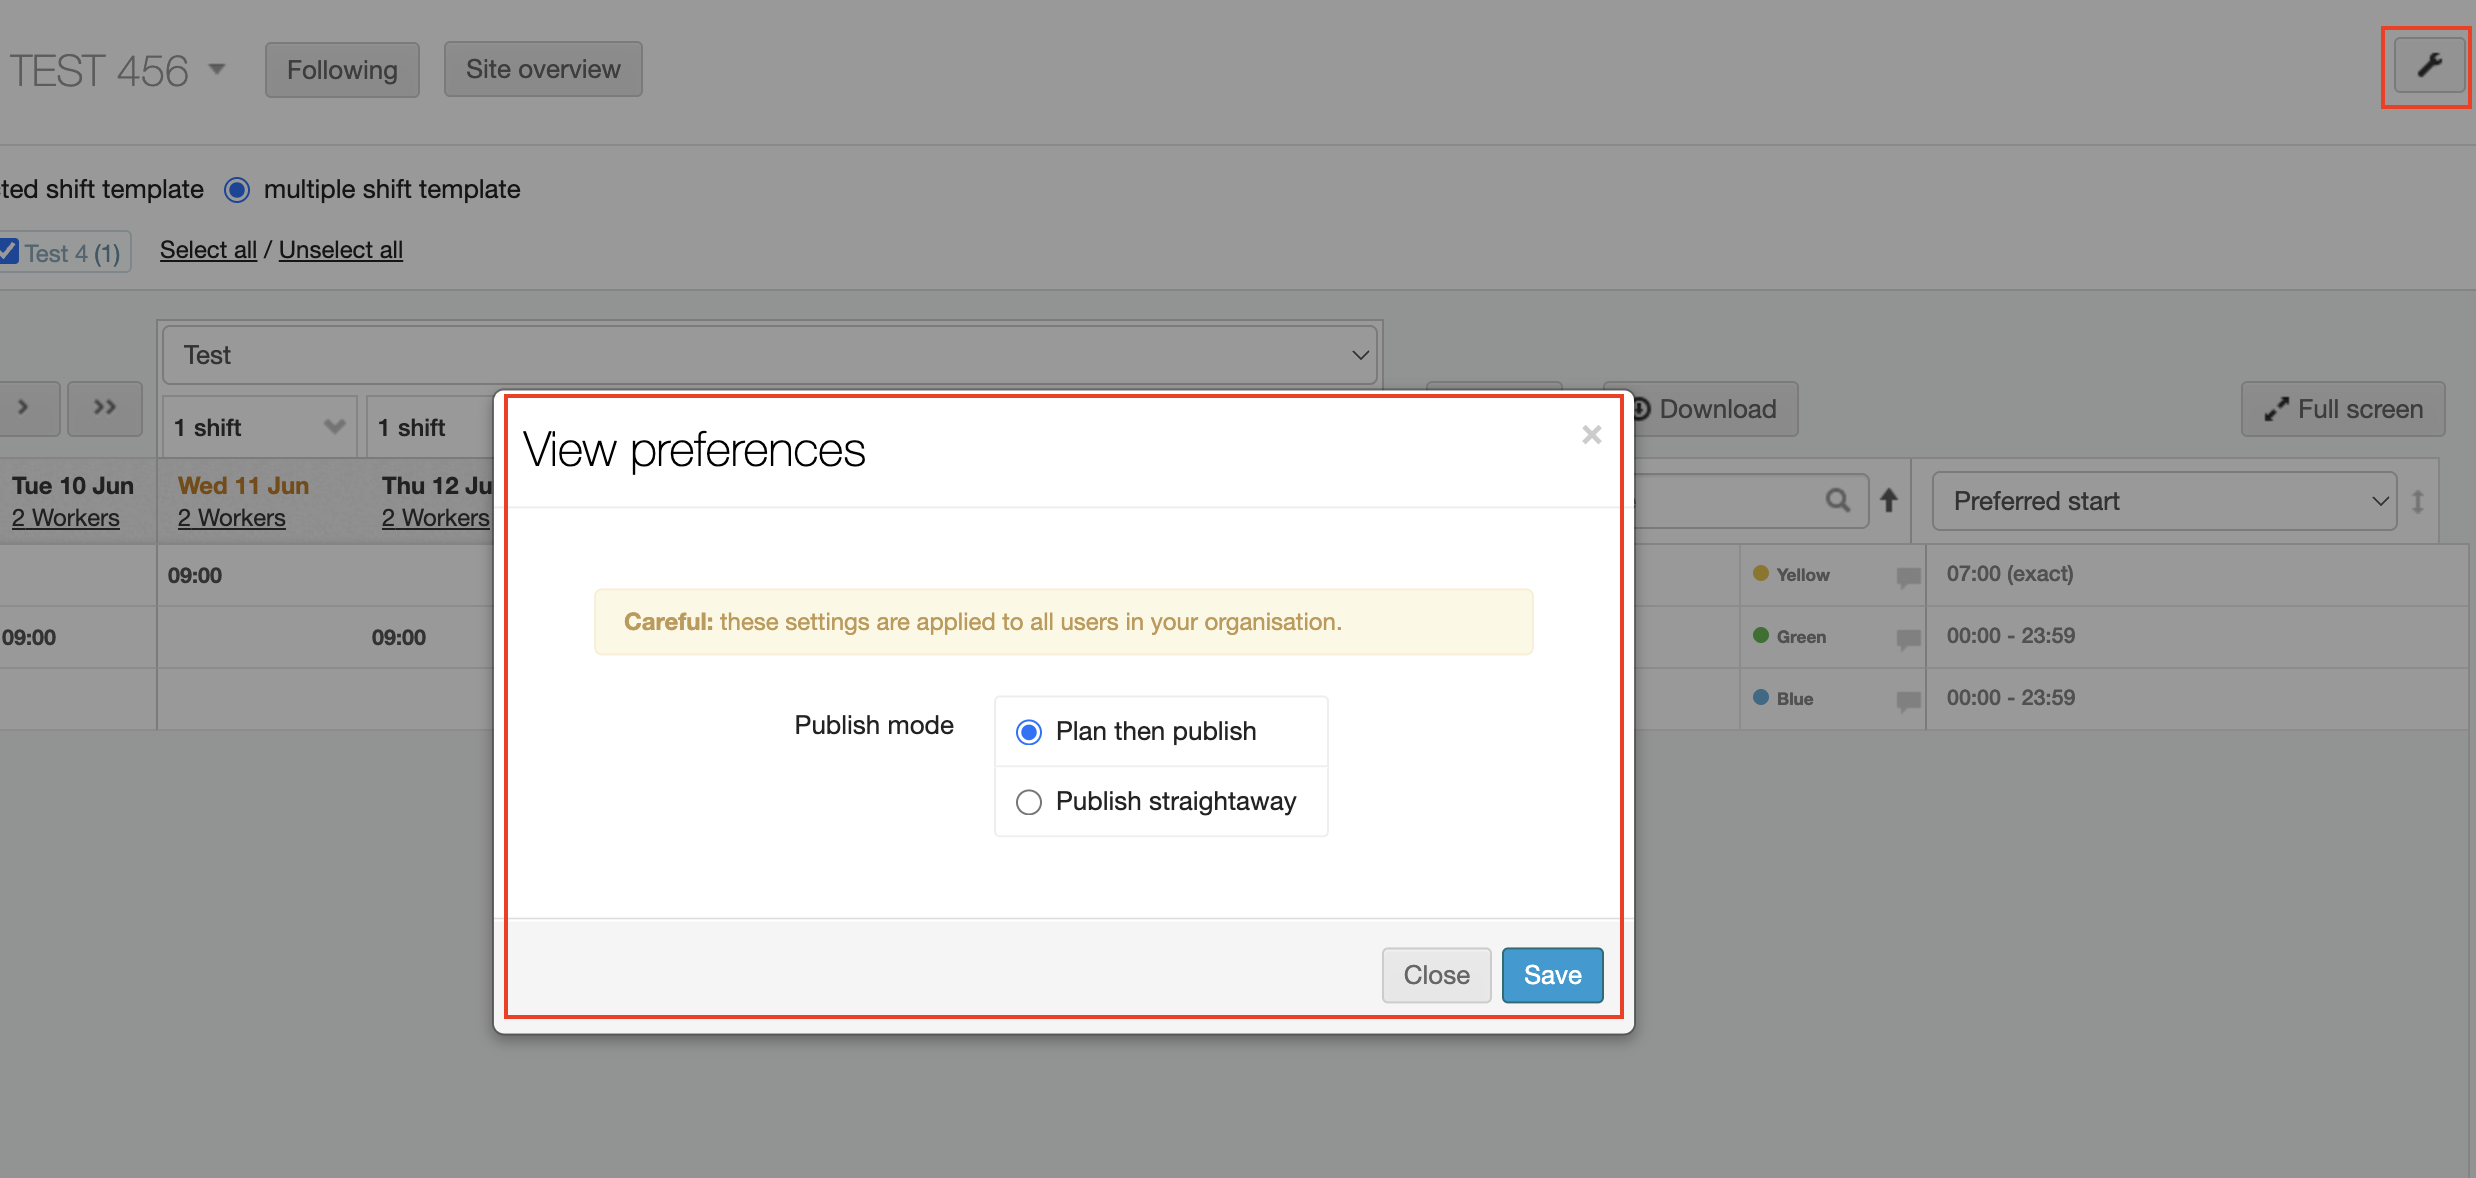
The worker will be notified of the booking by SMS and e-mail immediately or once the shifts have been published based on the system Preferences setting. You can check this setting by selecting the wrench icon located in the upper right corner of the Shift allocation (On site) screen.
-
You can create multiple shifts with different start times by selecting the down arrow to the right of the # shifts text (in the row located above the work date). Select Create new shifts in the drop-down menu and the Create multiple shifts pop-up window displays.
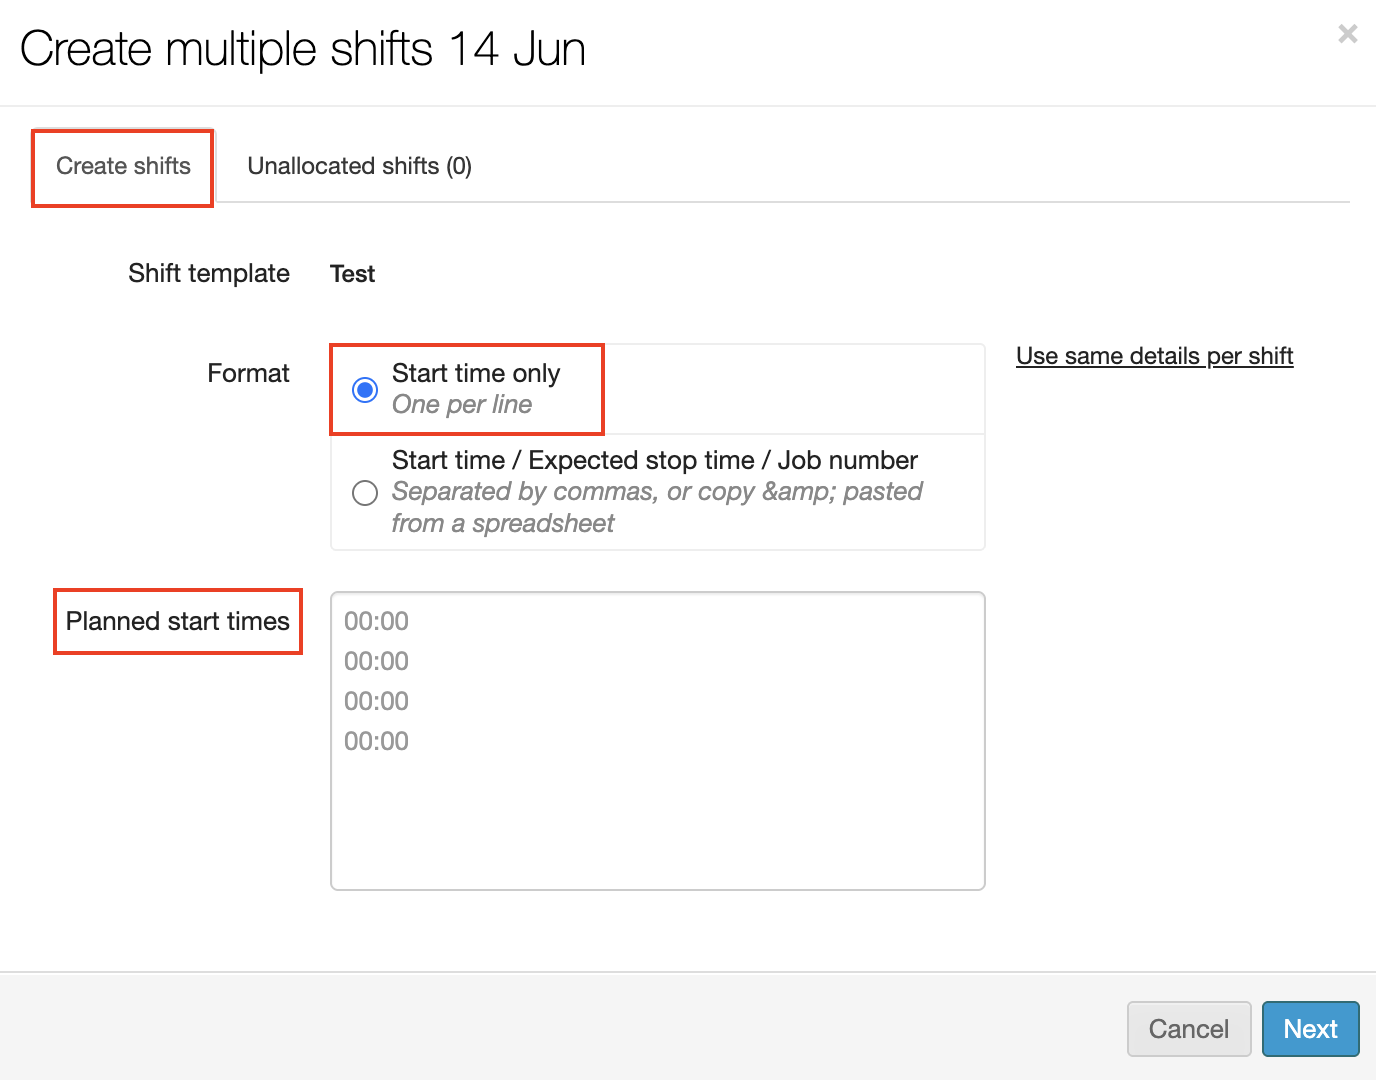
Create shifts: Start time only with multiple Start times option
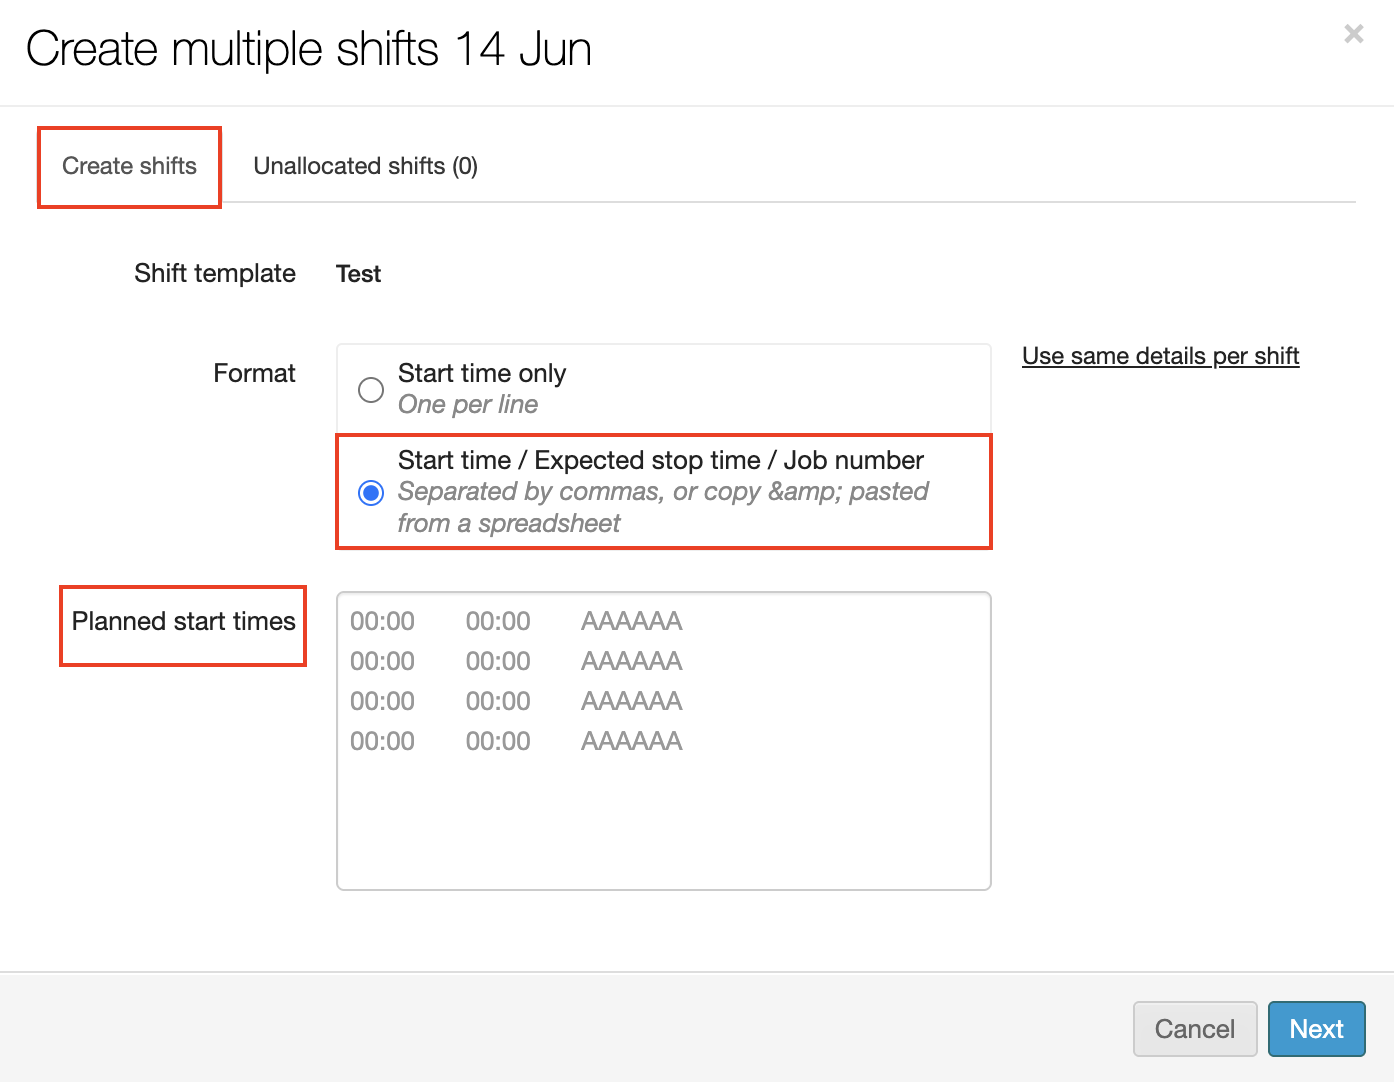
Create shifts: Start and Stop times with multiple Start times option
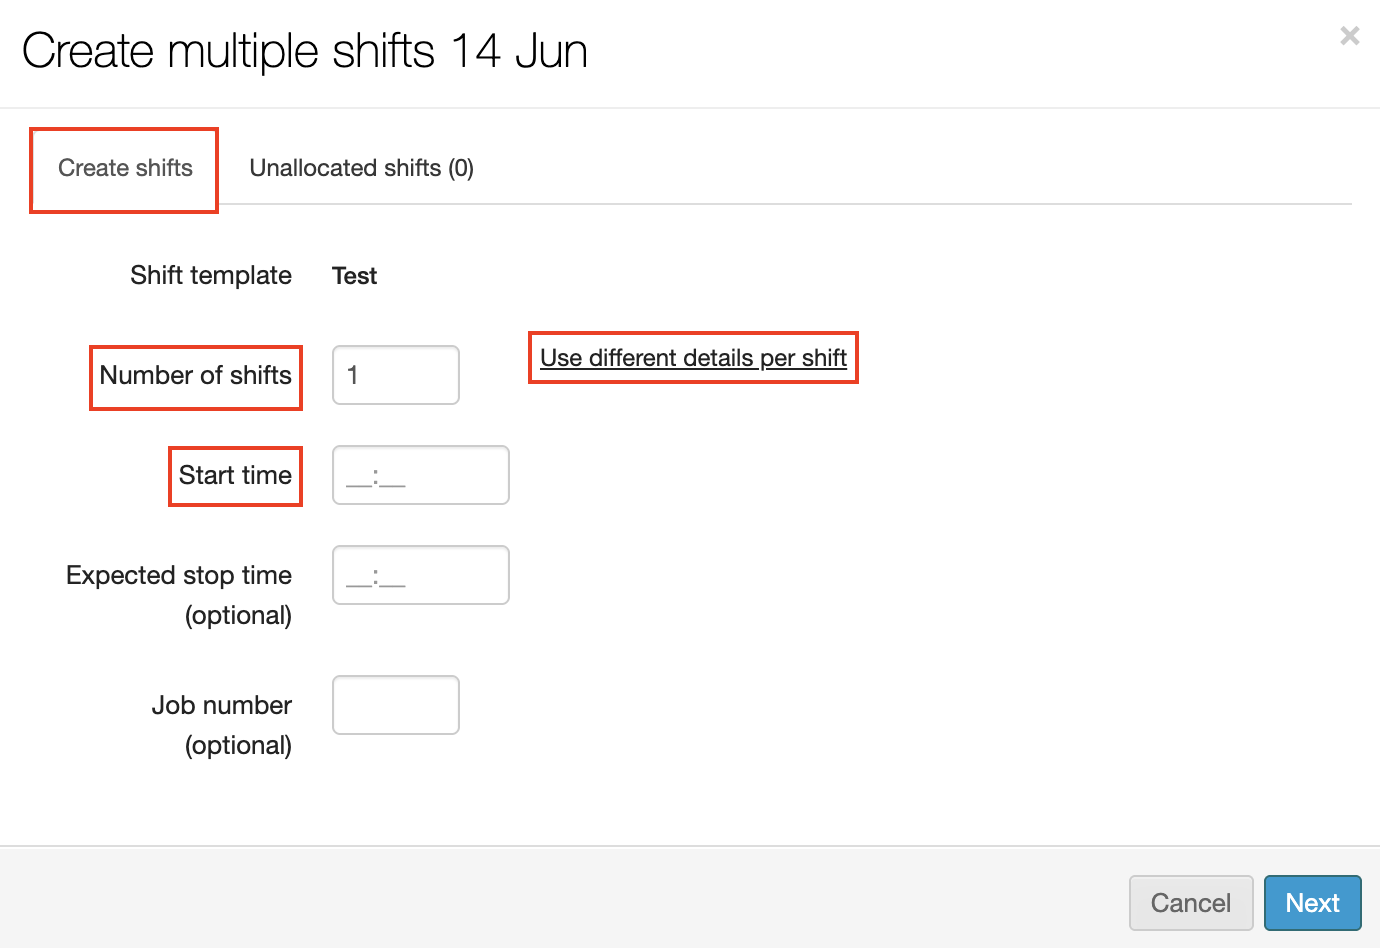
Create shifts: Use same details per shift option
The drop-down menu reflects the real-time activity of your system and therefore varies from column to column (for example, work date to work date) and even changes throughout the day as shift Start/End time thresholds are reached. As a best practise, review the display options carefully to avoid making unnecessary duplications. For example: Do you need to create new shifts, or do you need to publish shifts that have already been created?
-
You can assign workers different colours in order to group them together.
-
You have the option to download the bookings on a spreadsheet by selecting the Download CSV button.
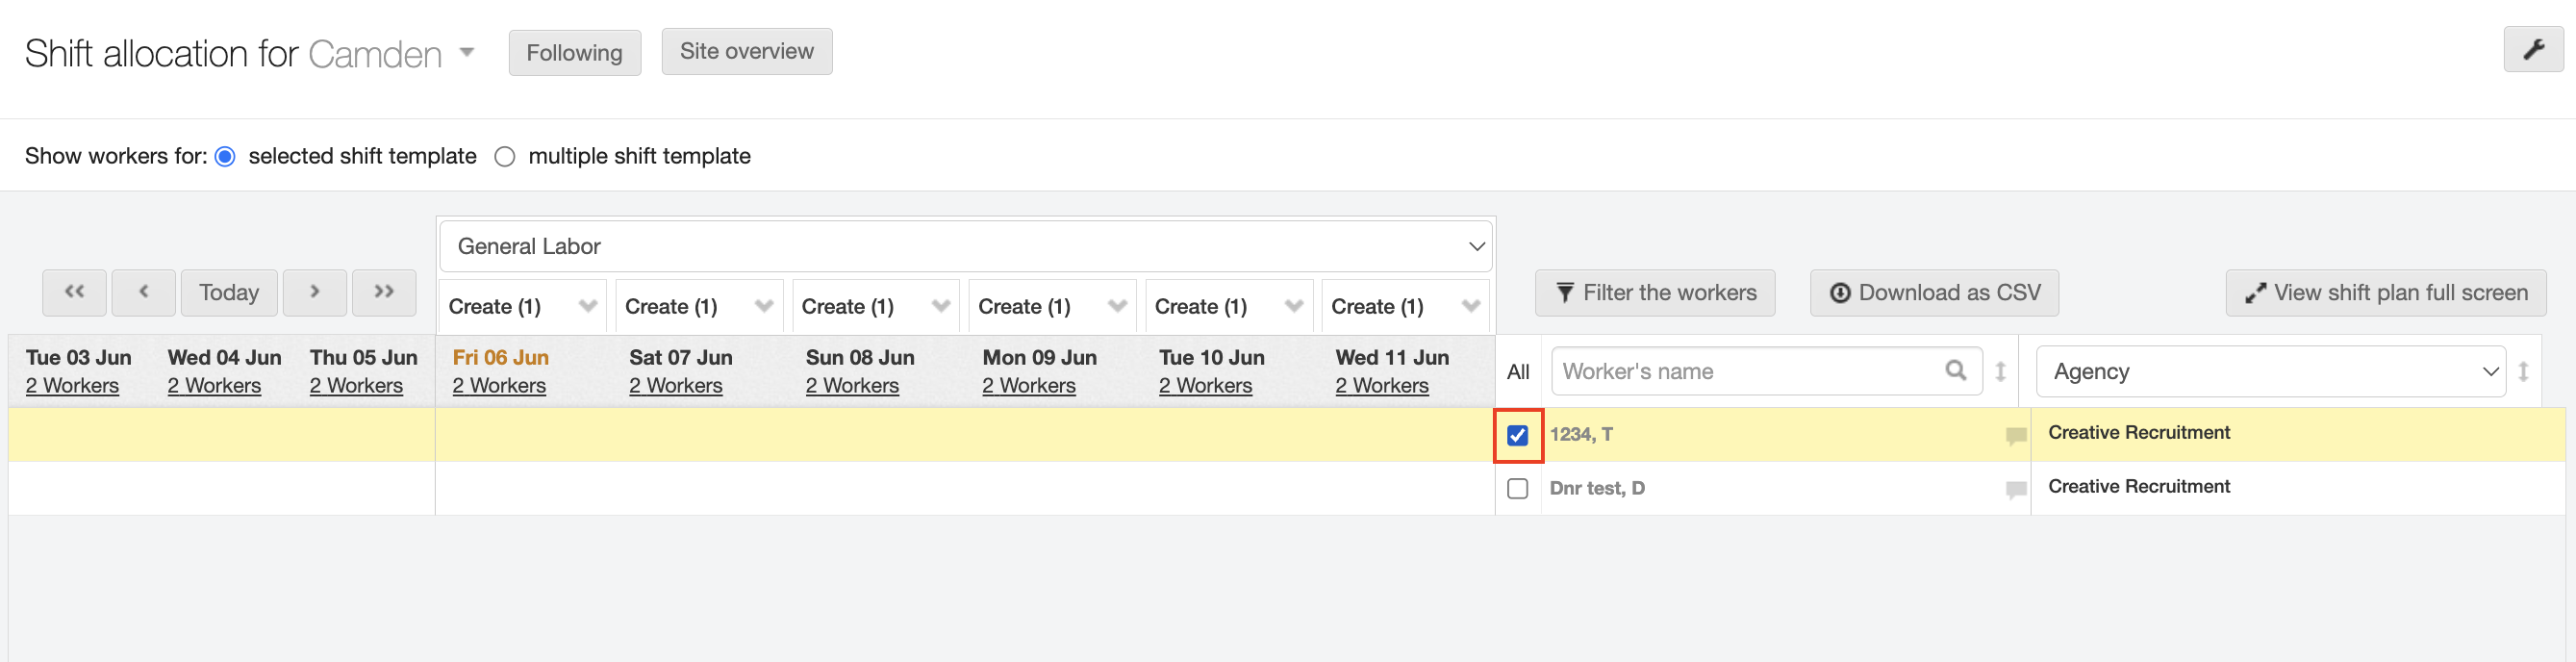
Alternatively, you can book multiple workers onto the same start time by ticking the blue boxes beside the workers name and then folow these steps: All those selected will be booked onto the same start time.
-
Click the tick box to select the worker(s) from the Worker list on the right side of the On site planner screen. The row for each selection will display in yellow.
-
Hover over the date column and click open menu. The menu displays to show all selection options.
-
Click Create new shift. The Create shift(s) dialog window opens.
-
Make your selections/entries in the dialog window as needed.
-
Select a Reason to indicate why you are adding more shifts.
-
Enter a Start time in the Planned start field.
-
Use the Create the same shift on multiple days link if you need to extend the shifts for multiple days.
-
-
Click Create shift(s) to save your changes and allocate the workers to the shifts. The system returns to the On site planning screen which will now include the shifts you just allocated.