Shift Patterns
A shift pattern defines a sequence of days when a worker is due to be working or not working ("off pattern"). Consultants use shift patterns to plan out their workforce for a customer. Shift patterns can either be weekly (for example, Mon-Fri, Mon-Sun, Weds-Sun) or a sequence between 3 and 14 days in length (for example, 4 days on - 4 days off, 3 days on - 3 days off) which provides a wide flexibility for your work schedule management.
You can assign a shift pattern to any of your workers and this will inform the system which days they should and wish to work. This will help guide you when you are planning their shifts.
You assign a pattern to a worker from either the worker’s profile or from the planning screen (either On Site or Branch). You can create a new one or select from the list of patterns already set up for your organisation.
From the Worker’s profile
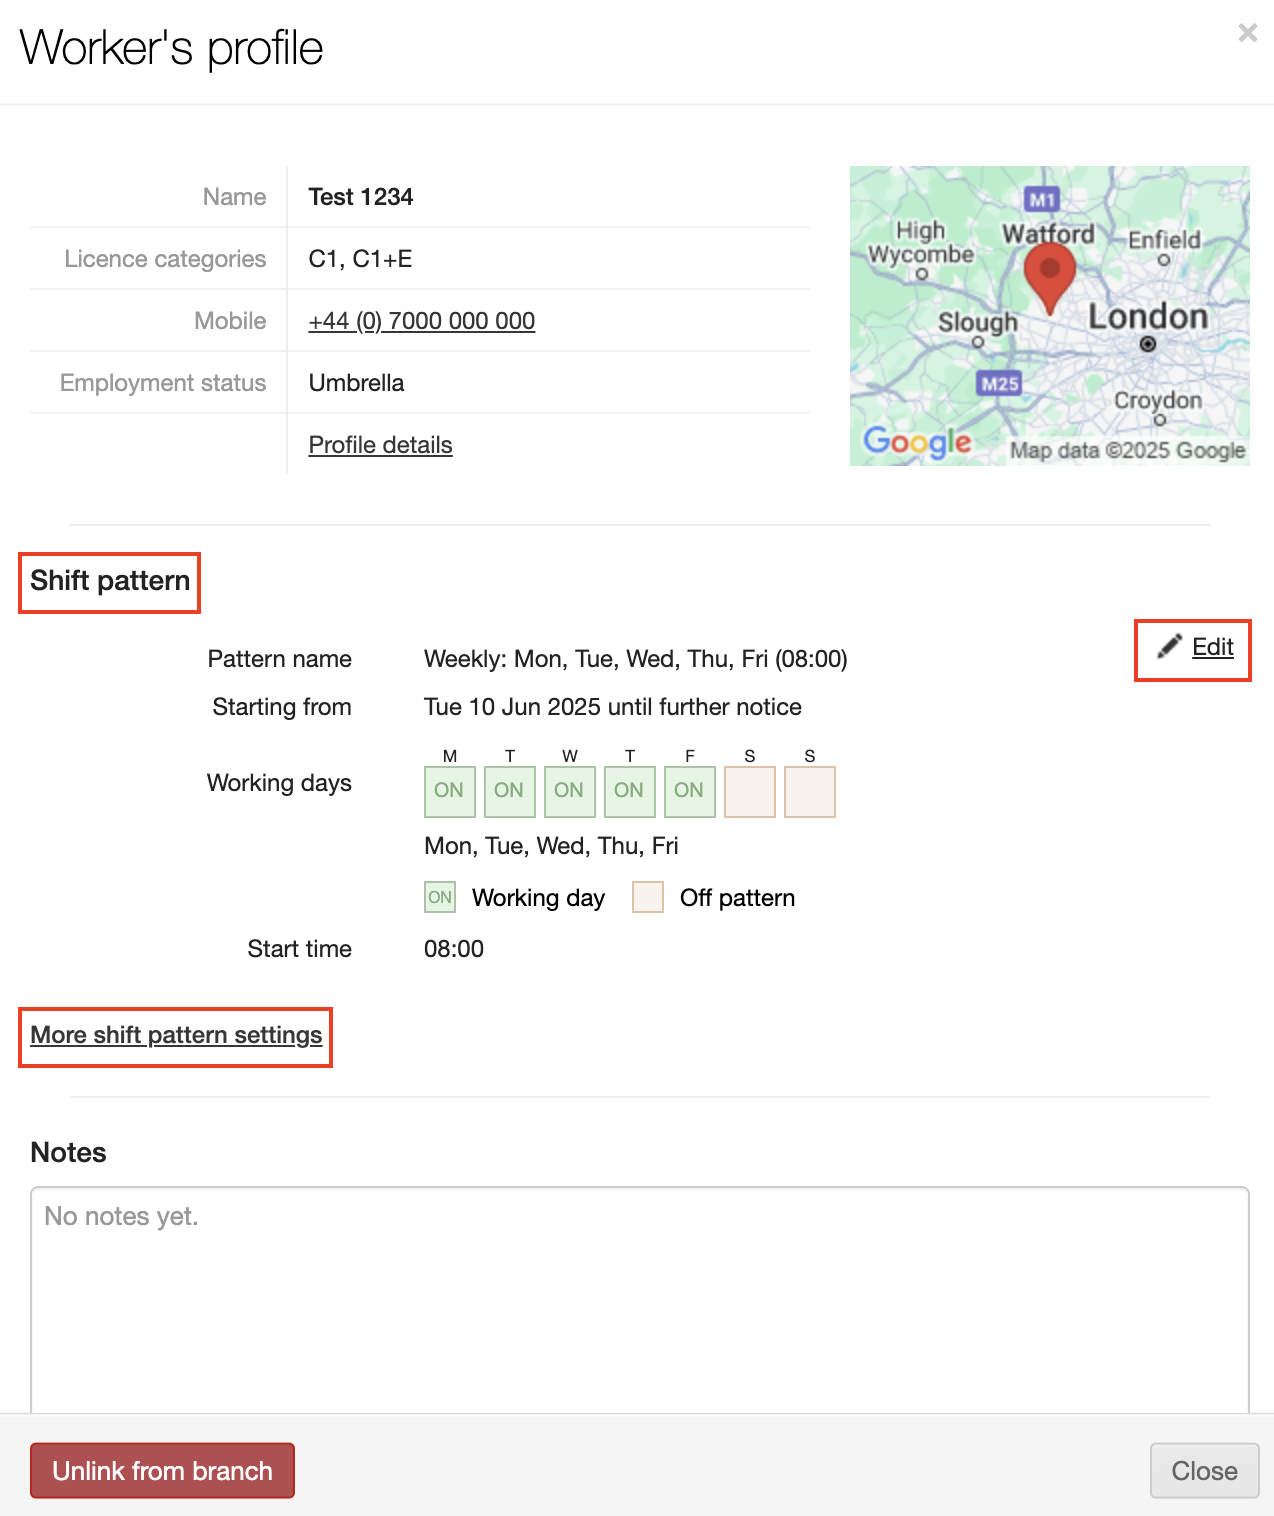
Navigate to the worker’s profile from Workers > Managed Workers and then drill down to the worker’s profile you need to adjust. On the left side of the worker’s profile, you will see an option for Shift patterns. Click Shift patterns to display this section of the worker’s profile.
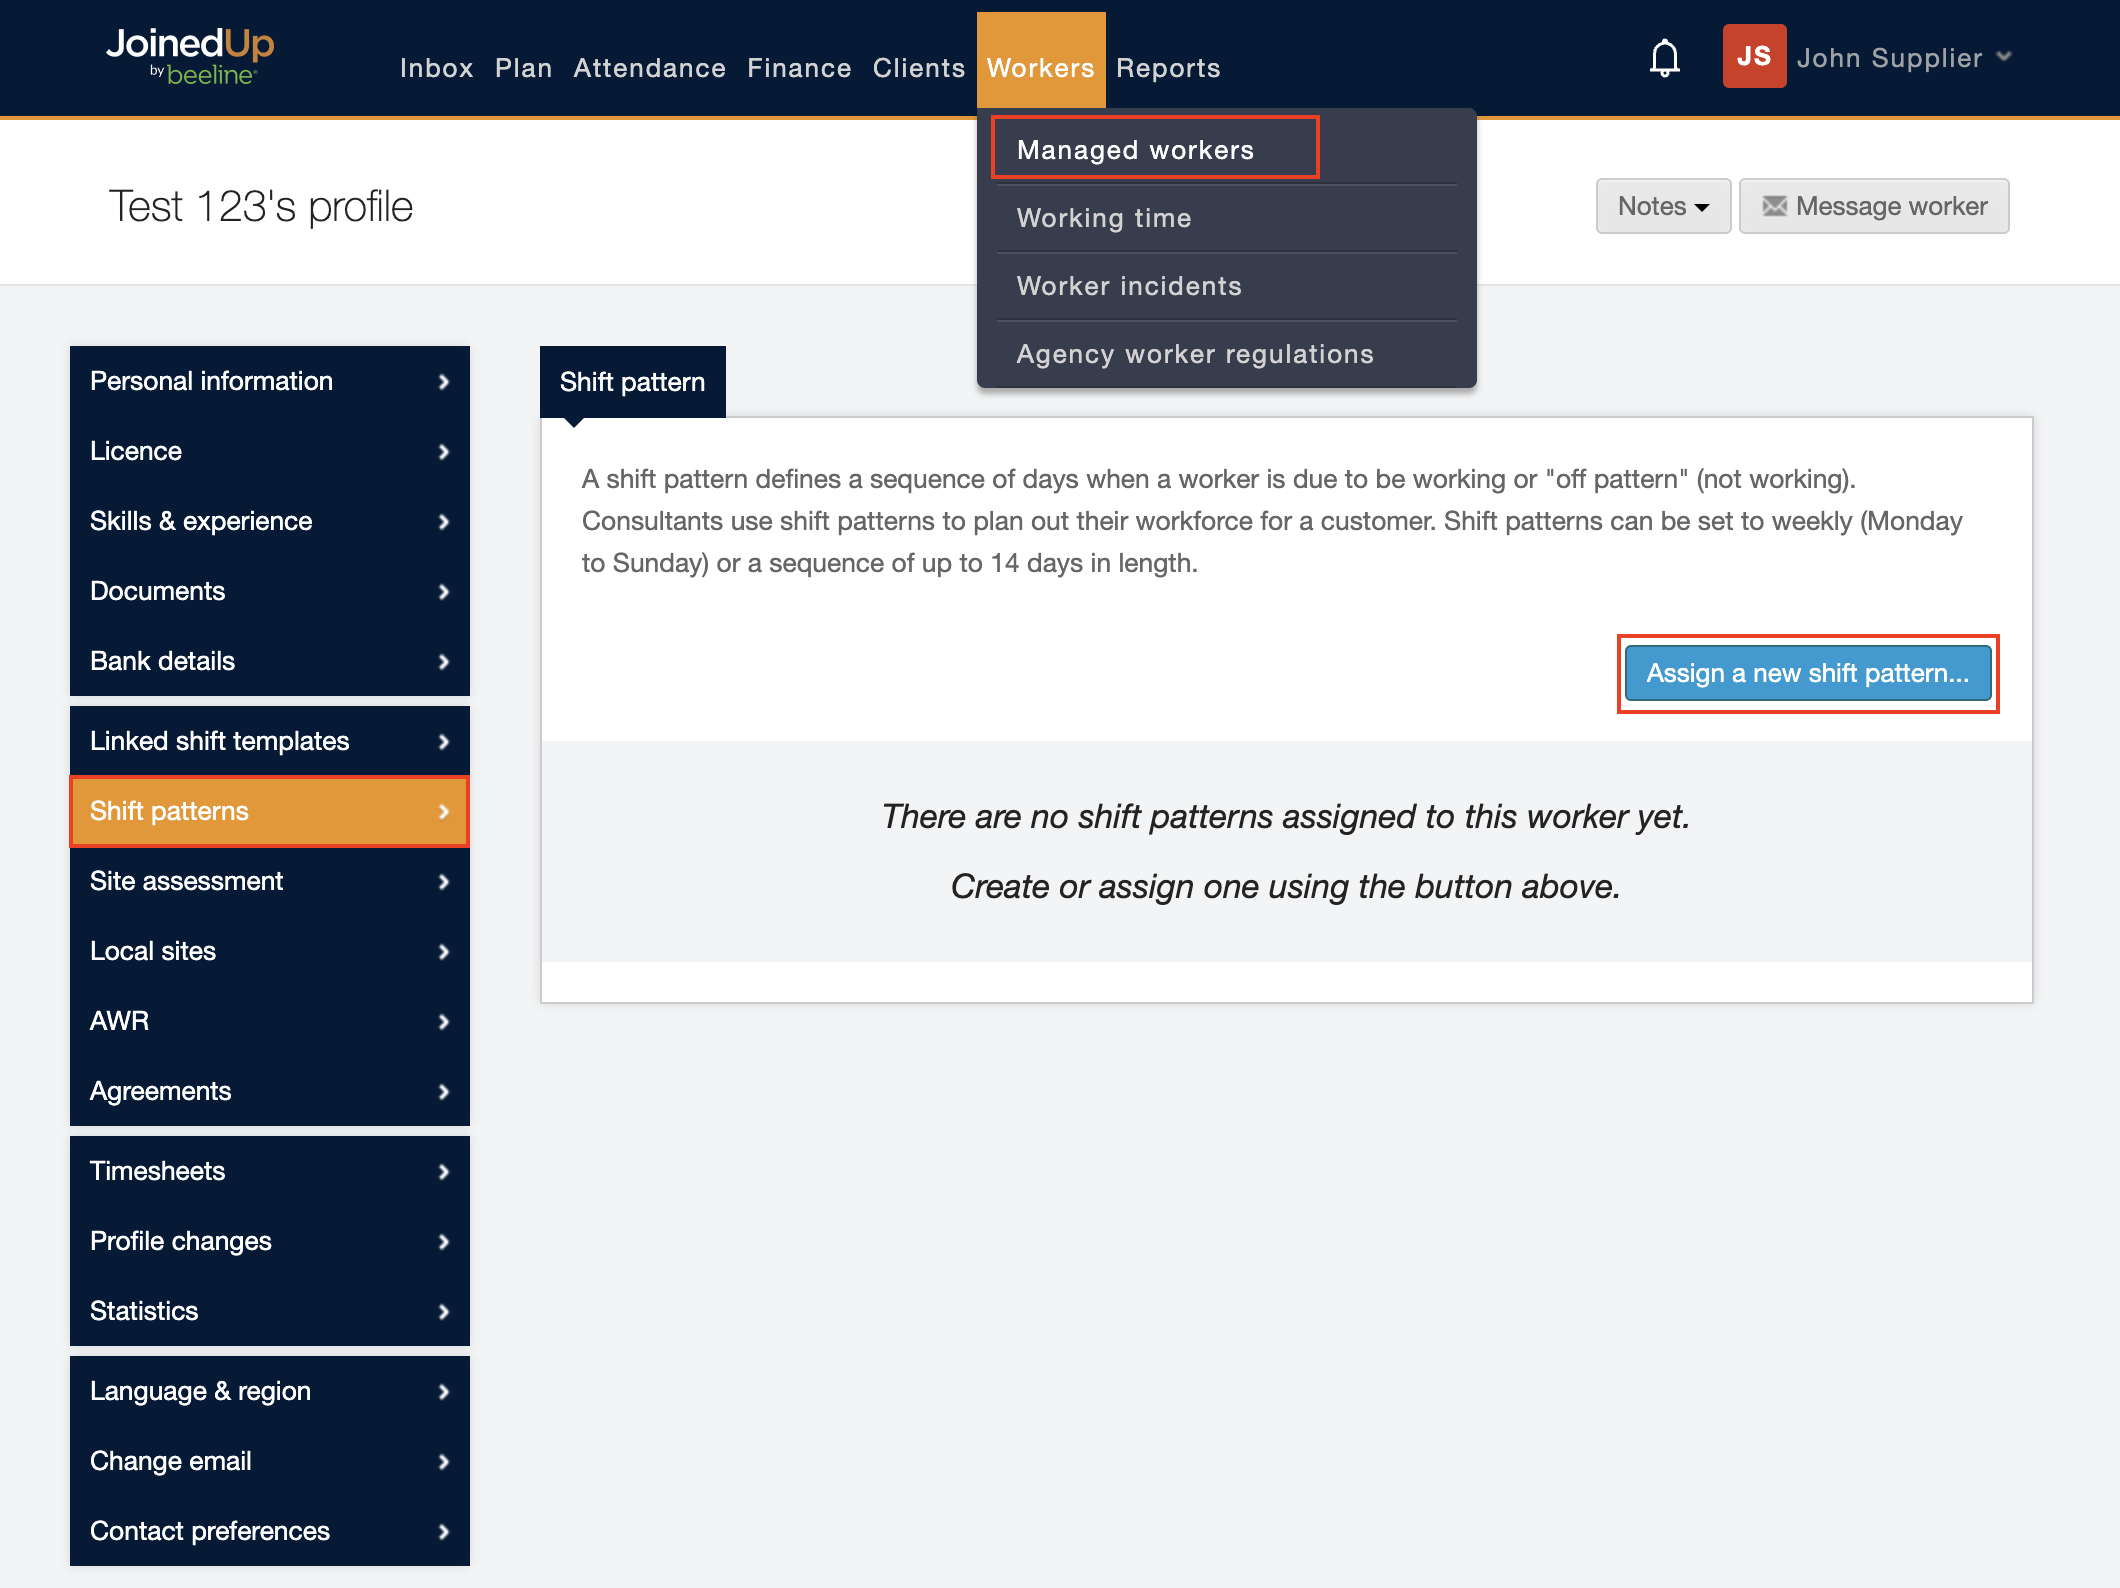
Click Assign a new shift pattern to open the dialog window.
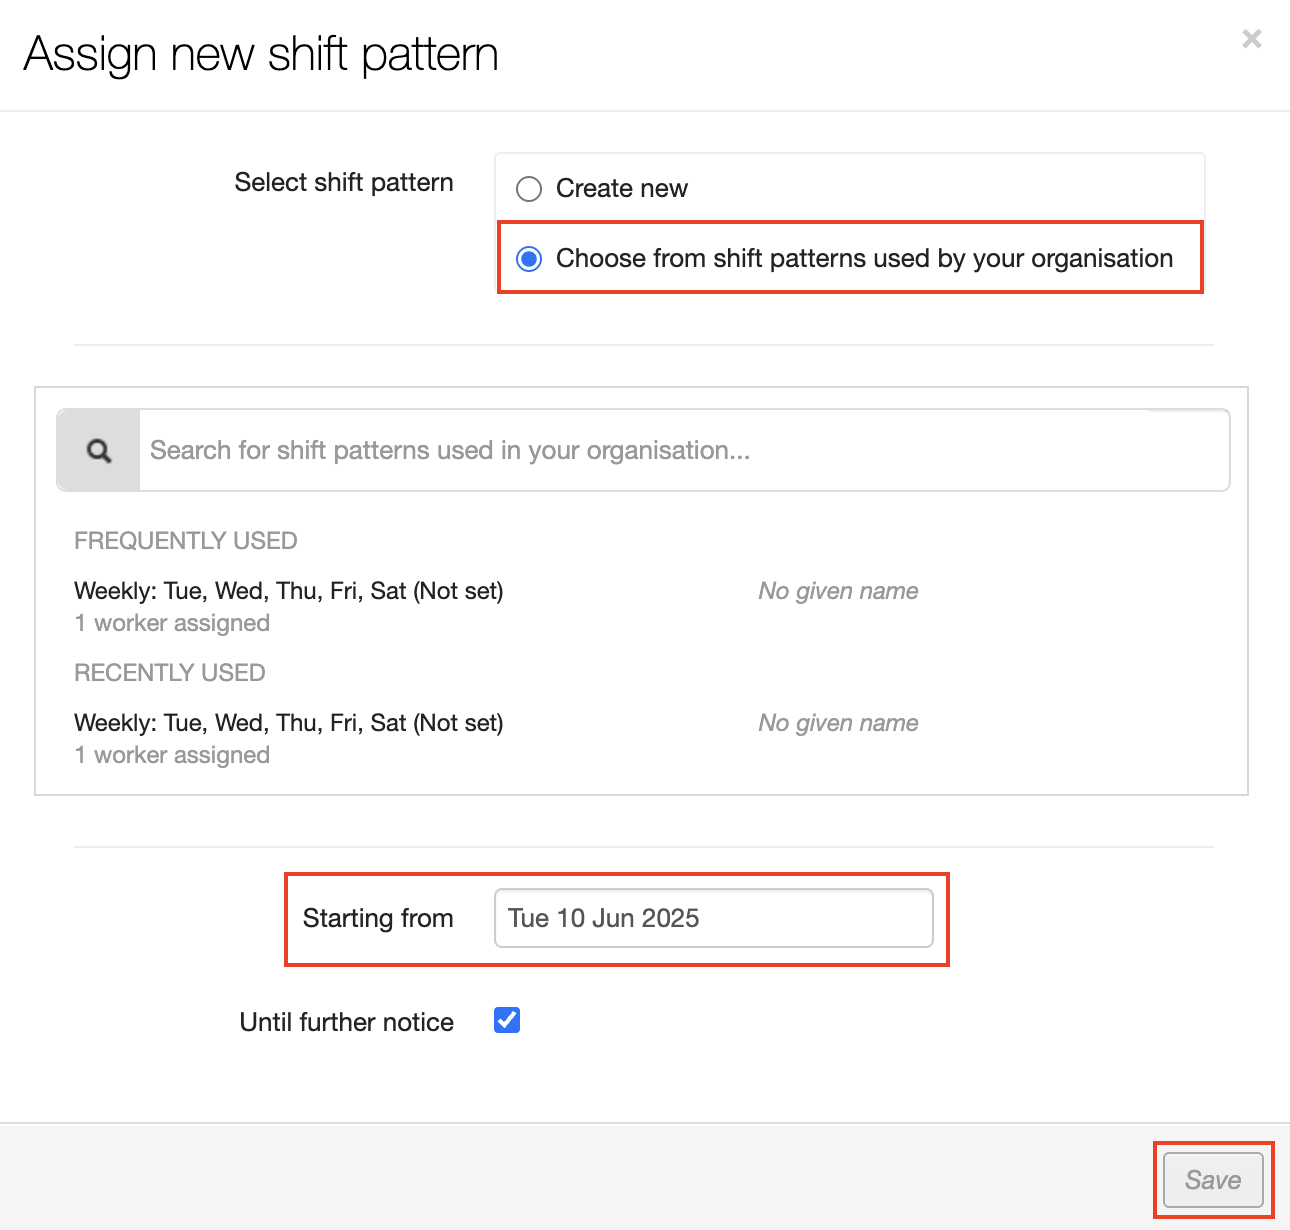
| Work through the settings from top to bottom since the selections you make could reveal additional selection options! |
Read through the setting options carefully and make adjustments as needed.
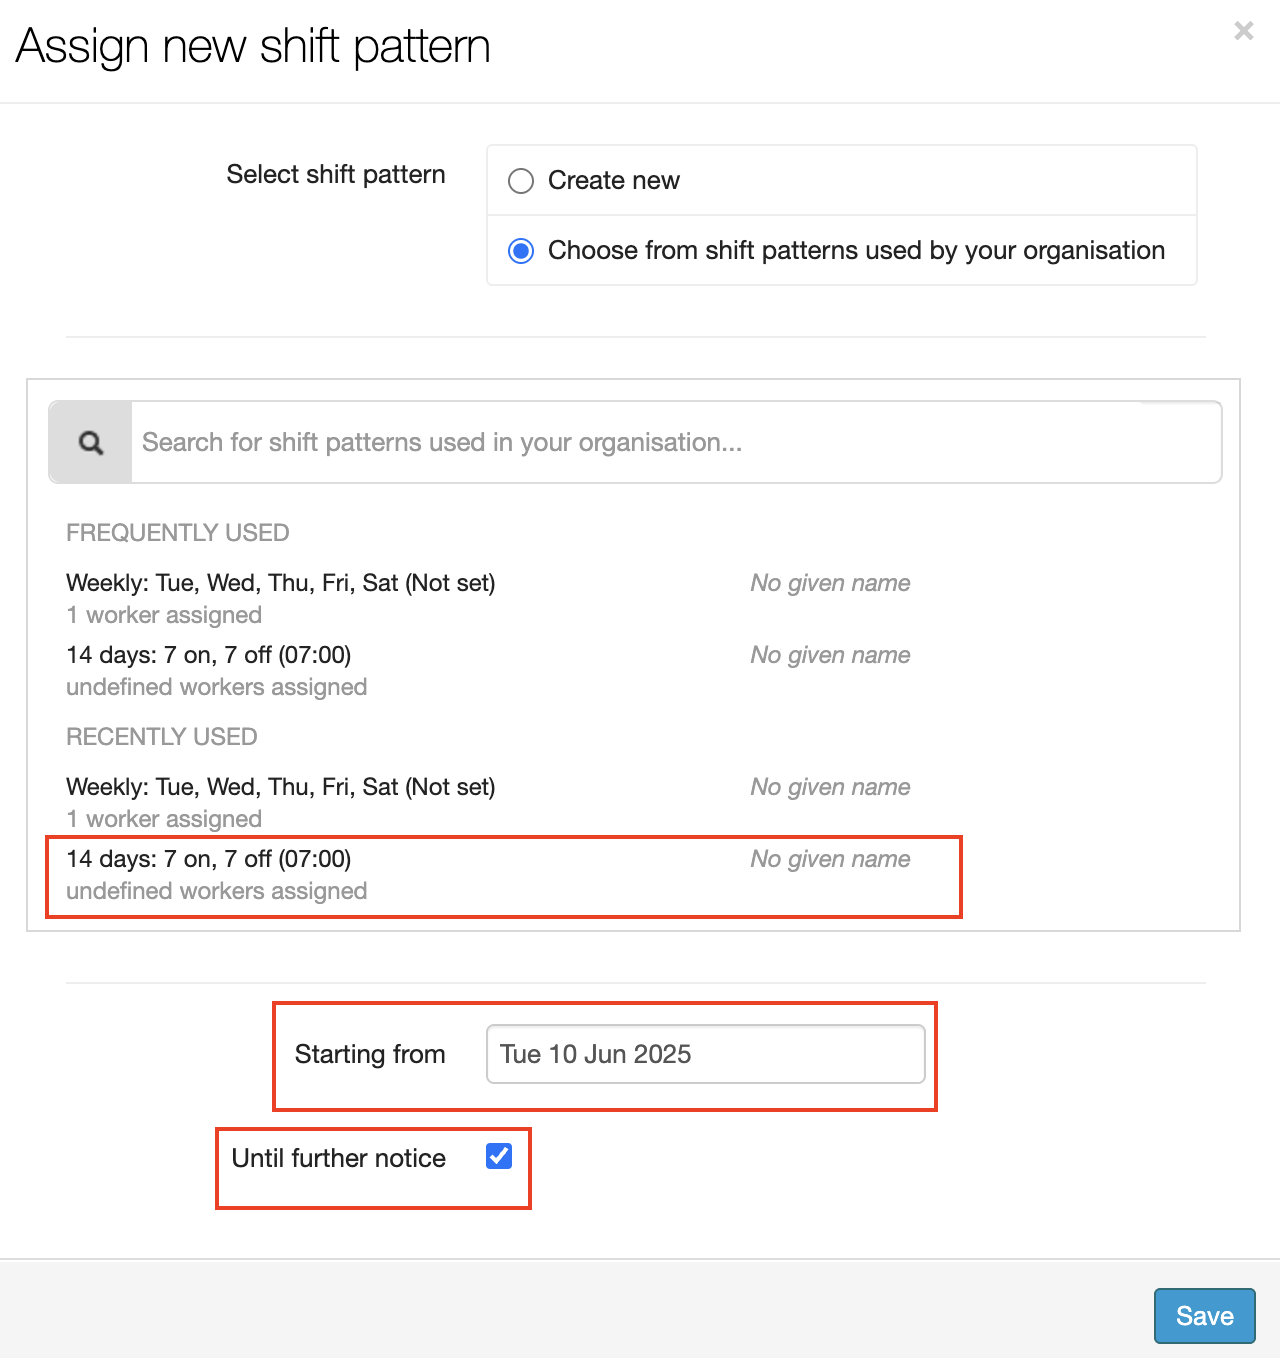
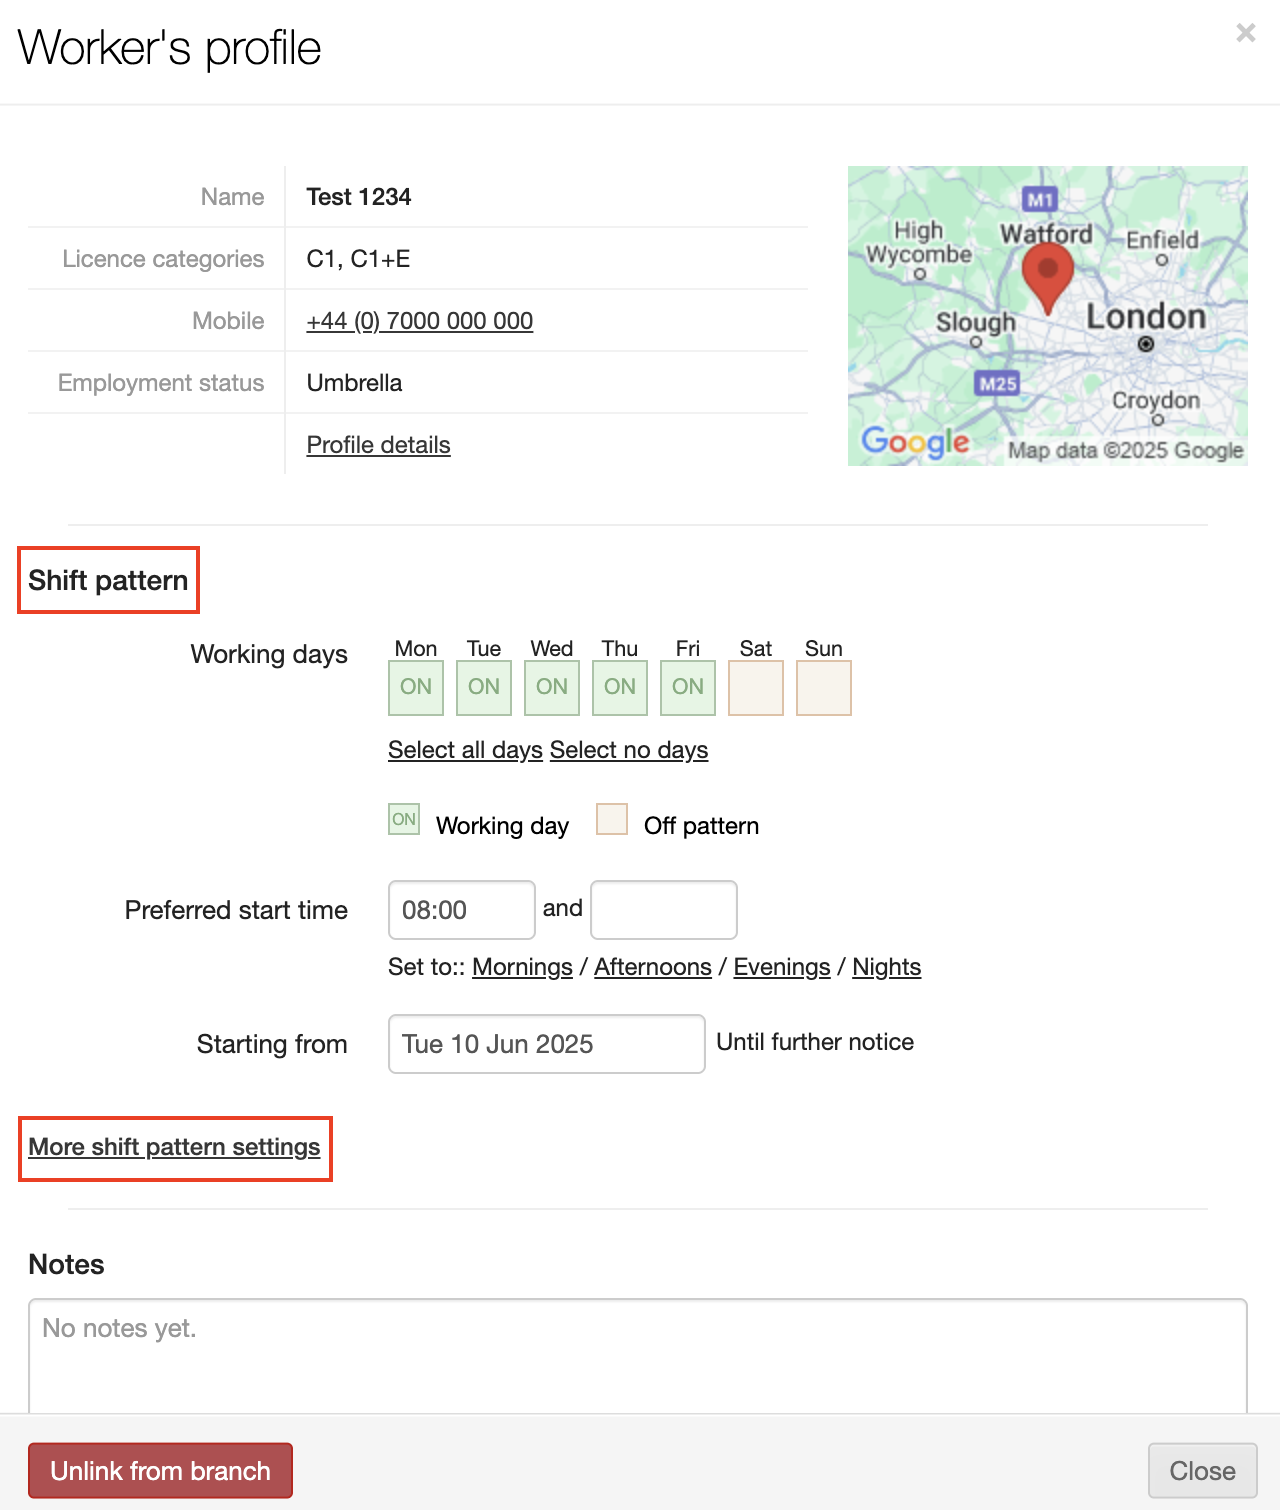
Select shift pattern: If this is a new shift pattern, click the Create new button and then adjust the fields to build the pattern you need. If you want to use an existing pattern, click the Choose from shift patterns used by your organsiation button and the window refreshes to show you a list of your organisations existing shift patterns from which you can choose. Assign a Starting from date and then click Save to complete this selection option.
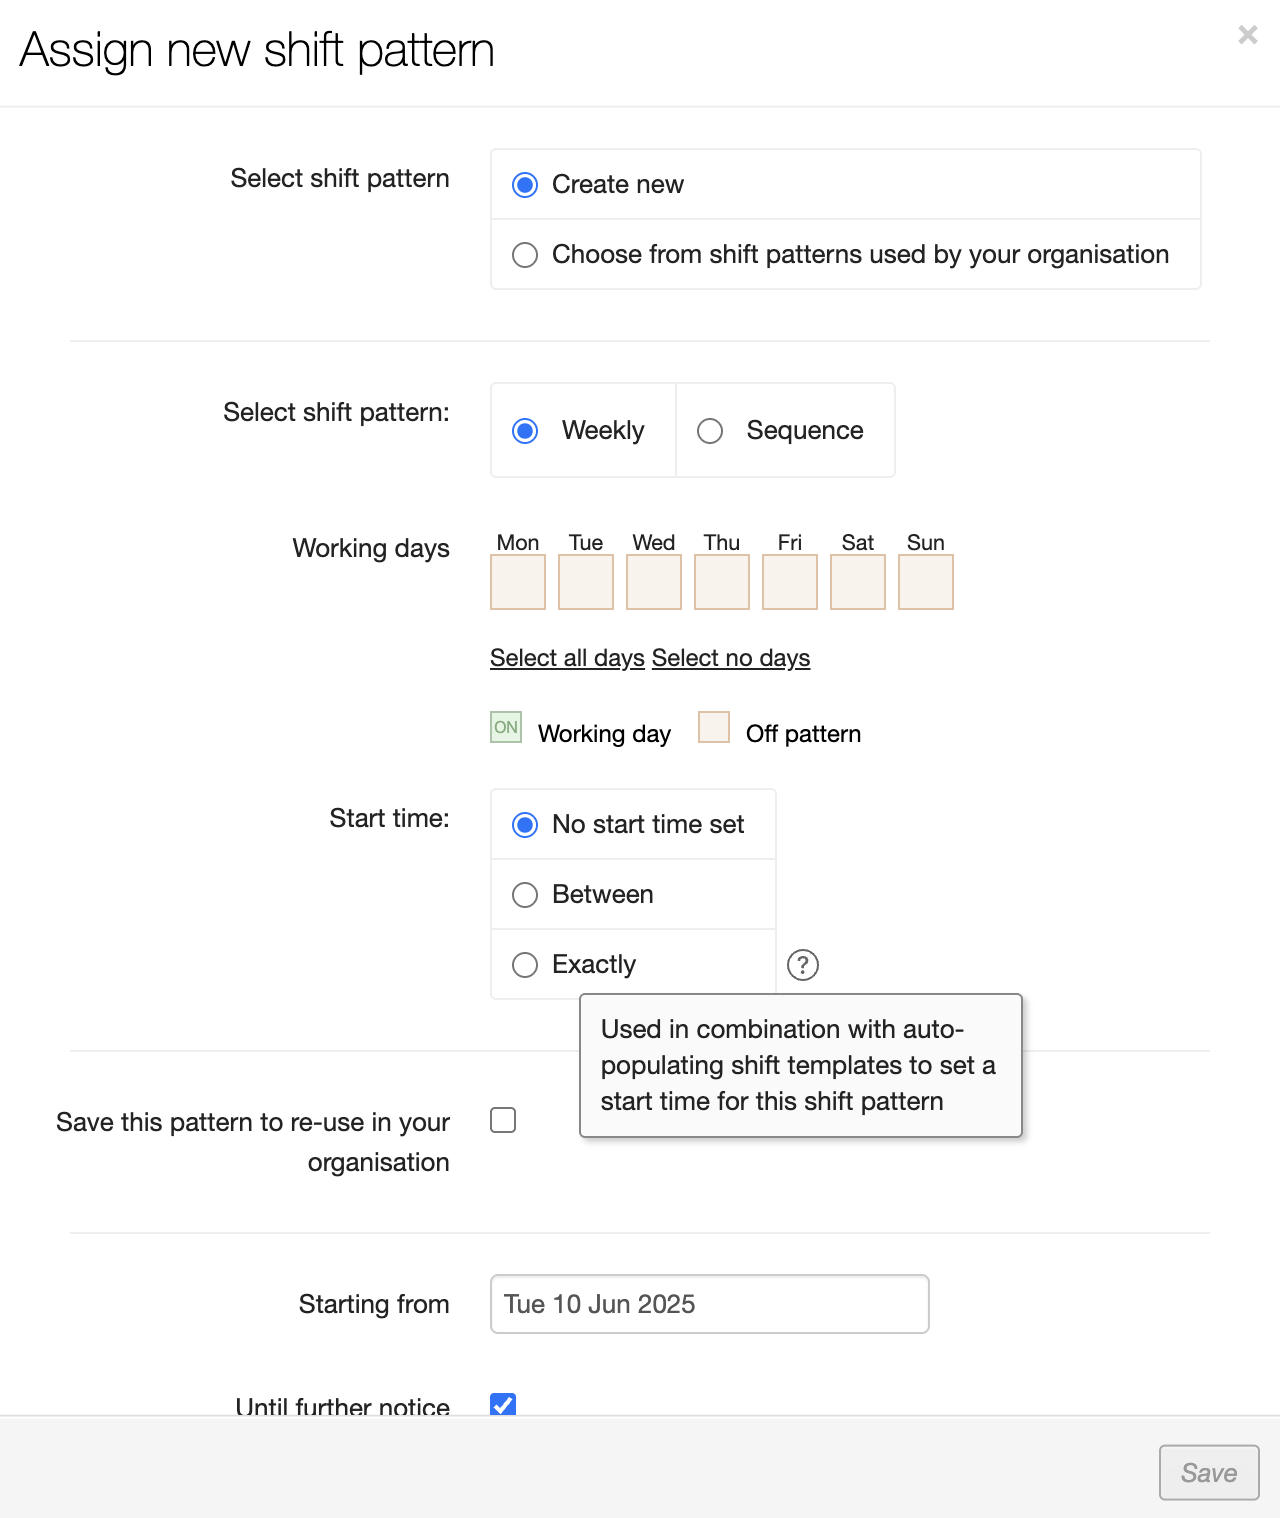
Select shift pattern (Pattern type): The pattern type can be weekly cycles or in a sequence you define to run in cycles between 3 and 14 days. Working days: Select which days of the pattern are working days and which ones are off-pattern by clicking in the relevant boxes. Start time: You can specify the worker’s preferred start time. This can be set to No start time (undefined), Between (a range of times), and Exactly (a specific time) for each day within the shift pattern.
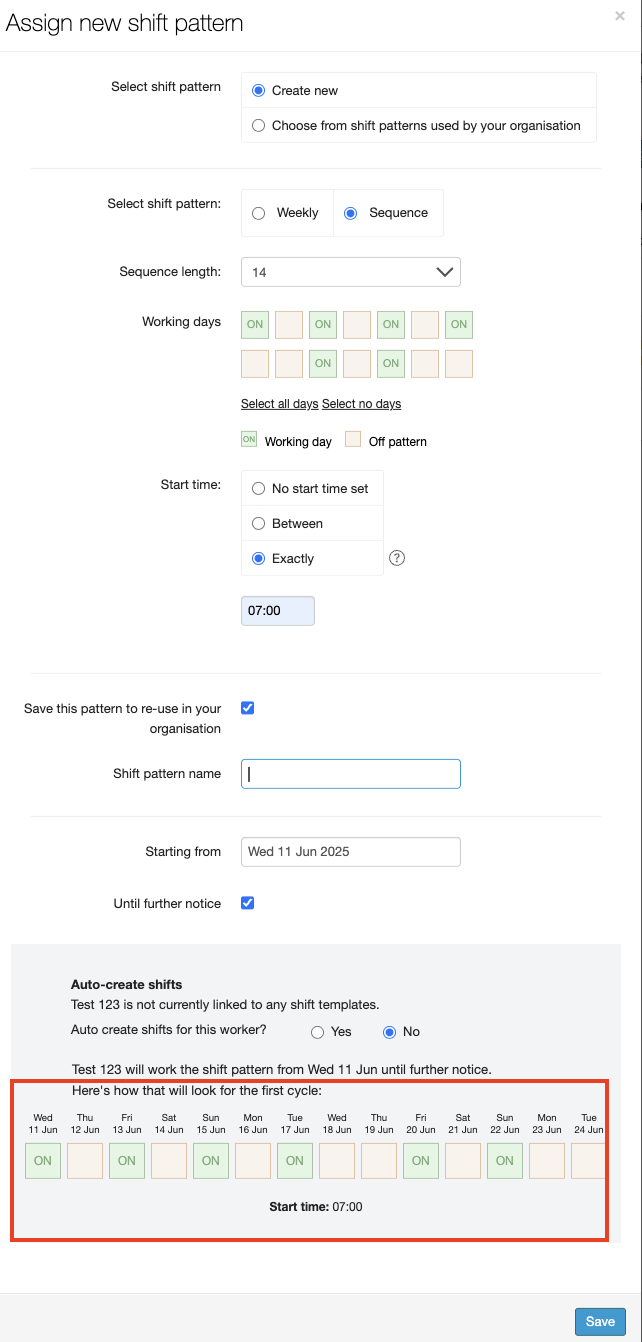
When you have completed your entries, check the summary section at the bottom of the dialog window to make sure your selections reflect the settings that you need…
For example:
The shift pattern shown below is new. It has a 14-day sequence pattern with Mon, Wed, Fri & Sun being the work days in the first week and Wed & Fri being the work days in the second week. The Start Time for all work days is 7:00 a.m. and this shift pattern becomes active on Jun. 15th.
The shift pattern is being saved for re-use in your organisation which exposed an additional field for Shift pattern name. Enter an easy-to-recognise name that ALL system users working with shift patterns will understand. This shift pattern is NOT set to auto-create for this worker, however auto-create is an option. (See the article for Shift Auto-creation for details about this feature). The settings are summarized, including a visual display of the schedule sequence, at the bottom of the dialog window for final verification.
Click Save to create a new shift pattern and return to the Worker’s Profile screen. Notice that the Worker’s Profile now reflects the new shift pattern linked to the worker.
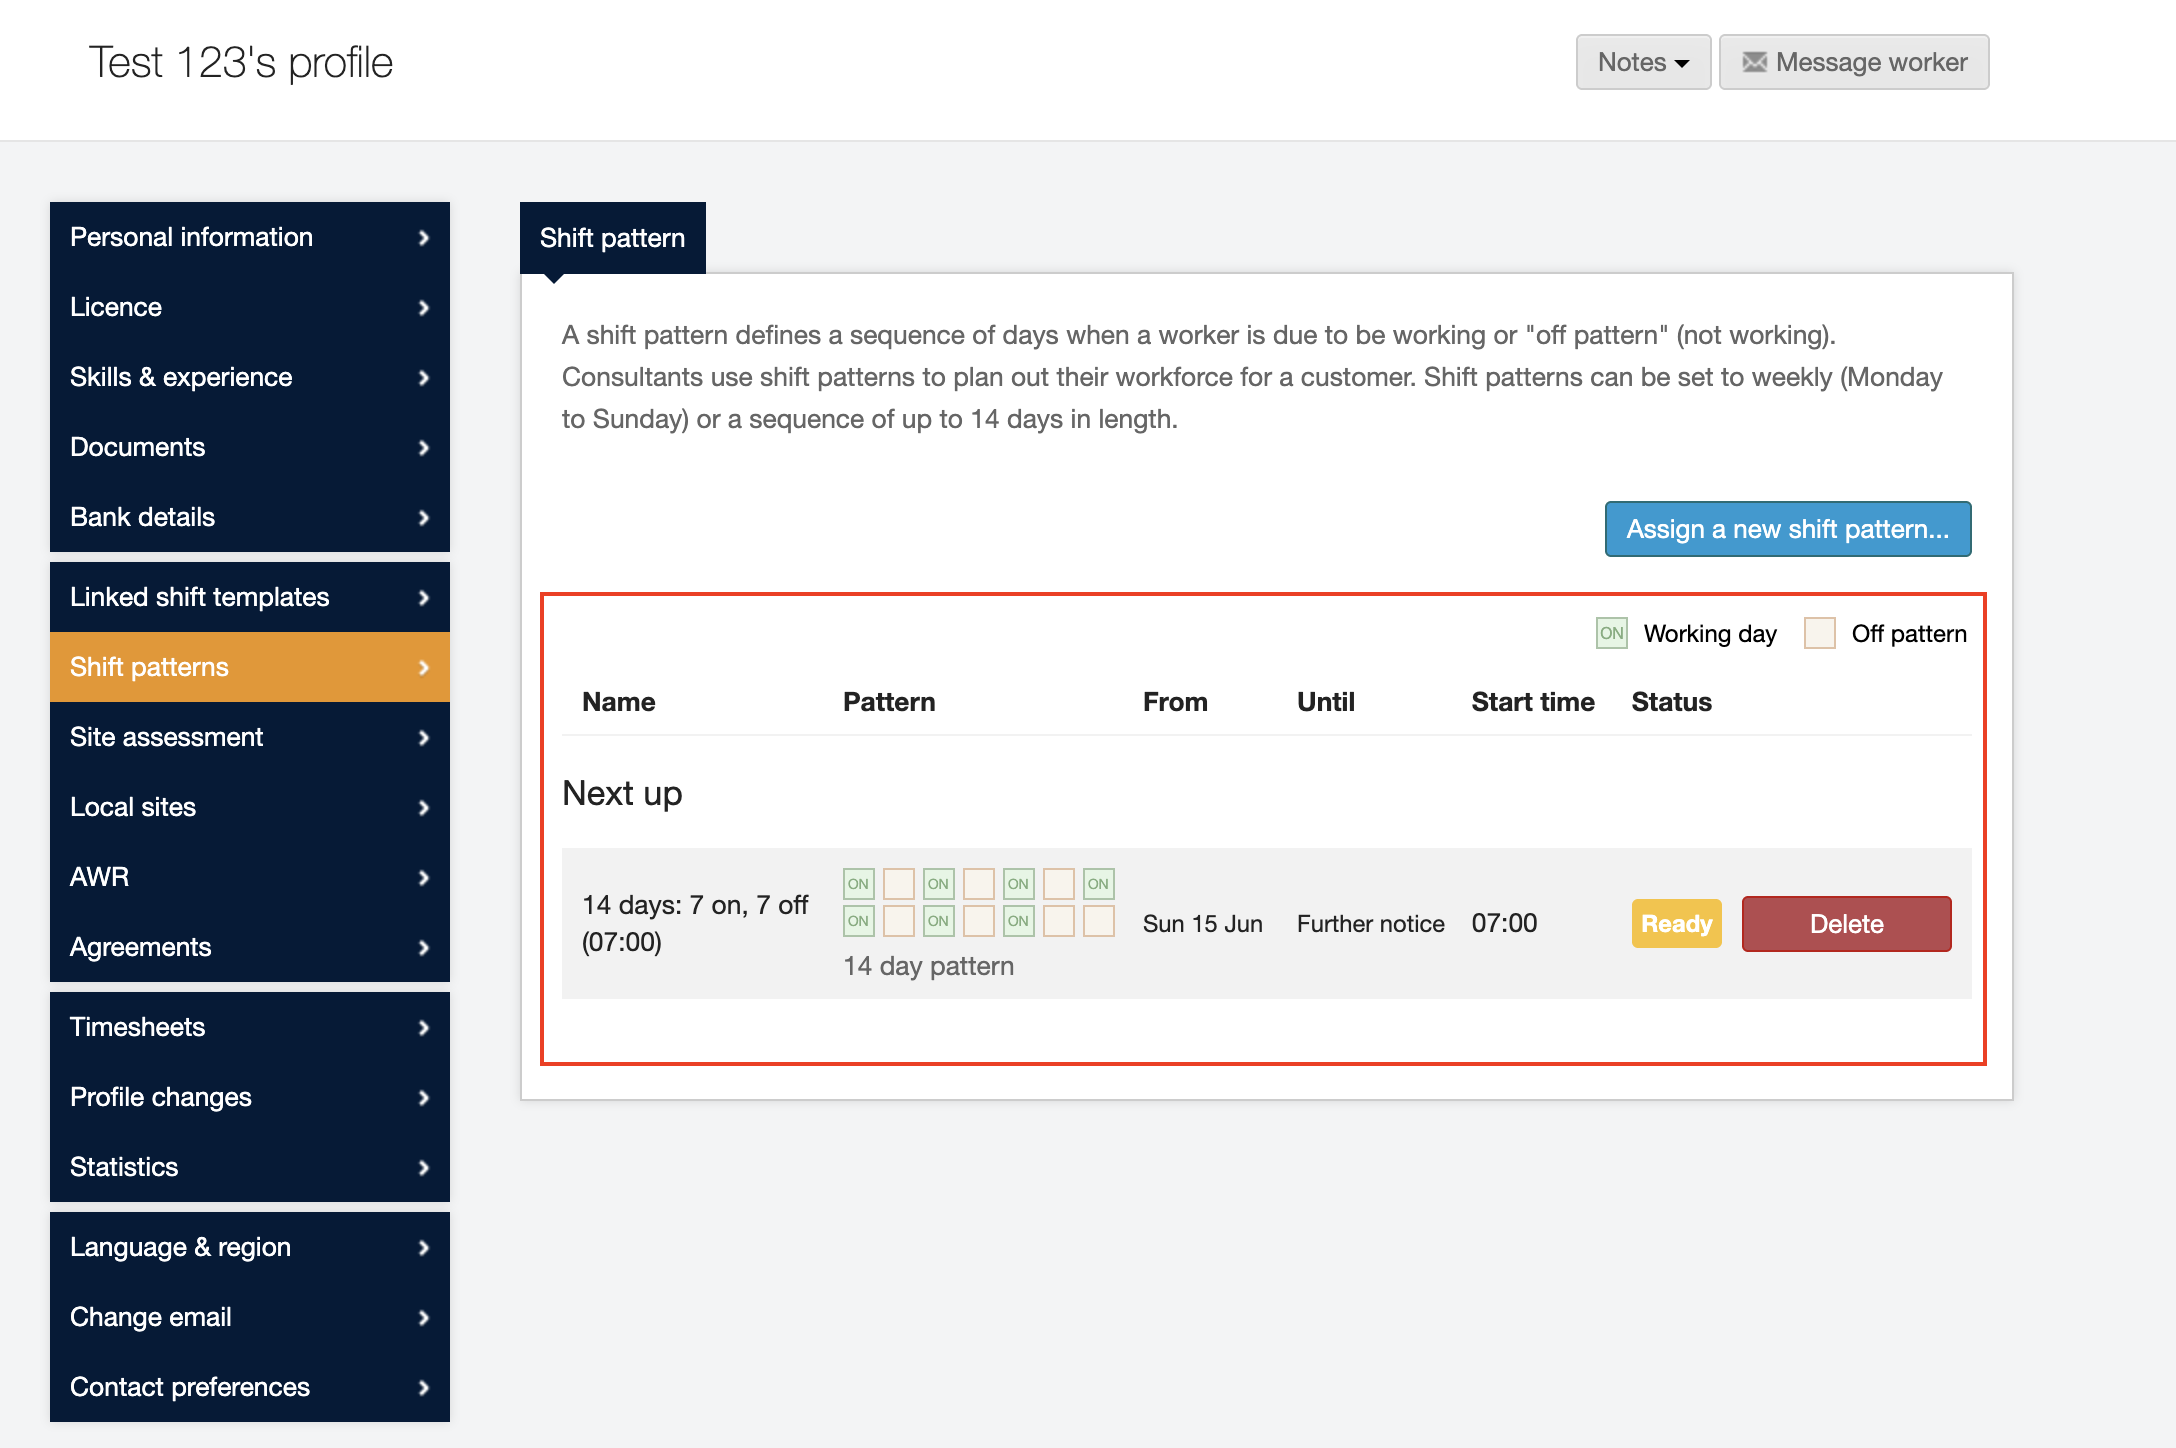
Once the shift pattern is saved, you can assign it to any other worker to which it applies. You will need to select the pattern from the list and define the start date when you’d like it to apply. You can also select 'Until further notice' for the pattern to apply until you deactivate it.
Shift patterns on the Shift Allocation screen
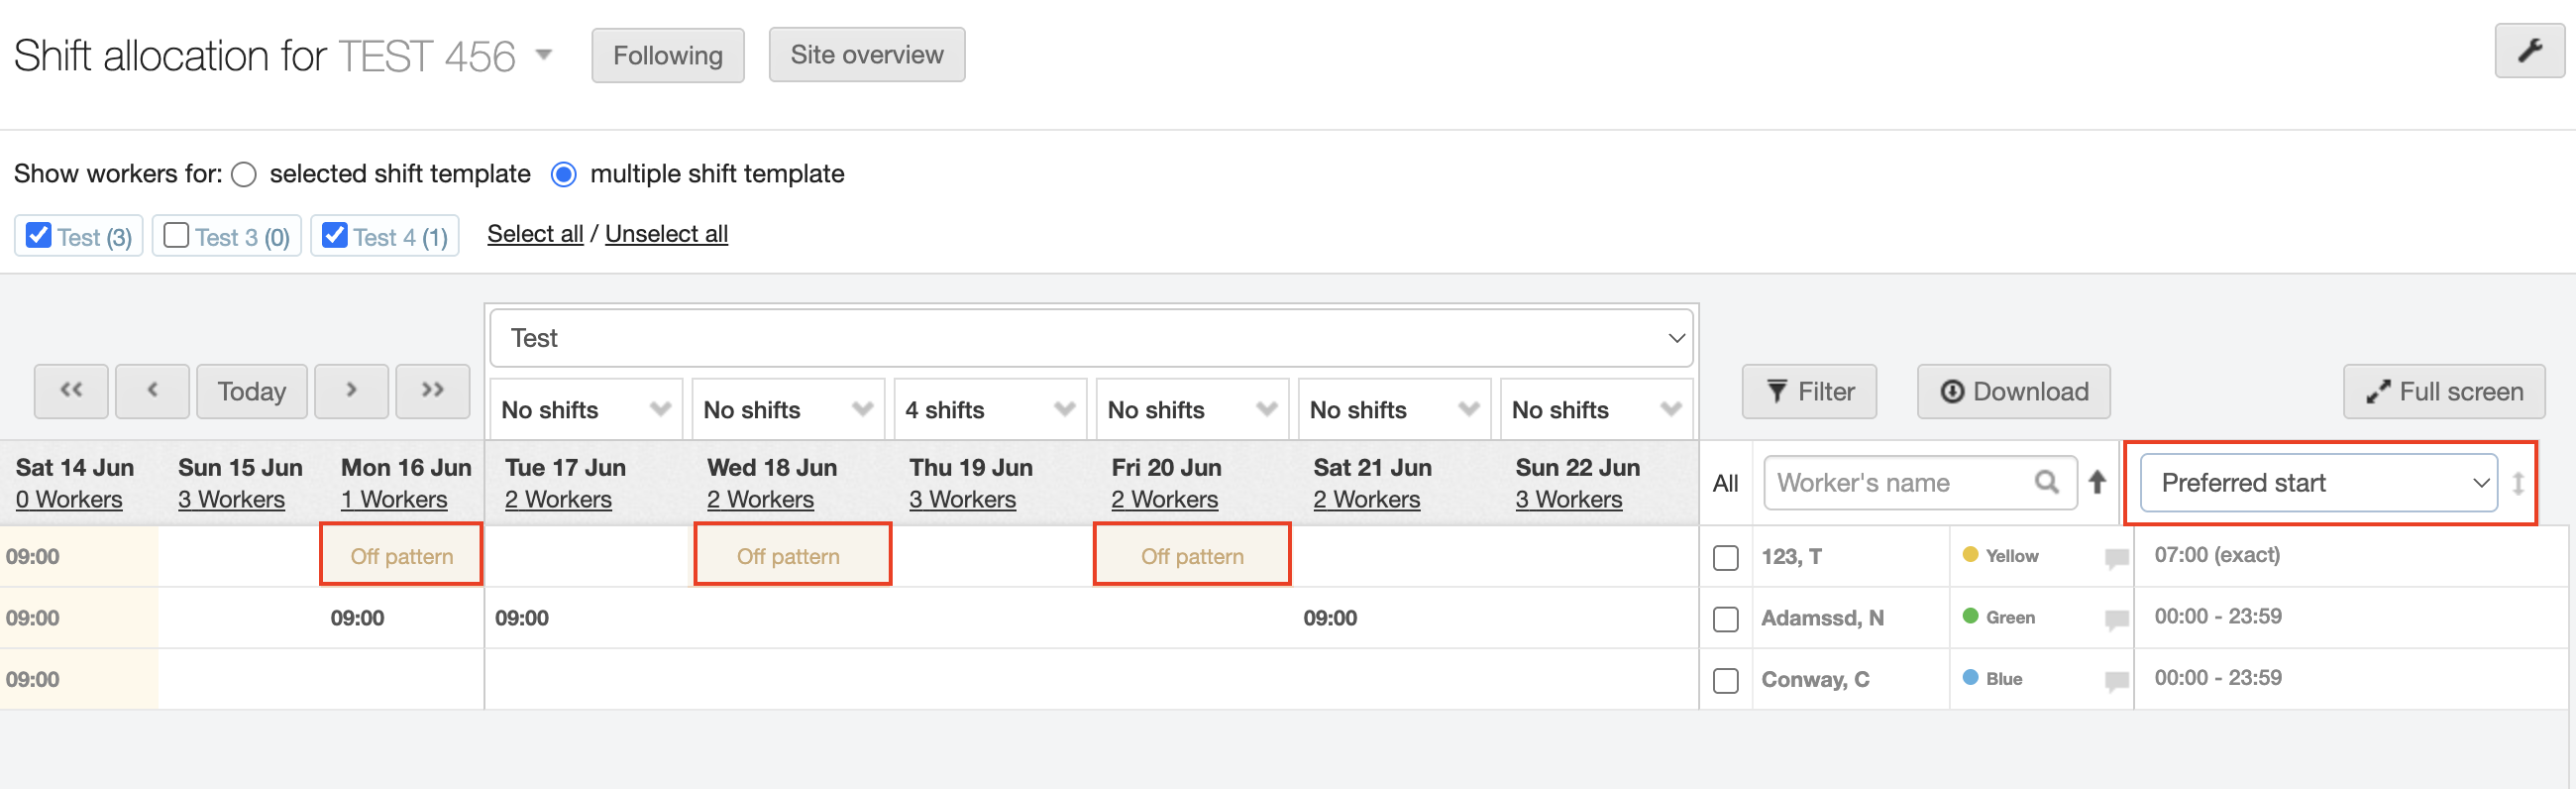
Once the shift pattern is active, the shift allocation screen (either On Site or Branch) shows which days the worker is "off pattern".
Shift allocation (On site):
Shift allocation (Branch):
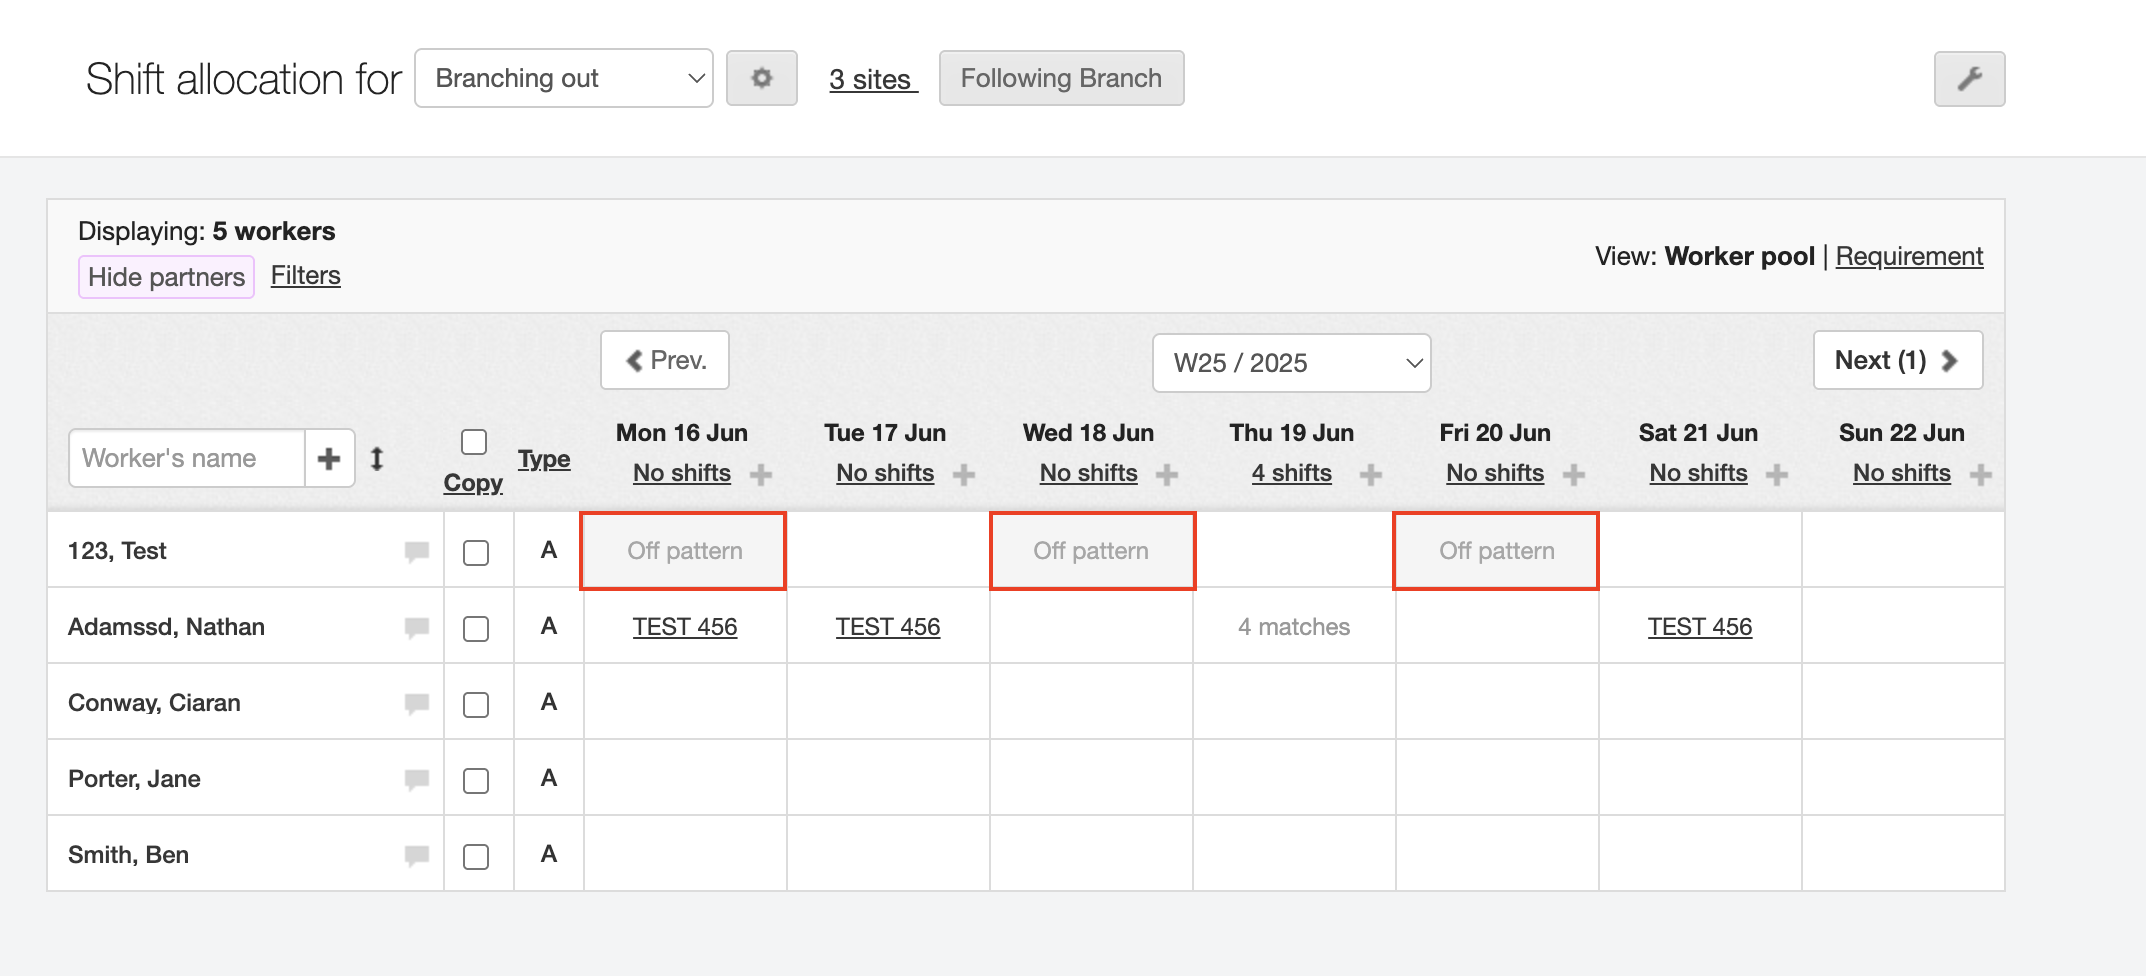
If the shift pattern specifies an exact start time or a start time range, this will display in the Preferred start time column on the Shift allocation (On site) screen and on the Worker’s profile summary pop-up window on the Shift allocation (Branch) screen—click the Comment icon to the right of the worker’s name to open the Worker’s profile summary window.
Both the "off pattern" days and the preferred start time act as extra information to help plan shifts based on worker’s preferences. However, these settings do not prevent shifts from being created and allocated to workers outside of their preferences.
You can edit the worker’s shift patterns directly from the shift allocation screen:
-
Locate the worker in the Worker’s name column and click their name. This will open a Worker’s profile summary screen, which includes a Shift pattern section.
-
Click the Edit link to switch the Shift pattern section to <edit> mode then follow the steps as described in the From the Worker’s profile section above to create or assign a shift pattern for the worker.
-
Optional: You can navigate directly to the Worker’s profile by clicking the More shift pattern settings link and make all your adjustments there.