Adding or deleting users
How to add members of your team
Any client user with admin access can add users to their team on JoinedUp.
To add a user to your organisation:
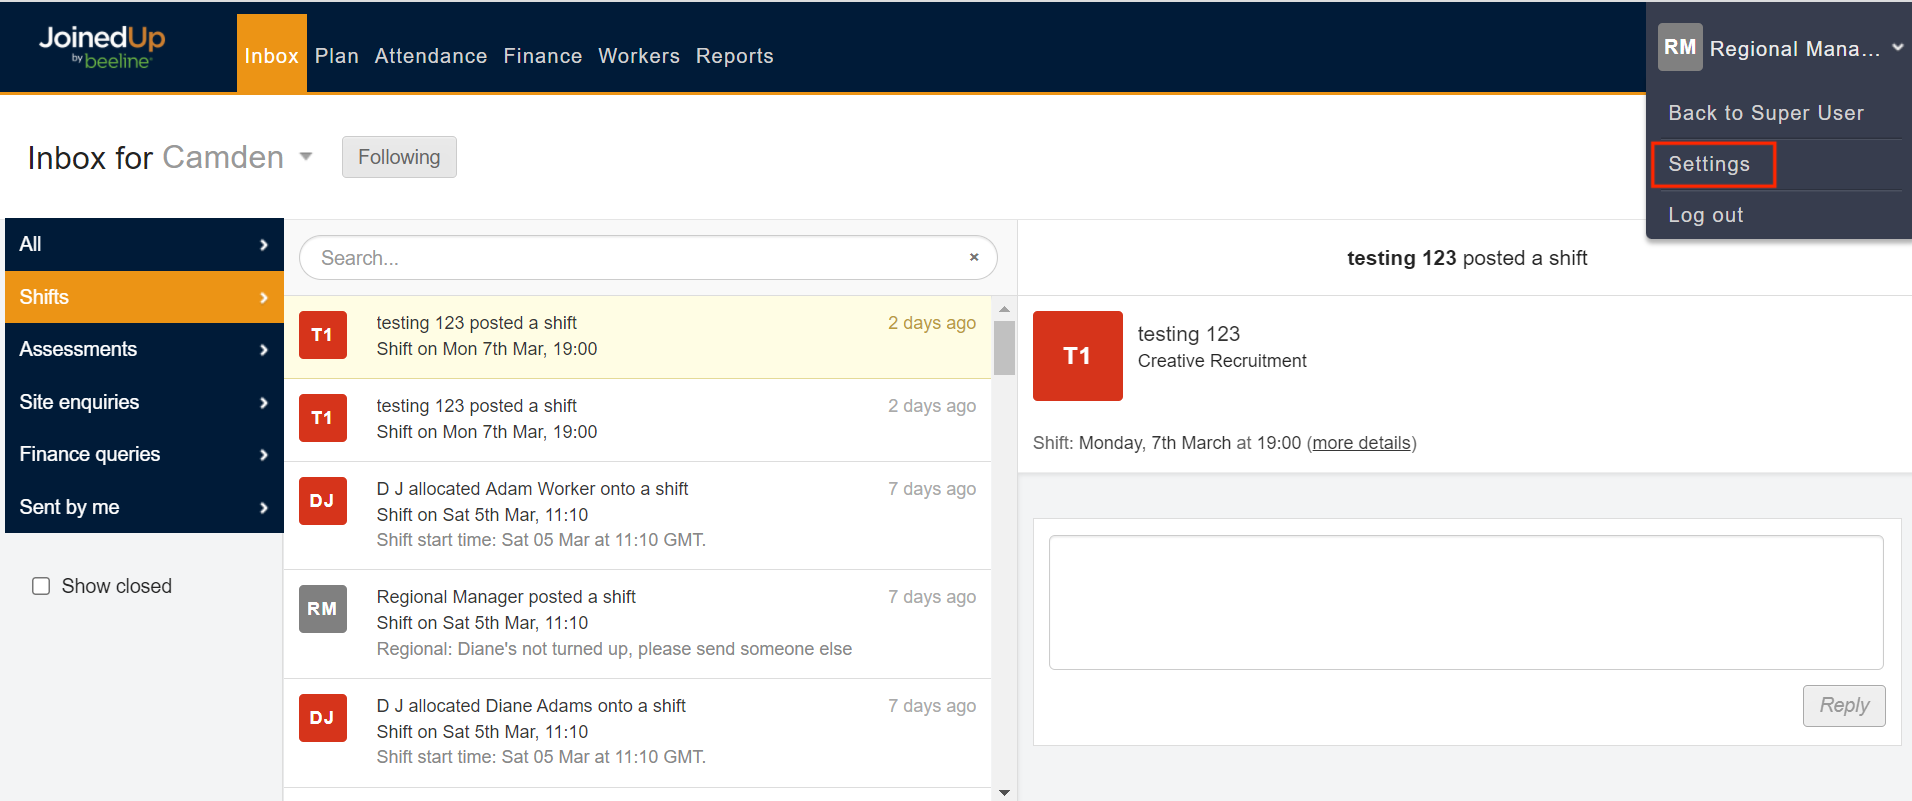
Hover over your name in the upper right-hand corner of the screen and click the down arrow to display the drop-down selection menu. Click Settings.
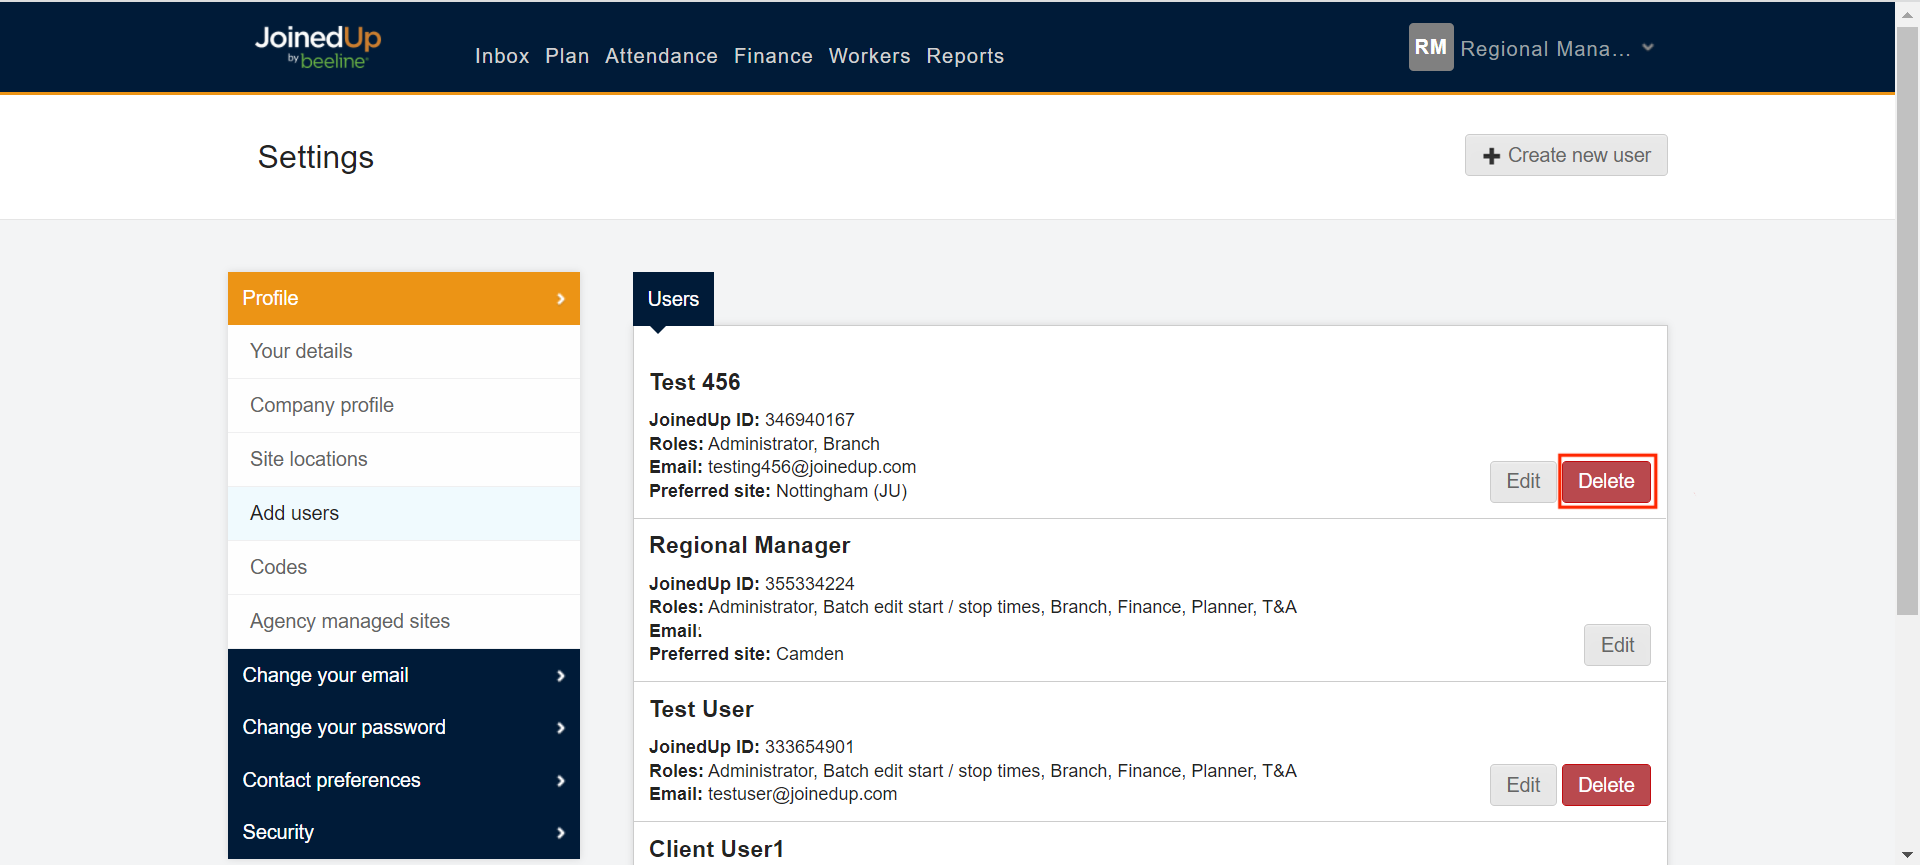
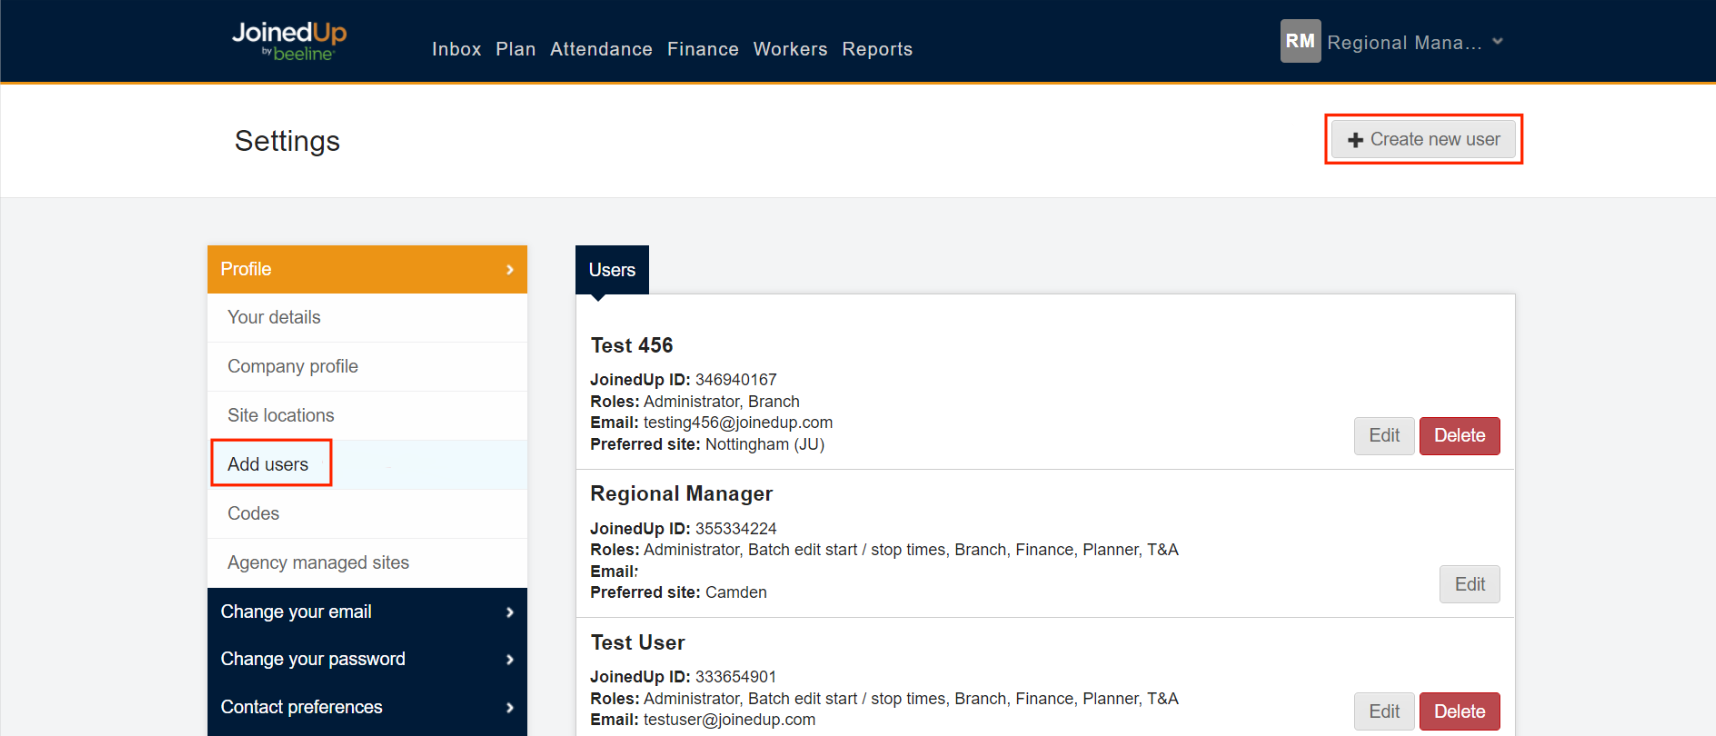
Click Add users in the left side navigation bar. The screen refreshes to display the list of current users. Click the + Create new user button in the upper right corner of the screen.
A pop-up window displays with details to create a new invitation.
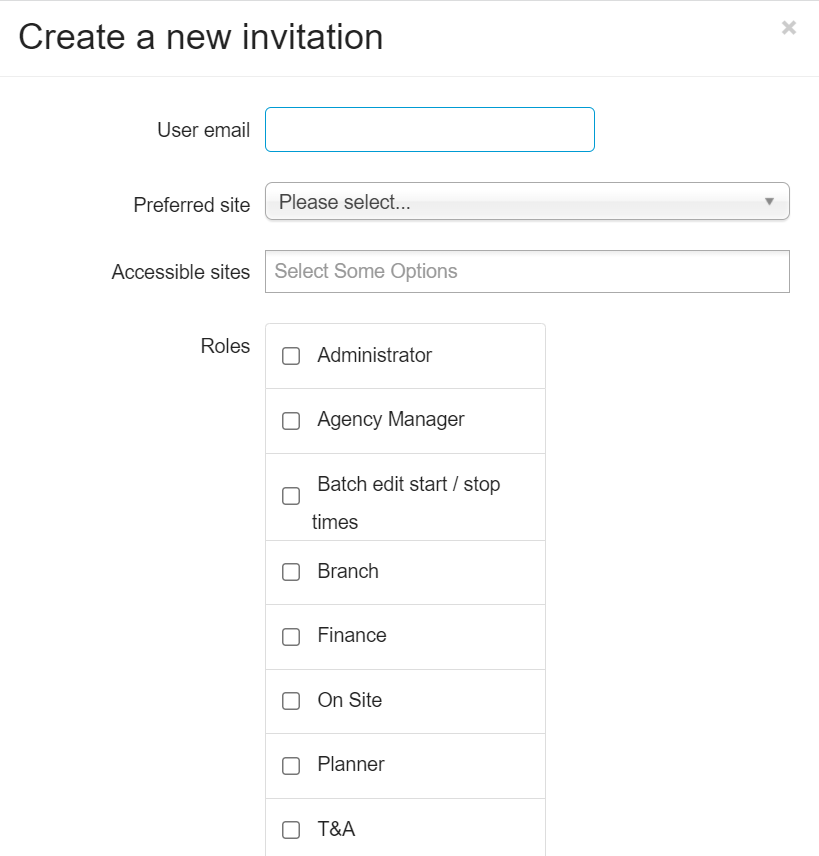
Enter the new user’s email address. This needs to be an active email address to which the new user has access since JoinedUp notifications will be sent to it.
Select which site should be designated as the user’s default site from the Preferred site selection list. Only one selection is permitted in this field.
Select ALL sites from the Accessible sites selection list to which the user needs access. Multiple selections are permitted but if this field is left blank, the user will have access to all sites. Not all organisations use Accessible sites so if this field doesn’t display simply advance to the Roles section.
Click all checkboxes that apply to assign Roles. Roles determine the system menus to which a user has access.
|
If you know a current user who has the same job position/duties, then review their user profile and select roles to match. In general assign:
Contact the Support Team if you need additional guidance on which roles to assign to a user. |
Click Create to save your entries and return to the Settings screen. The system sends a “Welcome” email to the new user with instructions on how to complete their initial login and set up their user password.