Linking & Unlinking Sites to Branches
Within JoinedUp a site identifies a single location where work is carried out, for example a warehouse or an office.
A branch is a group of sites organised geographically (North, South, etc.) or by the type of work (Driving, Industrial, etc.) You can also group all the sites you’re looking after under one Branch and see all of them in one place on your Branch Allocation screen.
A Site needs to be linked to a Branch in order to book and view the shifts booked for that Site on your Branch allocation screen.
The number of sites linked to a branch is indicated at the top of the Branch allocation screen to the right of the selected Branch name. Click the # sites link to view the list of sites already linked to the branch.
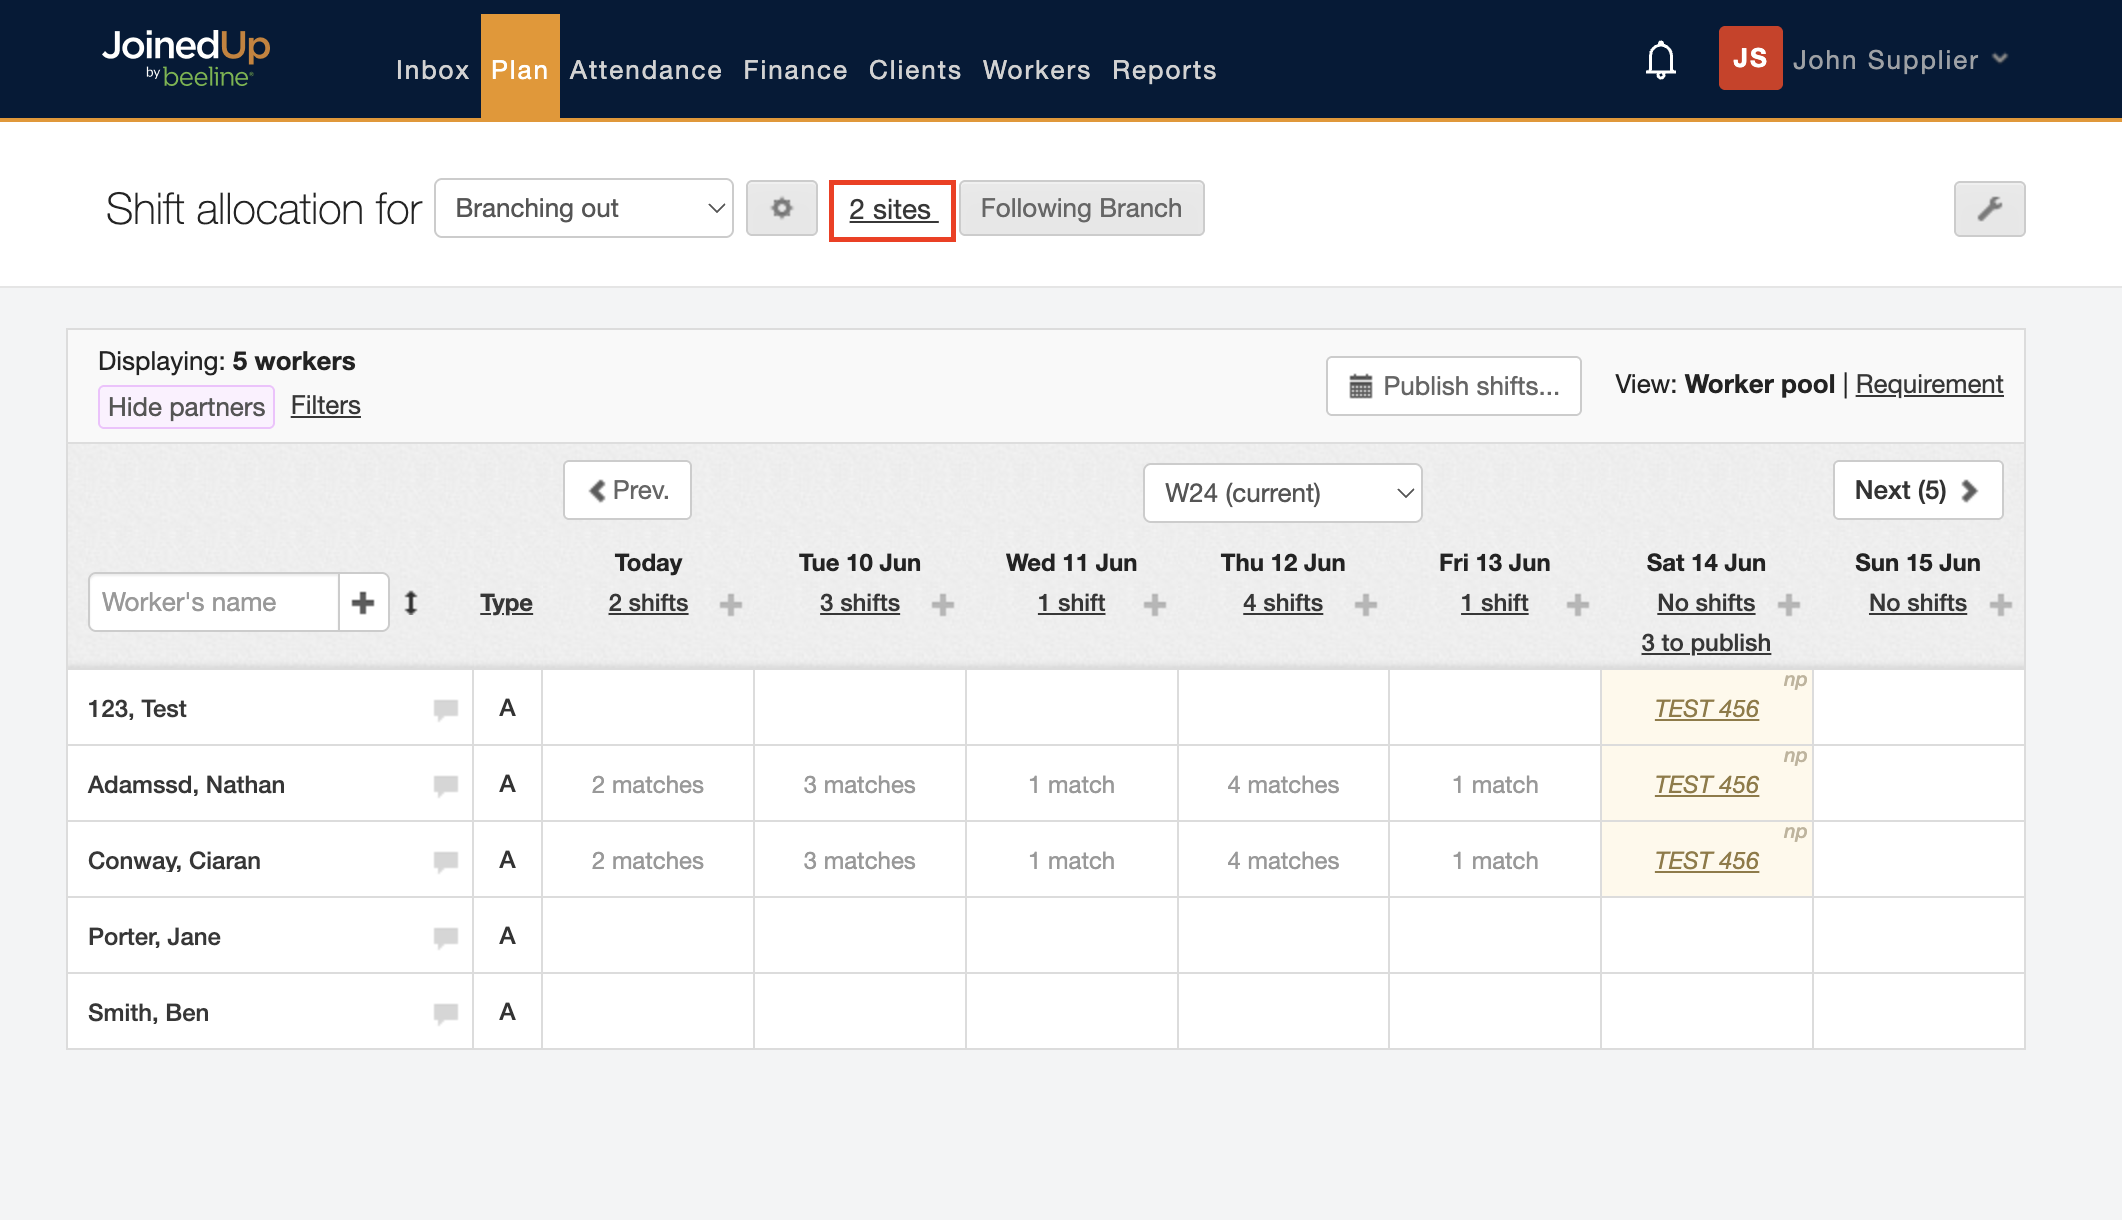
Click the # sites link to view and manage the sites already linked to that branch, and to add new ones.
You will see a pop-up with the sites listed and the button to add a new site.
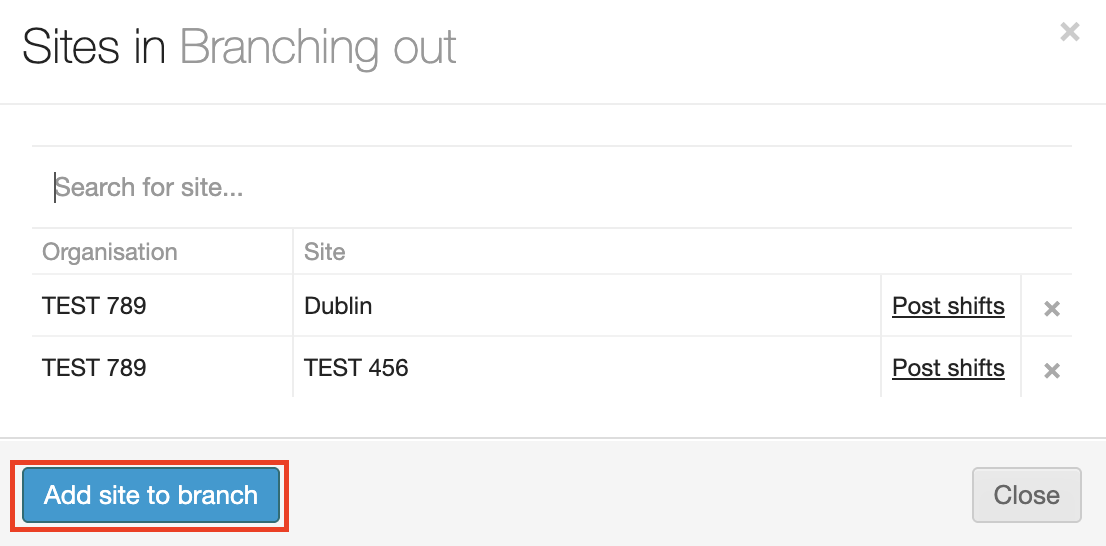
In the Add site to… window, select the Organisation which is the Client who owns the site and then select the site itself from the selection list.

Click Add site to branch to save your selection and link the site to the branch.
The site will be added to the list and the # of sites total will be updated to reflect the change.
Should you need to unlink a site from the branch, just click the x button next to the site’s name on the Sites list.

Other options:
You can also link a site to a branch when you create a site or on the Clients tab from the client preview section when you edit a site.
Navigate to the Clients tab, then click the expansion arrow to the far right of the client name to expose the preview section.
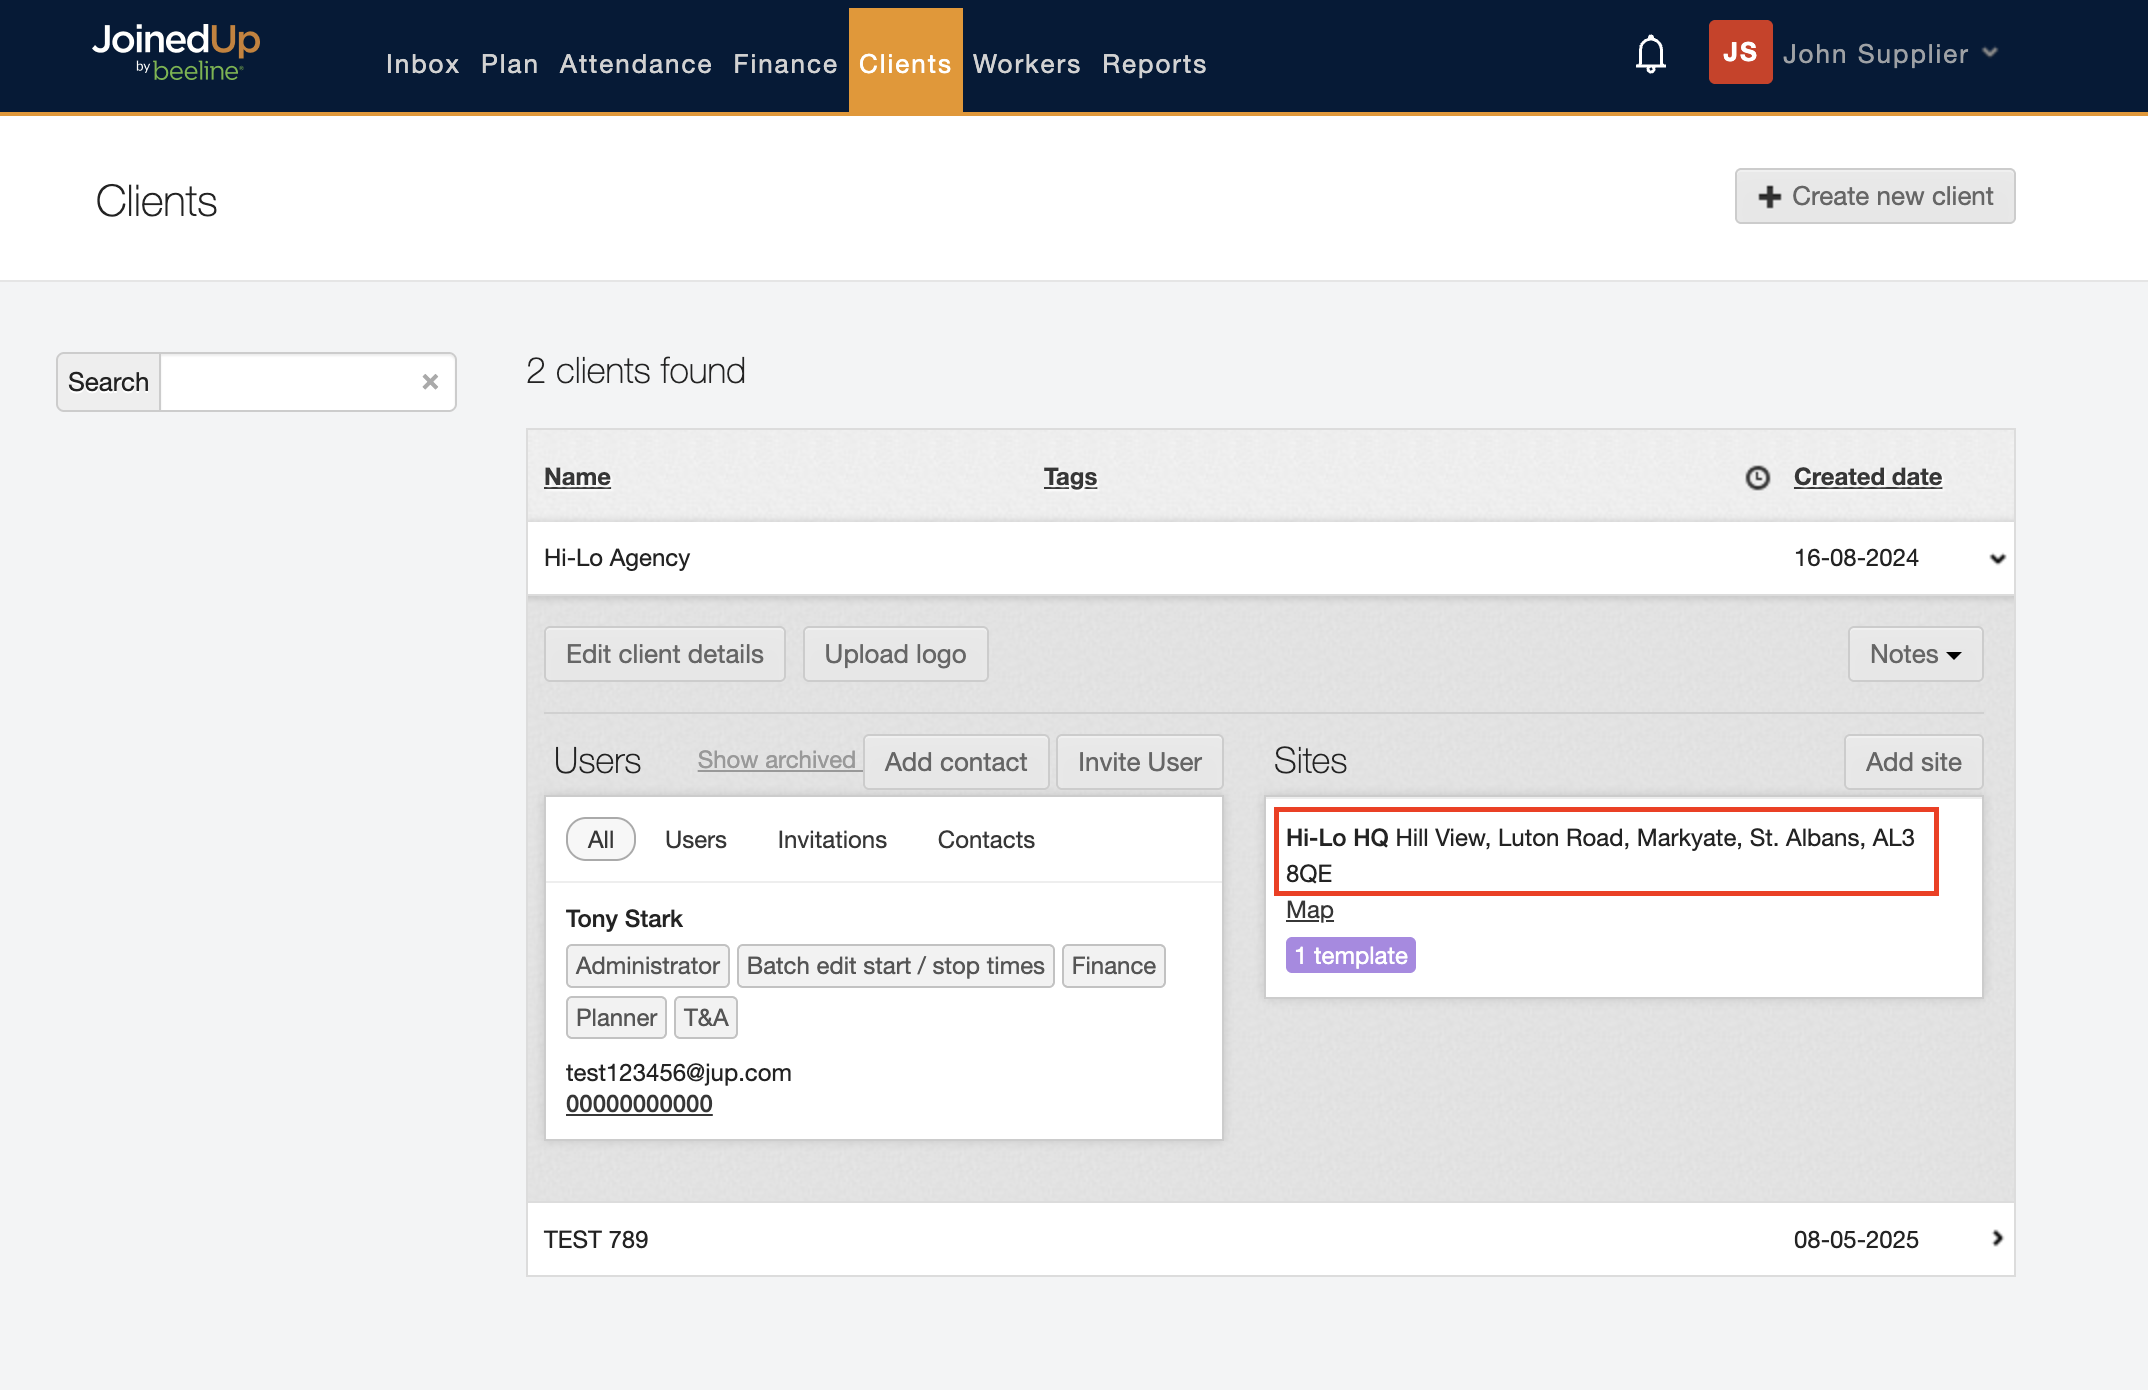
Click the name of the site you want to edit.
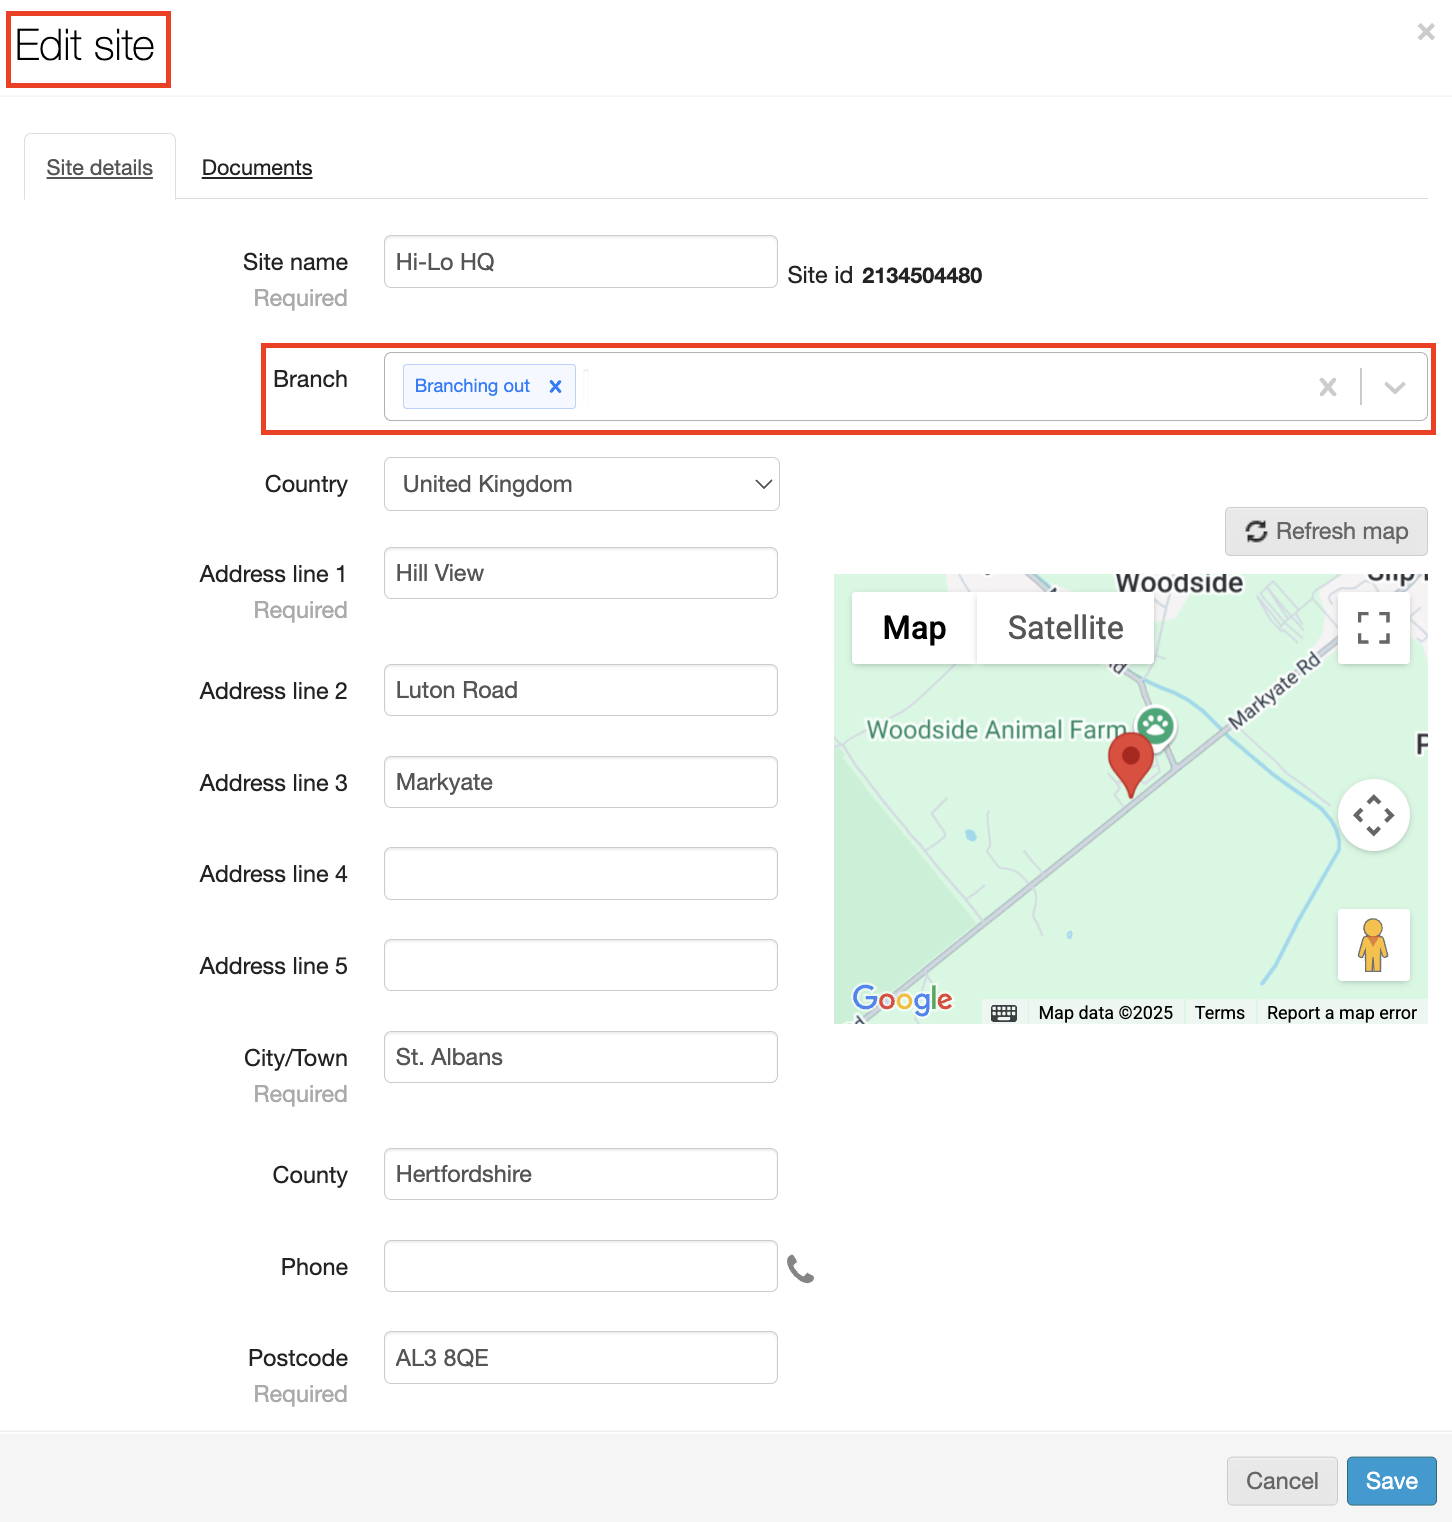
Click Save to save your changes and return to the Clients screen.