Post Shifts Screen
Manage your requirement by creating shifts in the Post shifts screen and manage the shifts posted by your client.
You can then allocate these shifts to your workers.
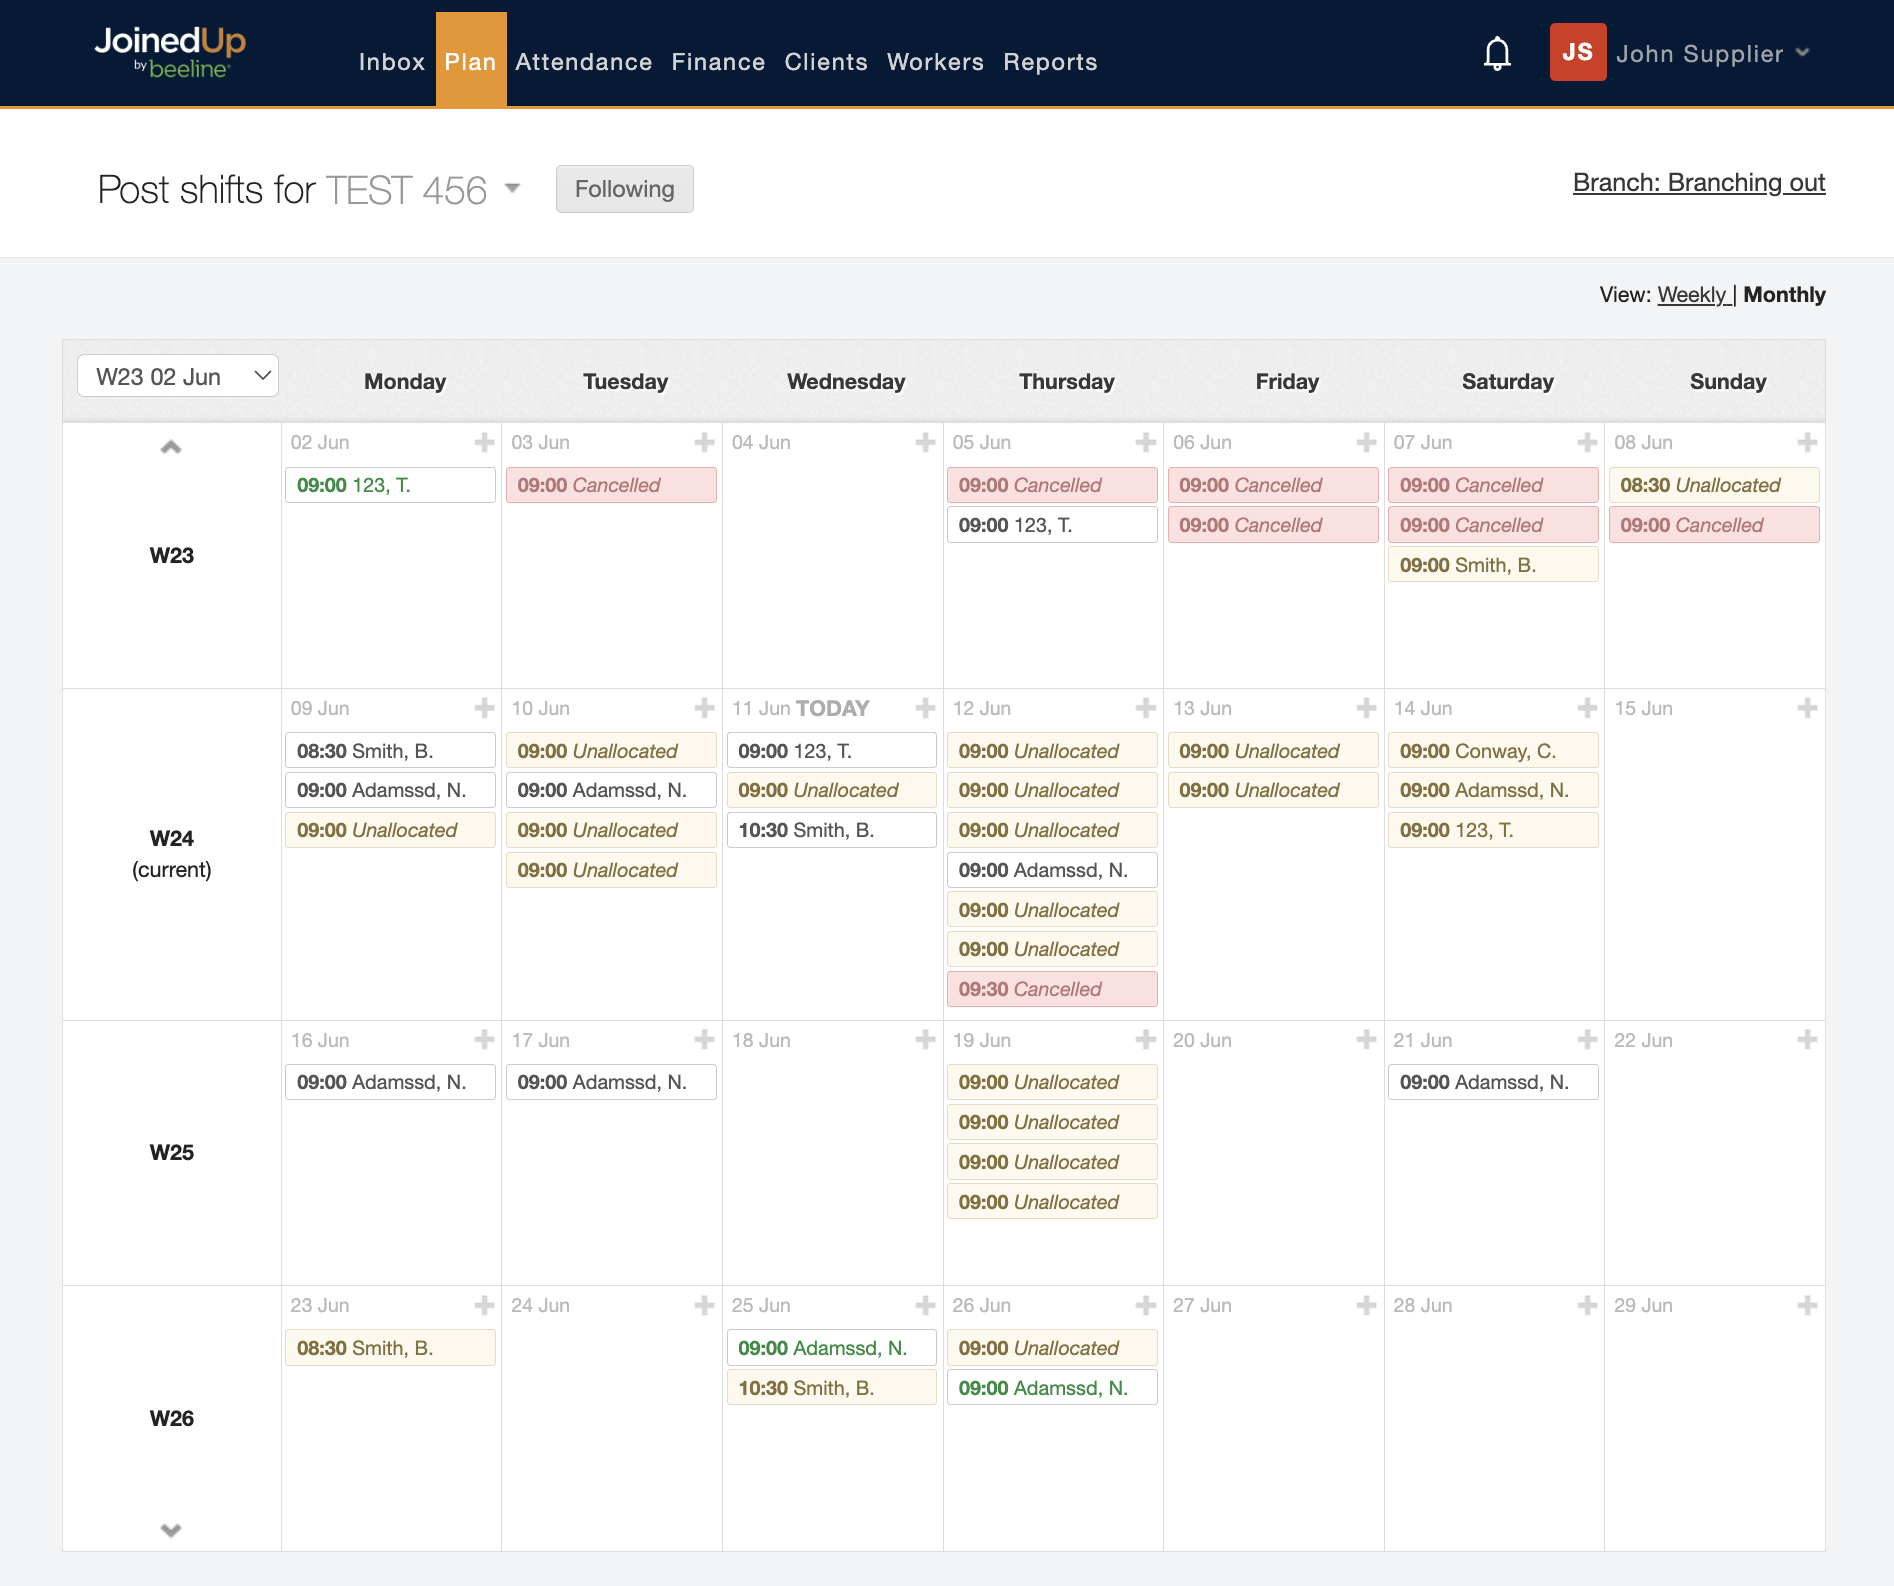
Navigate to Plan tab in the Header menu and then select Post shifts from the drop-down list. The Post shifts screen can be displayed in either a Monthly or Weekly view.
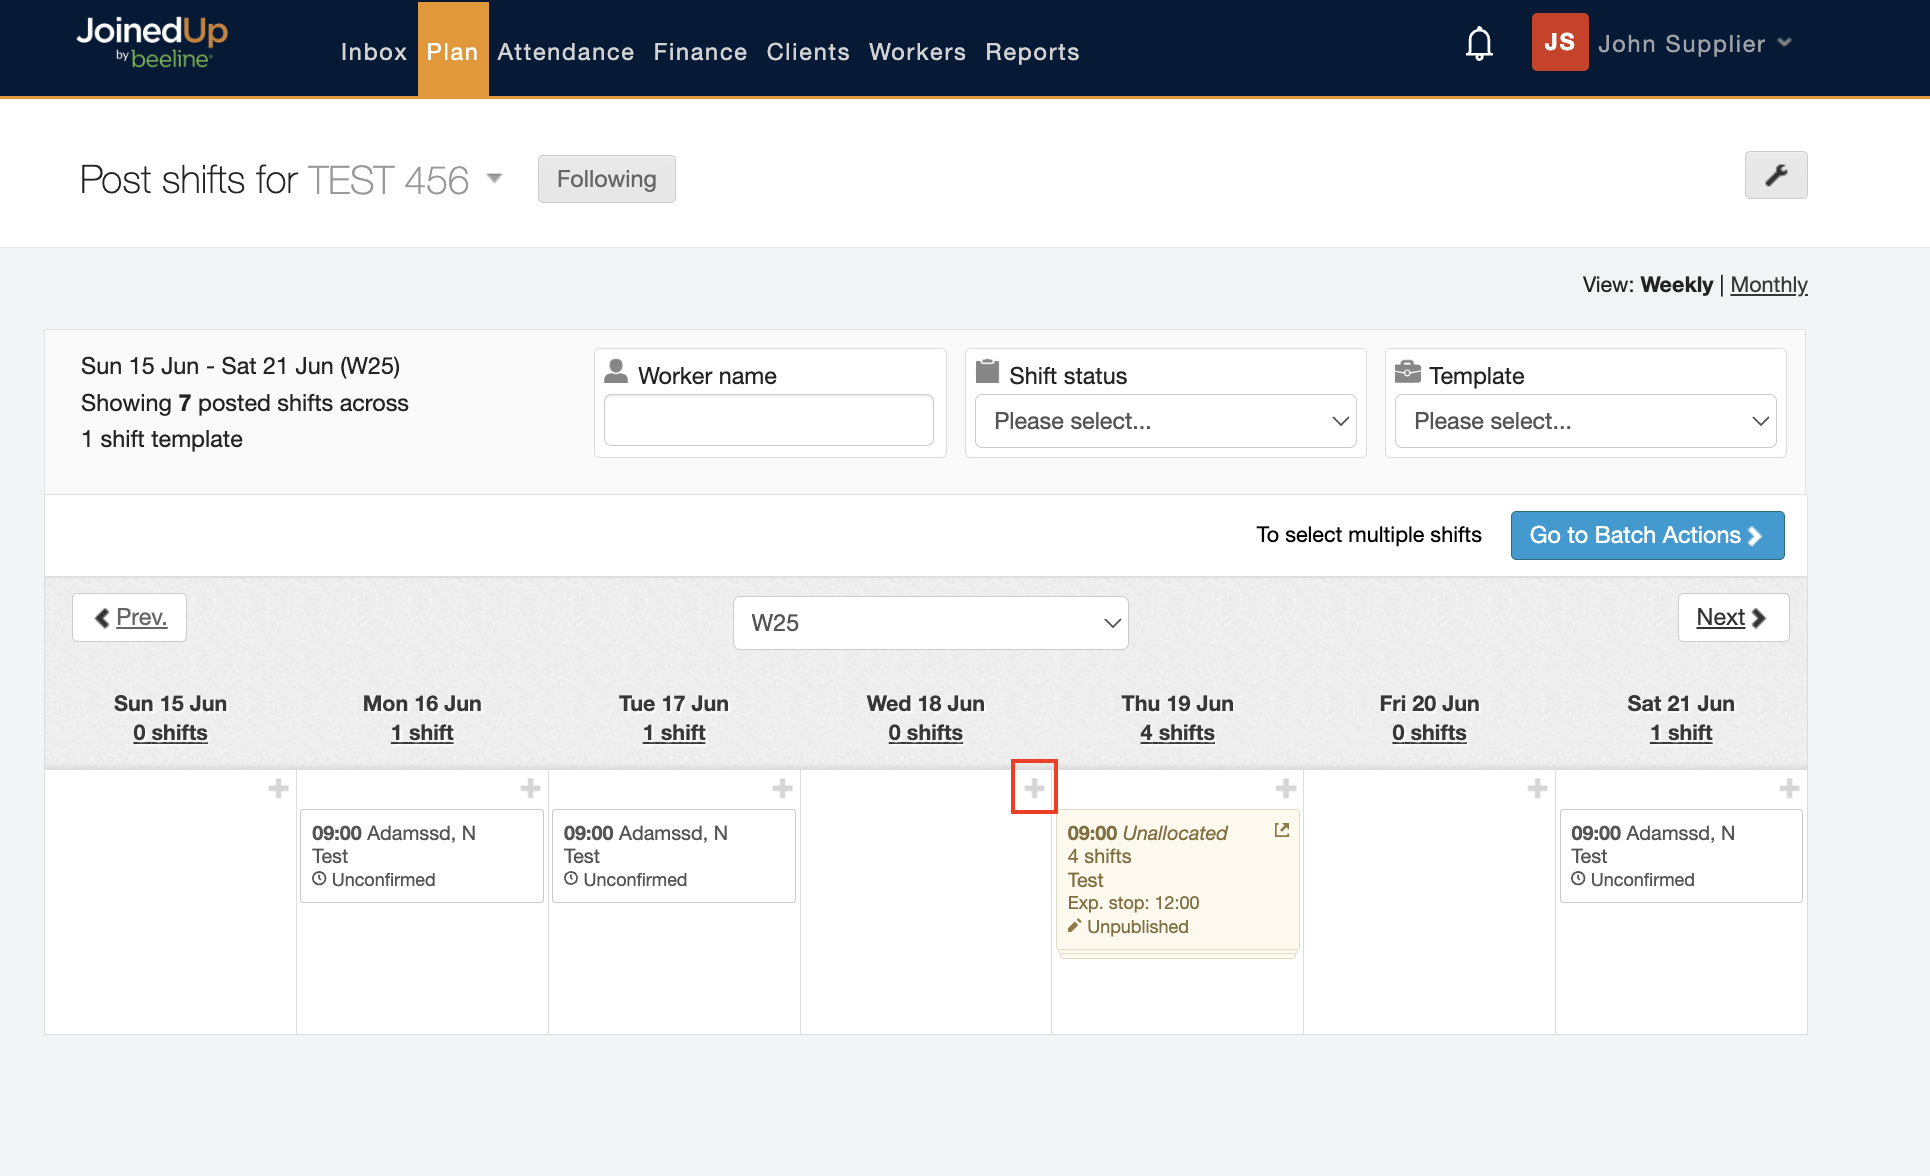
To create the shifts simply press the + button in the upper right corner of the tile on the day for which you would like to add shifts.
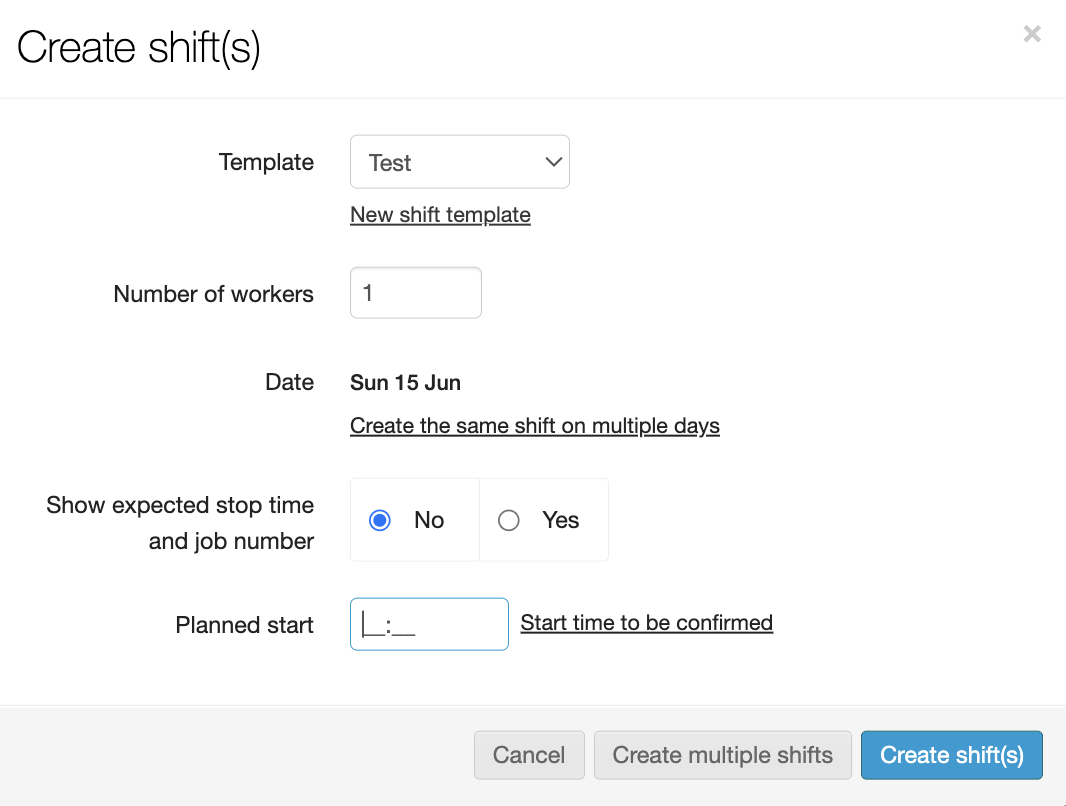
When creating shifts you will be asked to specify:
-
What type of job it is by selecting the respective shift template.
-
How many workers are required—one shift for each worker.
-
Which date is the shift for, along with the option to create the same shift, or set of shifts, across multiple days.
-
Designate the start time and as an option, the expected stop time and job number.
The moment you create the shifts they become visible on your planning screen, and you can start allocating workers into these shifts. You will be able to see which shifts already have names against them and which have yet to be allocated.
Shifts for the same type of job and starting at the same time get grouped together by stacking the associated tiles. Click the stack and a side panel displays with the options to cancel or edit them in batch mode.
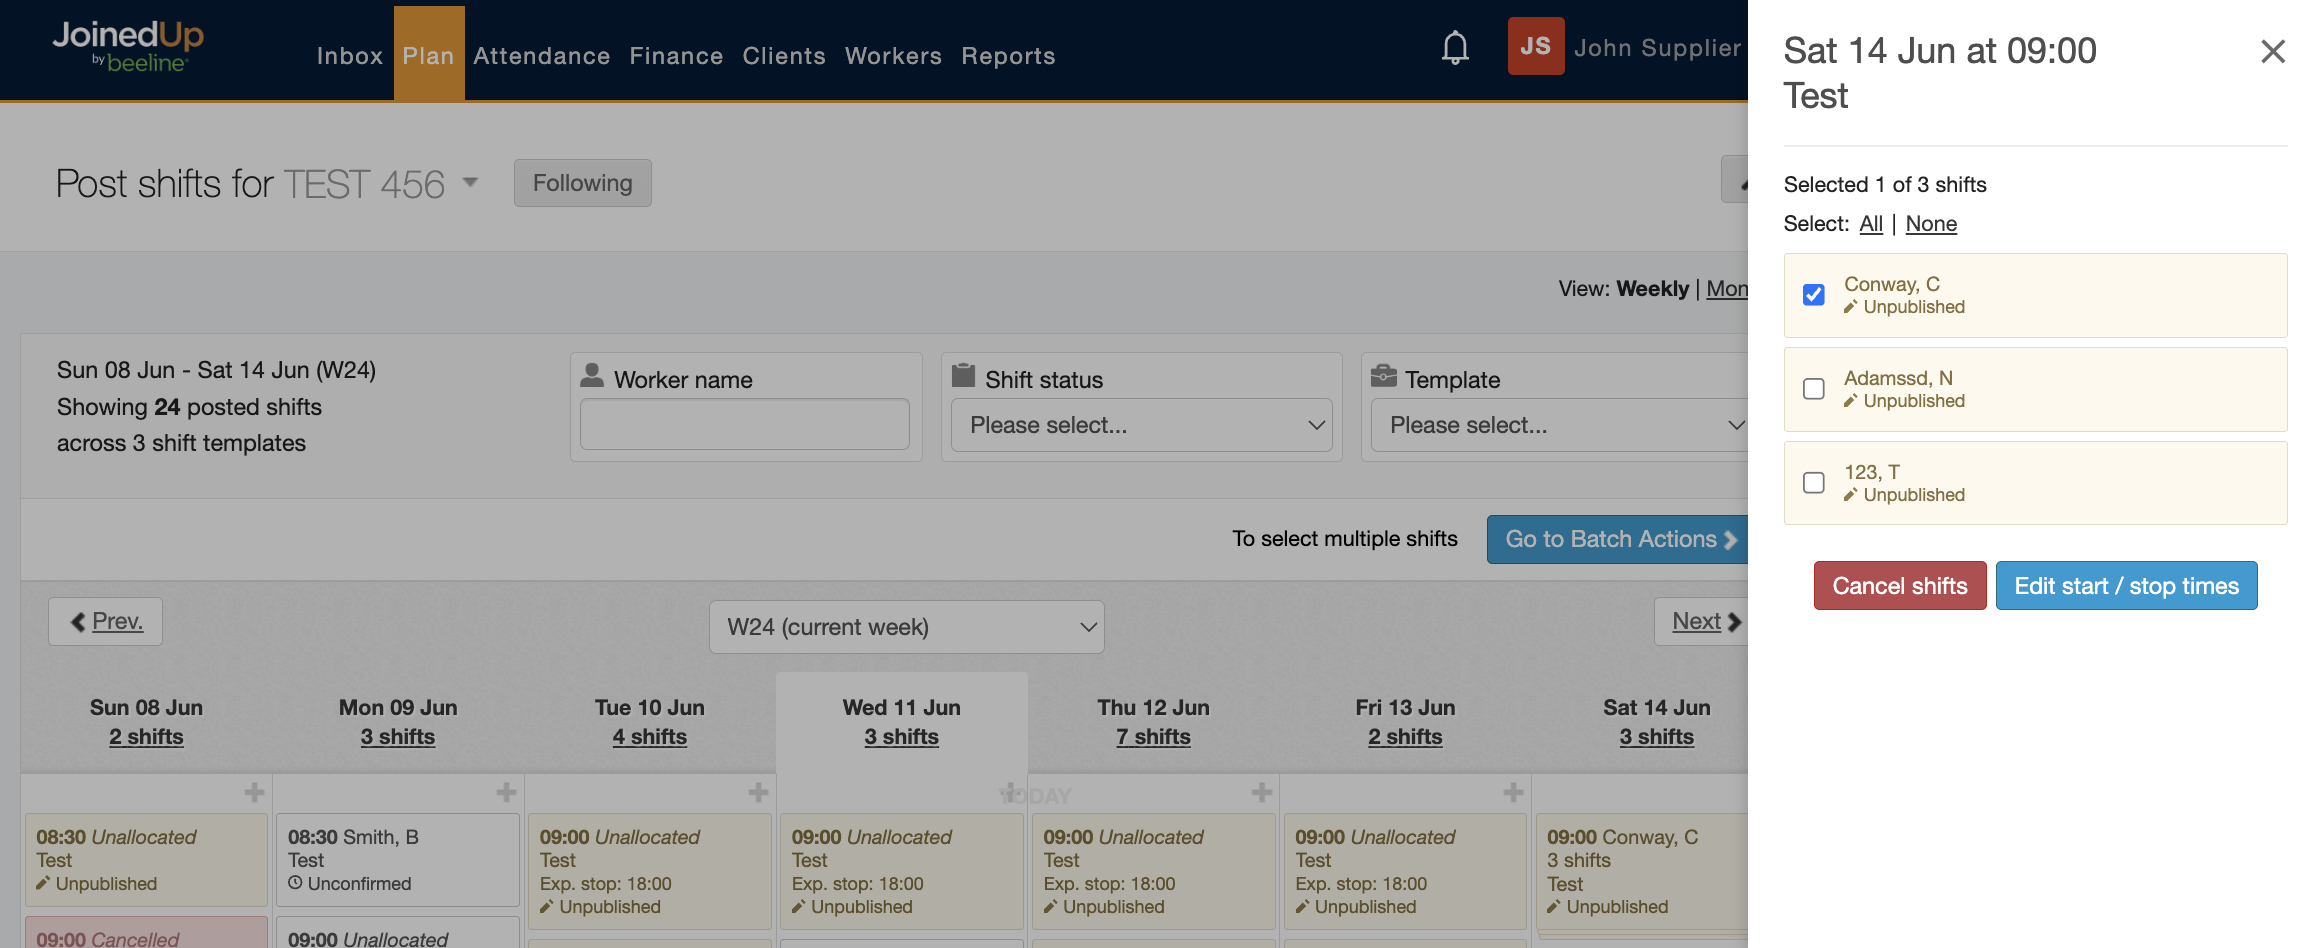
You are able to cancel or amend any shift.
|
Colour-coding is used to represent the different statuses of the shifts:
|