Adding Clients
Adding New Clients
You can service all your clients through JoinedUp. Each of them will have their own access to the system along with their own set of locations (sites) that you are supplying workers into as well as their own users accessing the system.
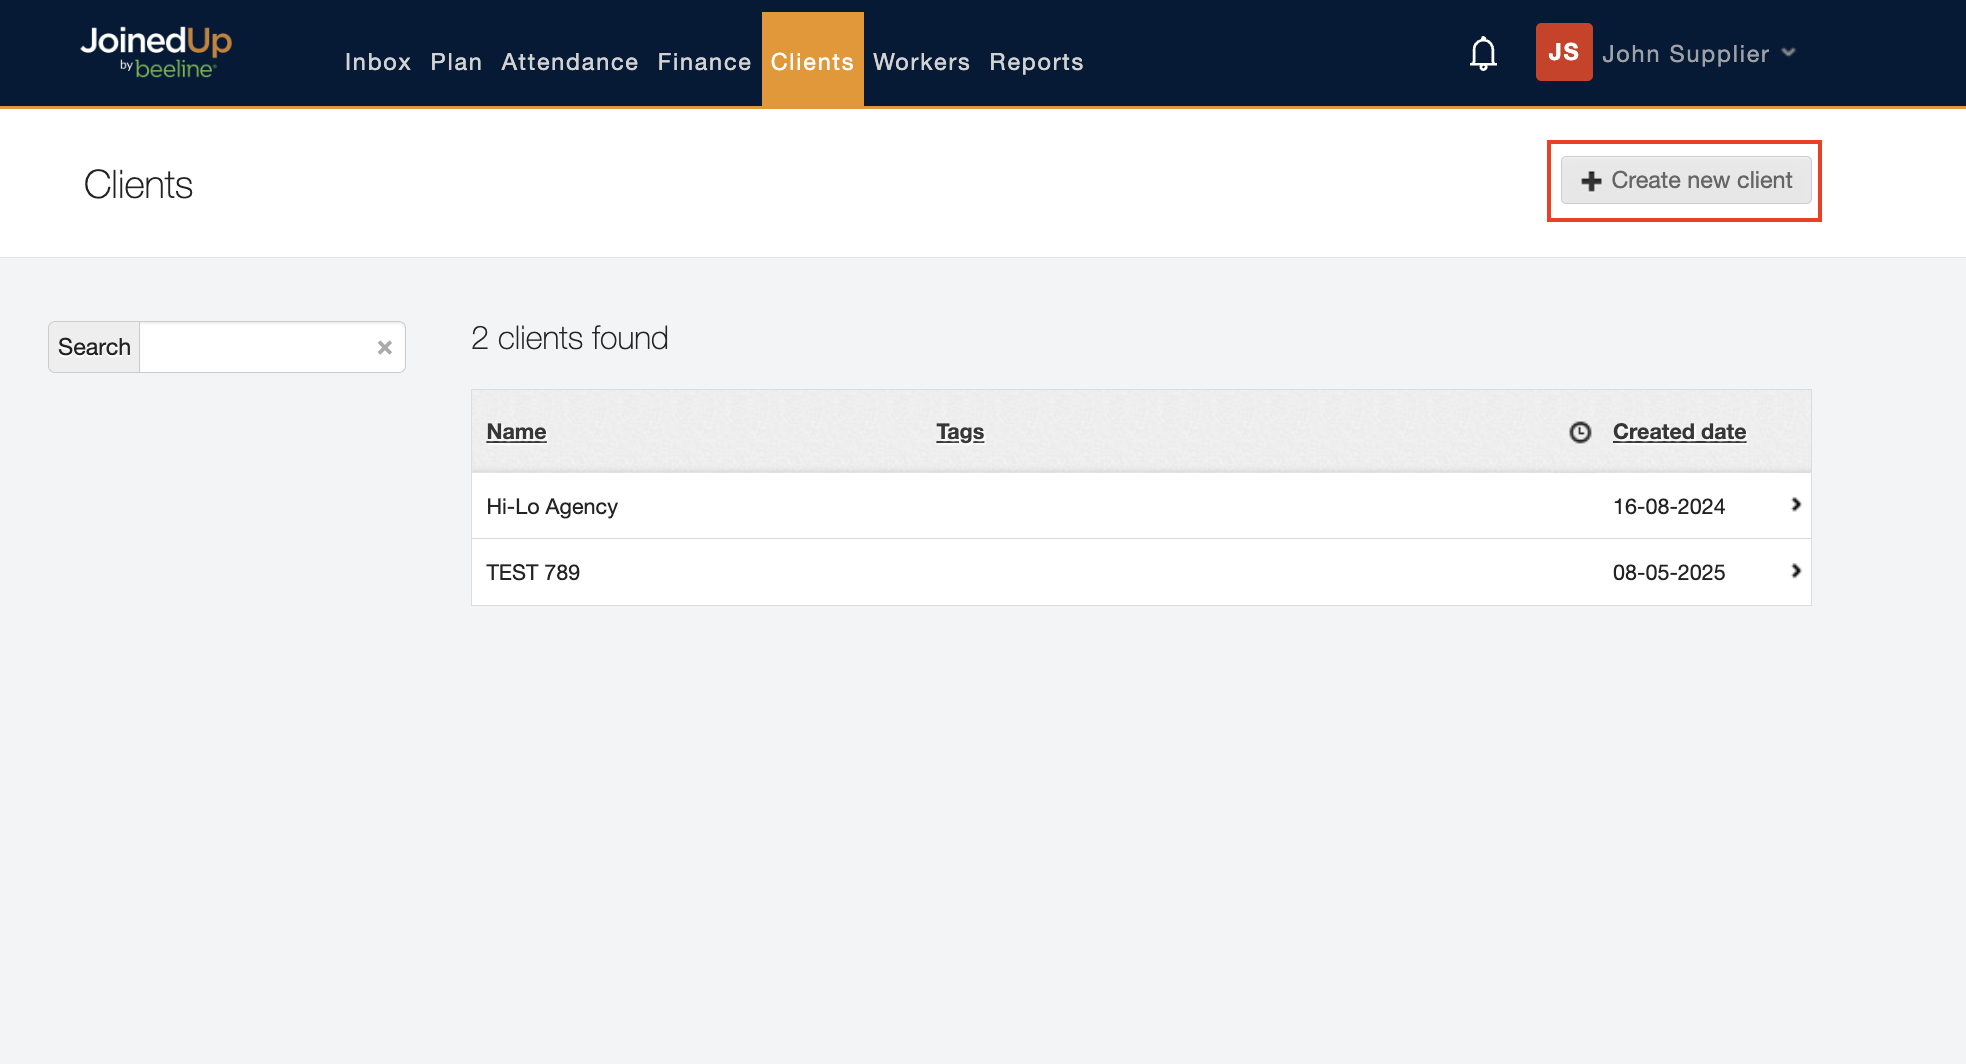
All your existing clients information can be found under your Clients tab.
This is also the page to use when creating a new Client entry on the system. Please note that only Admin users can create new Client entries.
To get started, navigate to the Clients tab and select the Create new client button.
The first field allows you to put in the email address for the first user of the newly created client organization. You can skip this step for now and add all the client users at a later stage.
When adding a new Client you will be asked to fill in the details about your Client’s registered address and create the first Site that you will be supplying workers into for this particular Client.
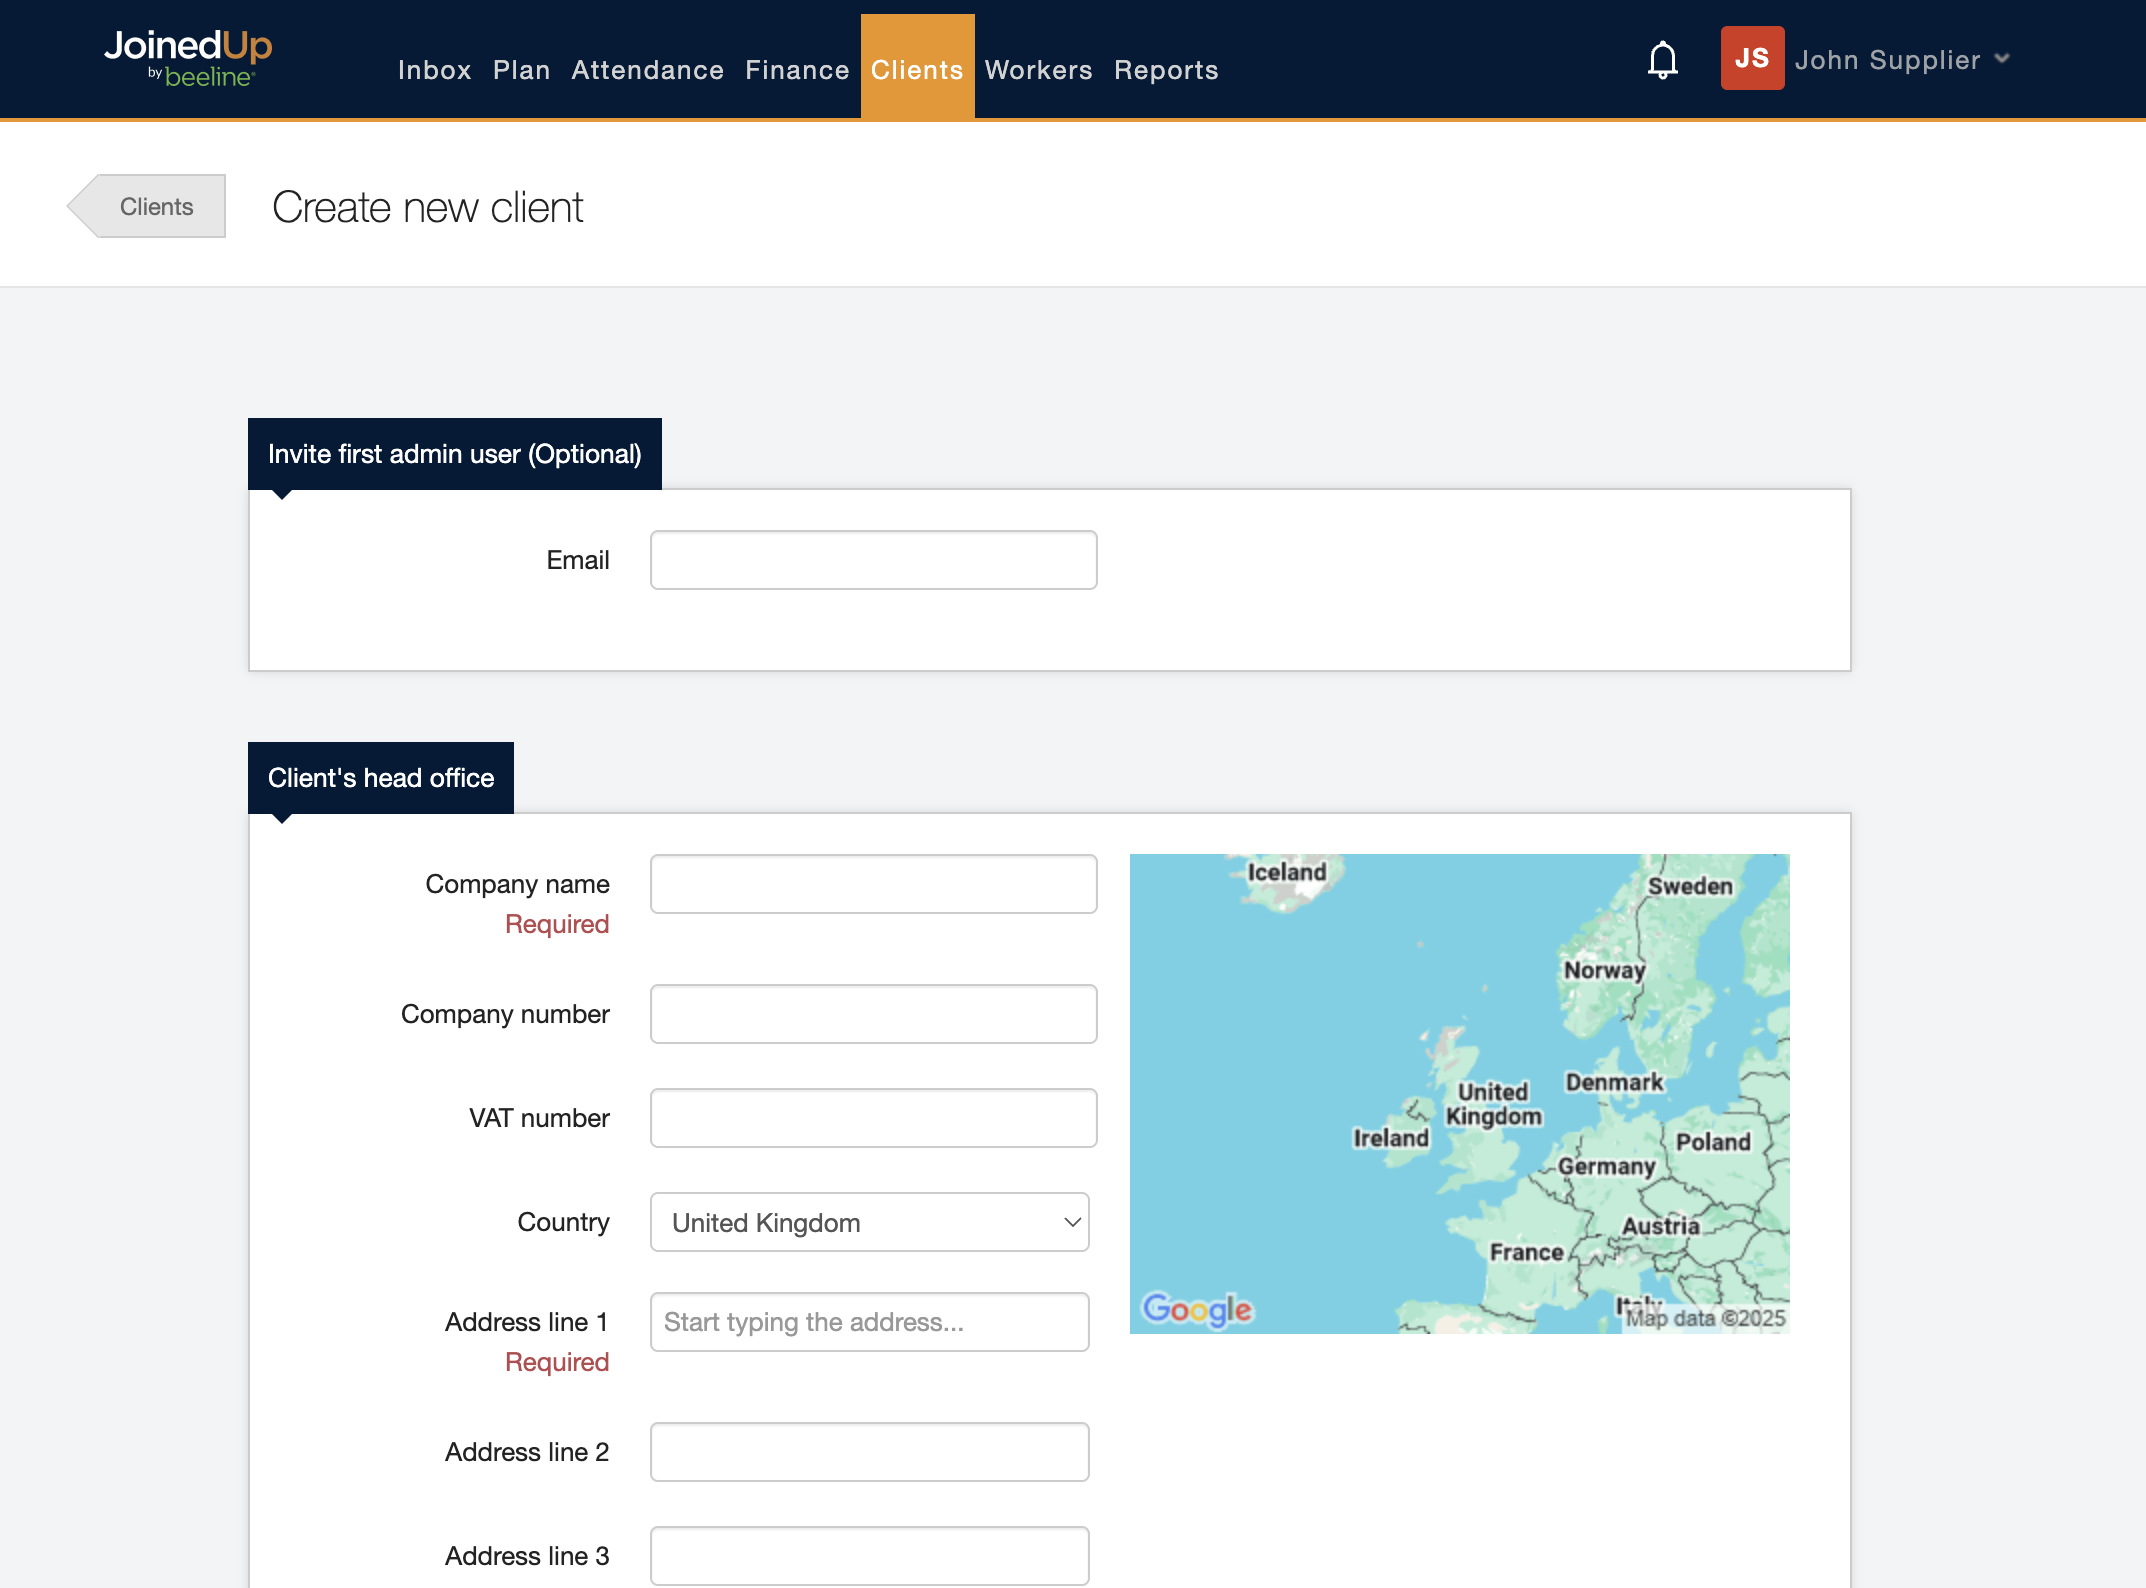
| When filling in the address details for your new Client or one of their Sites start by filling in the Postcode field. Then click the blue Find button. The system will display a list of addresses to match that postcode. Click to select the address that matches your Client or Site and the system will auto-populate the required fields and refresh the map display to match your selected location. |
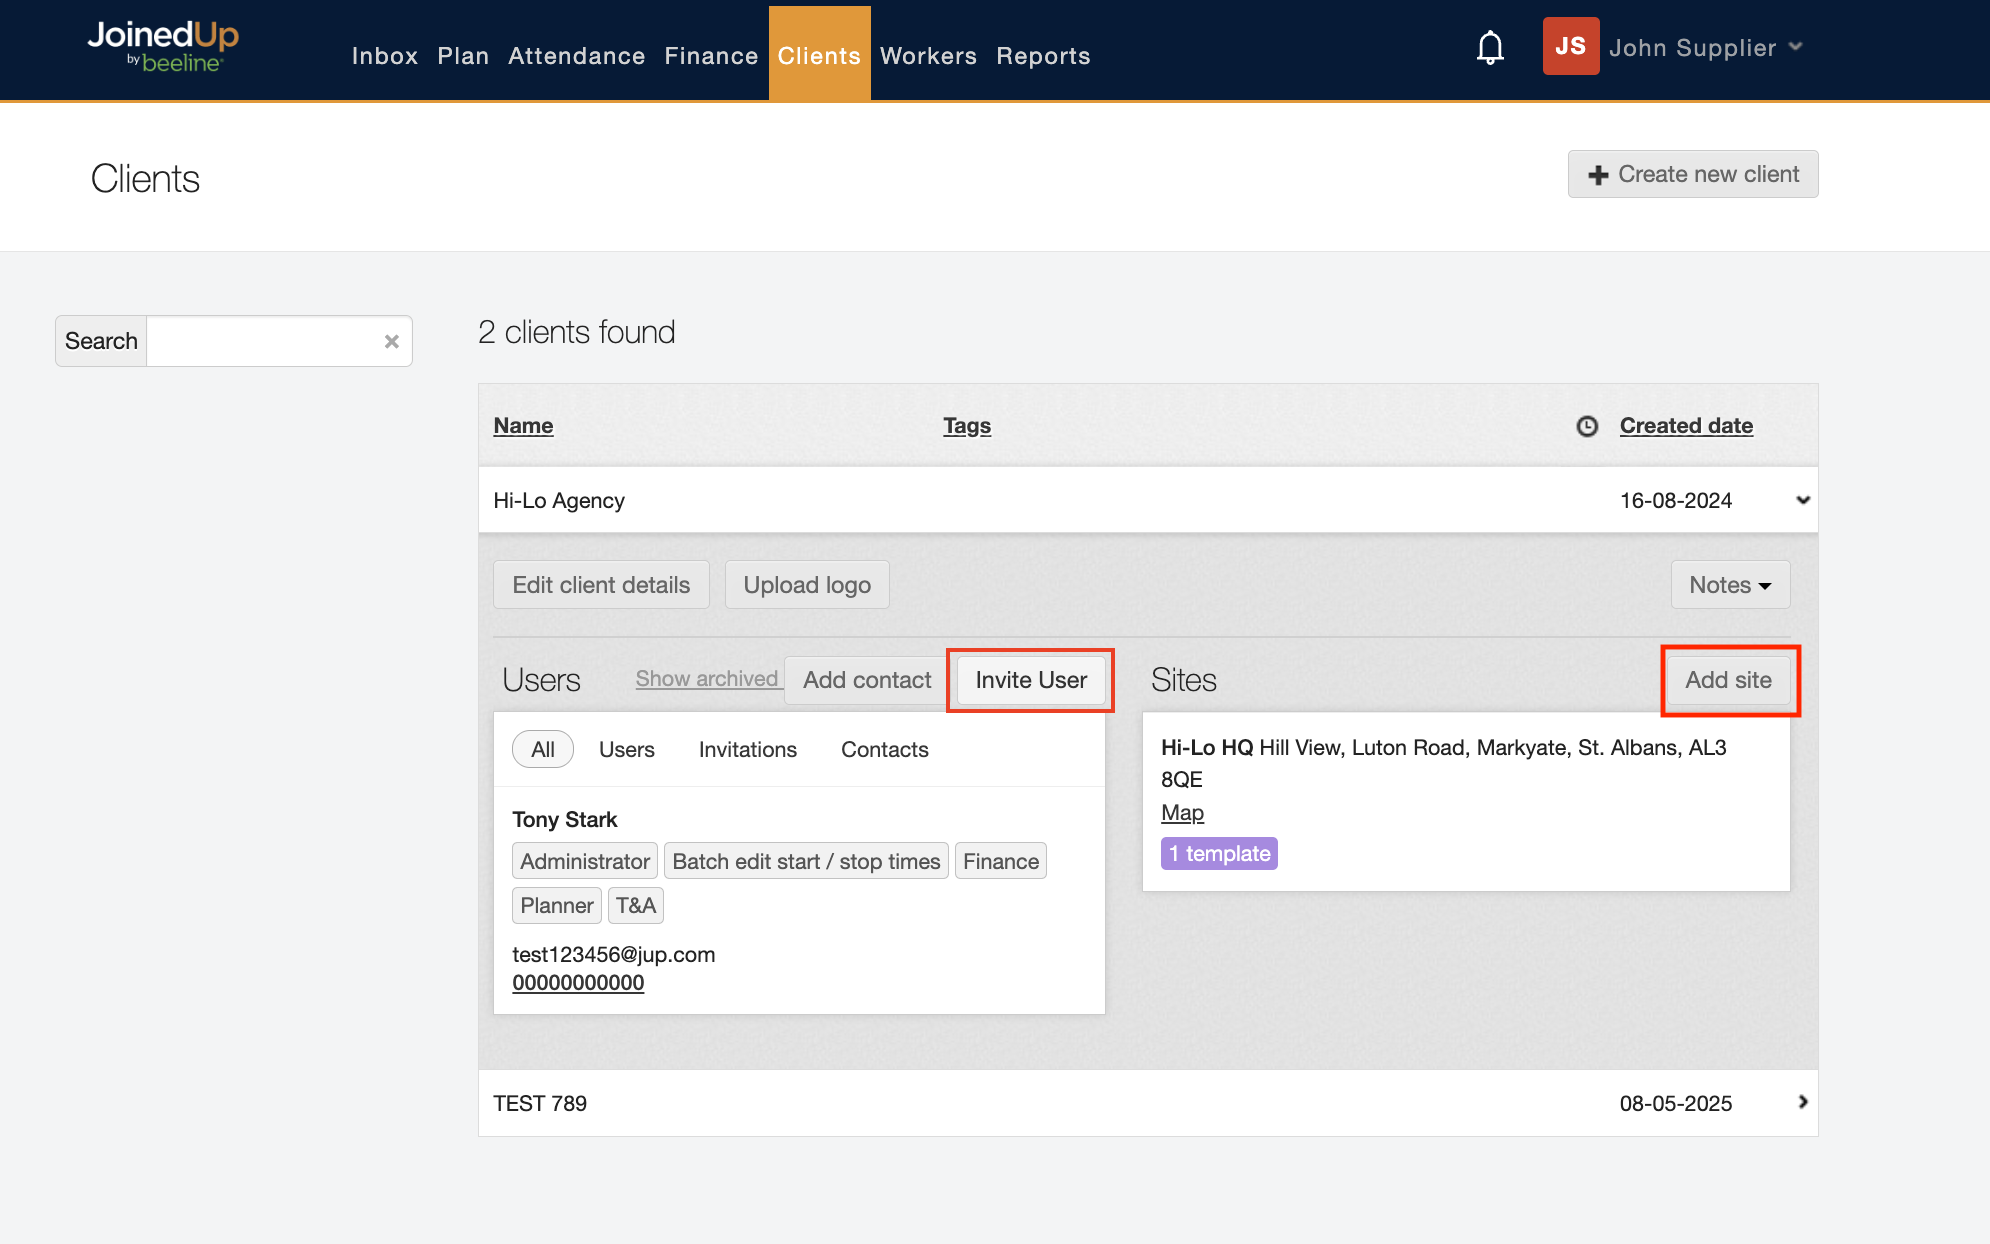
Once your new Client entry has been created you will be able to see it in the Clients tab. You can check or modify their details as well as add more users from their site and more locations where you will be booking shifts for them.