Planning Shifts
Shift allocation - On-site
Shifts are created and allocated using one of the two planning screens in Plan. The On-site screen allows you to see and book shifts at a single site.
Creating Shifts
At the top of the screen we can see the name of the site we are looking at. To change the site click the name and type the other site’s name into the search bar.
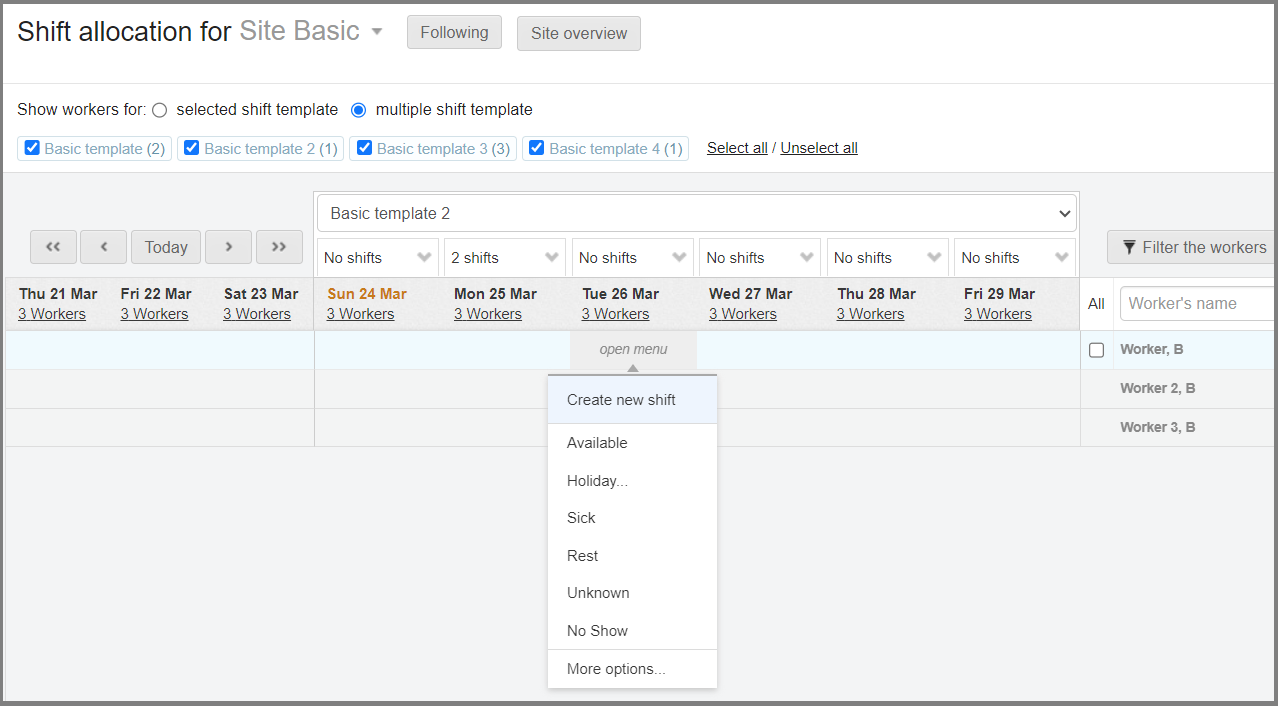
Underneath we have a view selection switching between seeing the entire worker pool at this site and only seeing workers of a selected role indicated by the Shift template. Use the drop-down menu below to switch between shift templates to book shifts for different roles. In the multiple shift template view, the workers not linked to the template currently selected will be greyed out and inactive.
The worker roster is on the right-hand side and each line represents a worker and their shifts throughout the week and each column represents a day in the week.
To create a shift for a worker, click the cell underneath the selected date and in line with the selected worker and select, Create new shift.
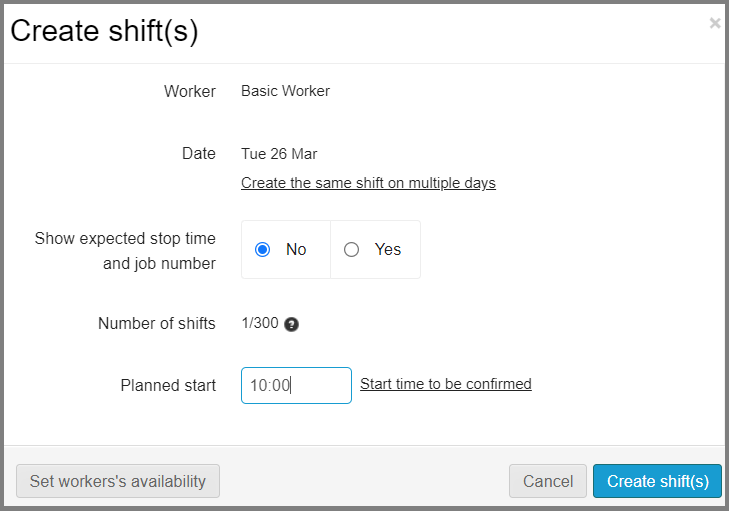
When creating, you will just need to add a start time and hit the button to Create shift(s).
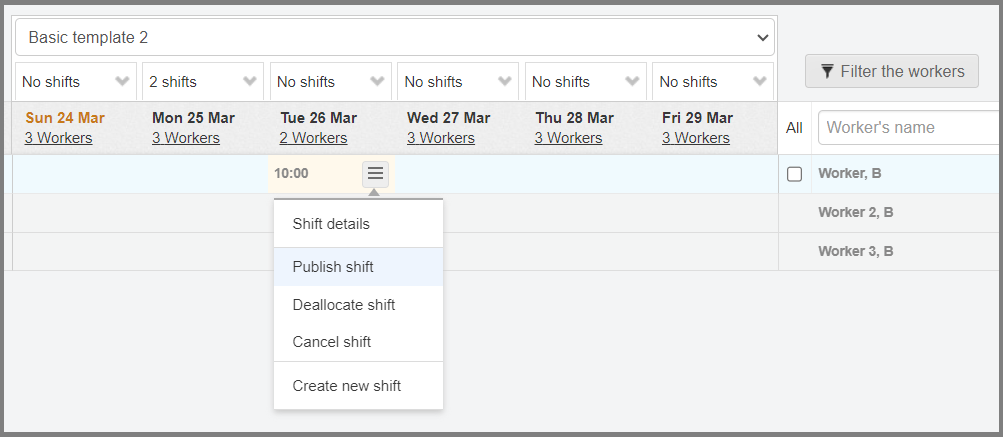
Once the shift is created you will see the start time under the date. The shift will initially have a light yellow background. This means that the shift has not been published yet and the worker allocated has not received and notifications about this shift. Publish shift and JoinedUp will send the worker a text and/or an email to notify them of their upcoming shifts.
Alternatively, you can also Deallocate a shift, which removes the allocated worker, but retains the shift to book to somebody else or Cancel the shift along with the worker allocated to it.
Allocating Shifts
Should your clients also use JoinedUp, they can post the shifts on the system themselves and notify you of their requirement this way. In this instance, the shifts would already be on JoinedUp and all you would need to do is allocate workers to them.
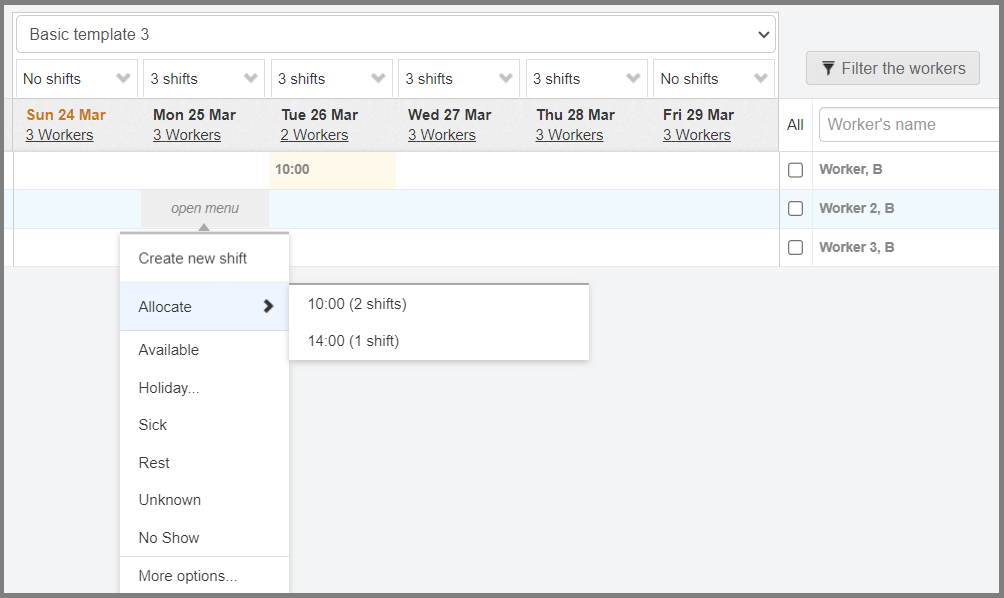
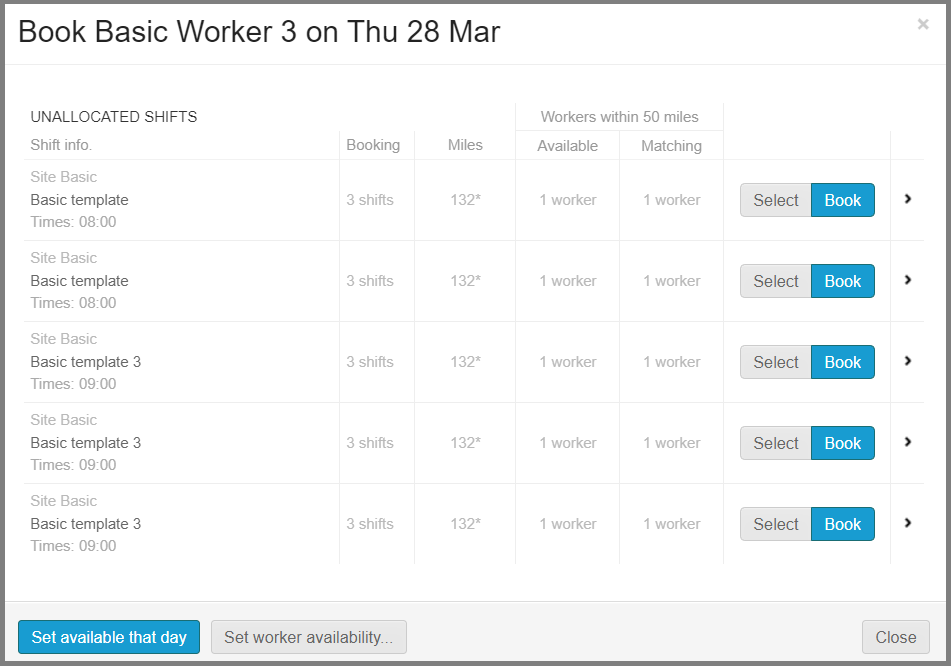
Once shifts have been posted, you will see the number of outstanding ones for each shift template above each day. To allocate a worker into a shift, click on the cell underneath the selected day and in line with the selected worker, just like when creating a shift. This time there will also be an option to Allocate and you will need to select the shift with the correct start time.
| Don’t forget to publish the shift afterwards so that the allocated worker receives their notification. |
Shift Allocation (Branch)
The other allocation screen available on JoinedUp is the Branch allocation screen which allows you to see the activity and book shifts for a number of sites grouped under a branch.
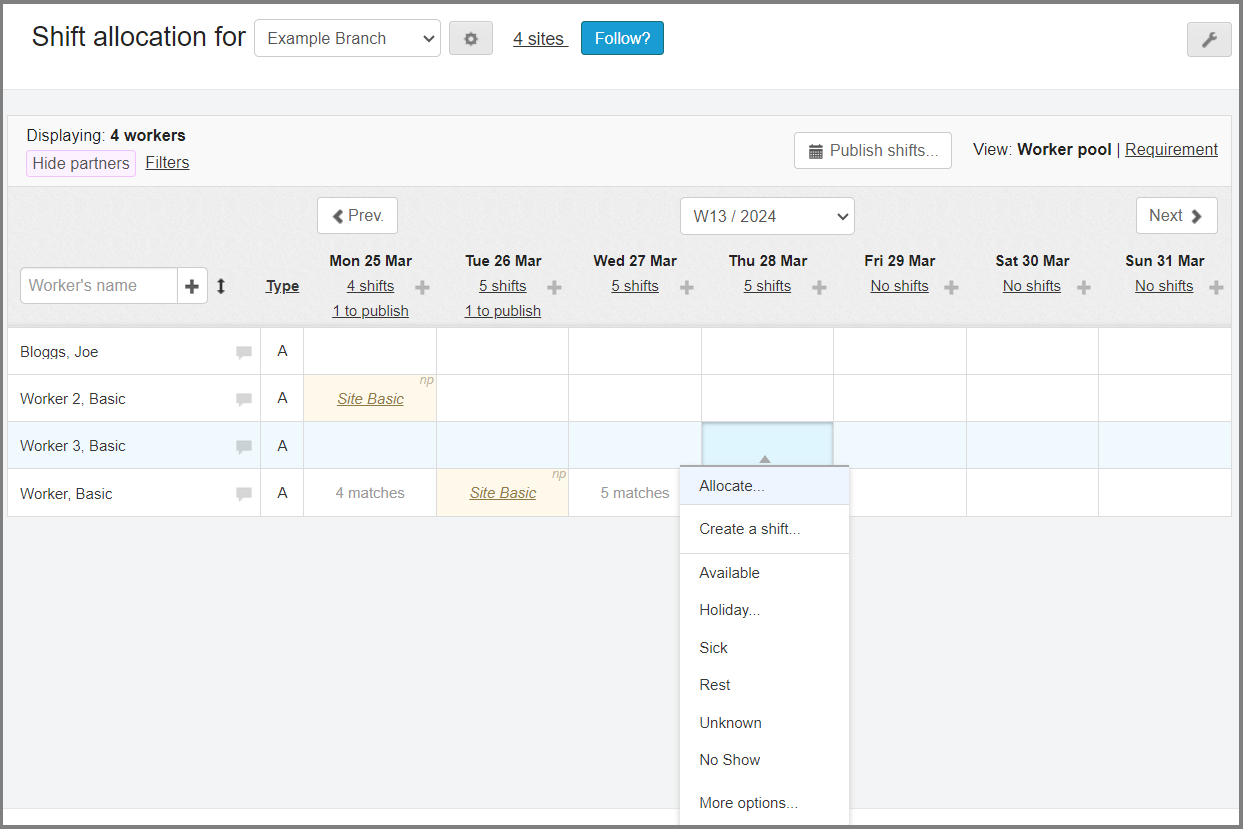
Otherwise the screen operates similarly to the on-site plan. Each line represents a worker and their shifts and each column represents the day in the week. As before, when you click the selected day for the selected worker, you will see a menu with the options to Create or Allocate shifts.
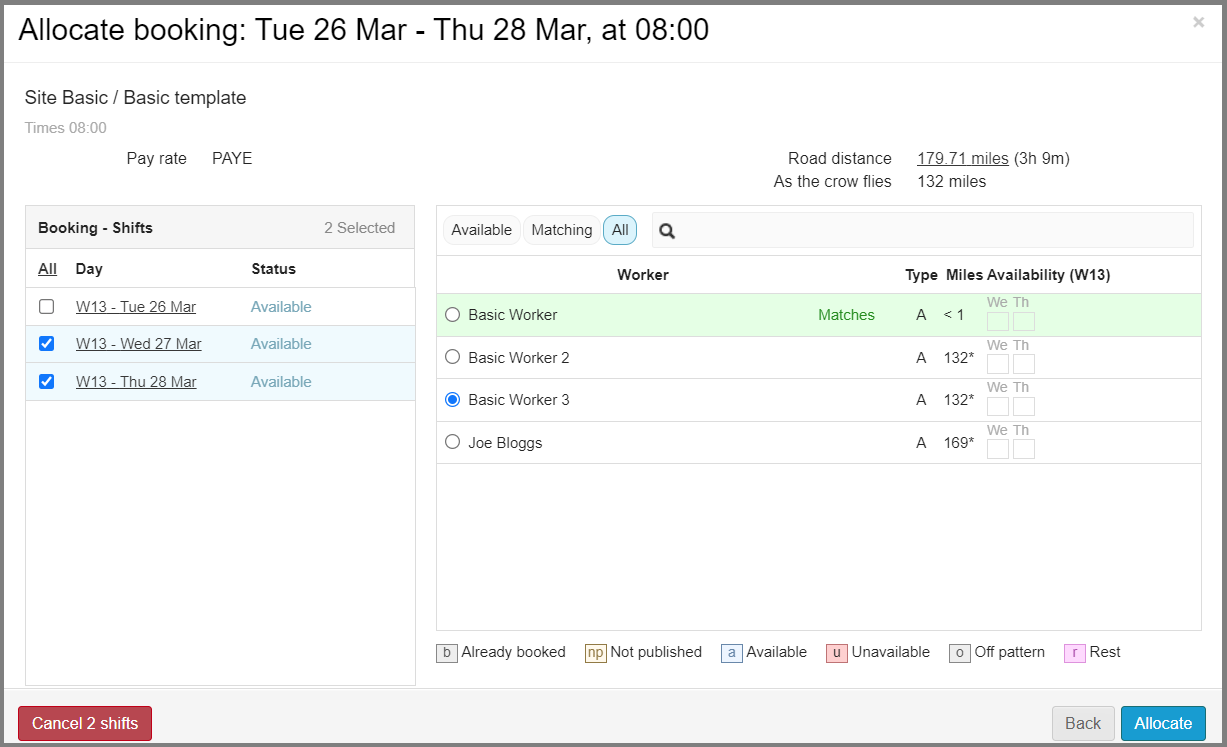
When allocating shifts you will see a pop-up to select which shift (under which site, template, and start times) to allocate.
And then reconfirm your date selection in the left column and the worker selection on the right and click Allocate.
| As before, don’t forget to publish the shifts after you are finished with planning. There is global, ‘Publish shifts’ button at the top of the screen to publish the booked shifts in batch mode. |