Adjustment and Expense Approvals
| The submission and approvals process is only available for Agencies/Suppliers whose End Hirers have the feature enabled. |
As an agency/supplier, your adjustments and expenses can now be submitted for approval by your End-Hirer.
To support this enhanced workflow:
-
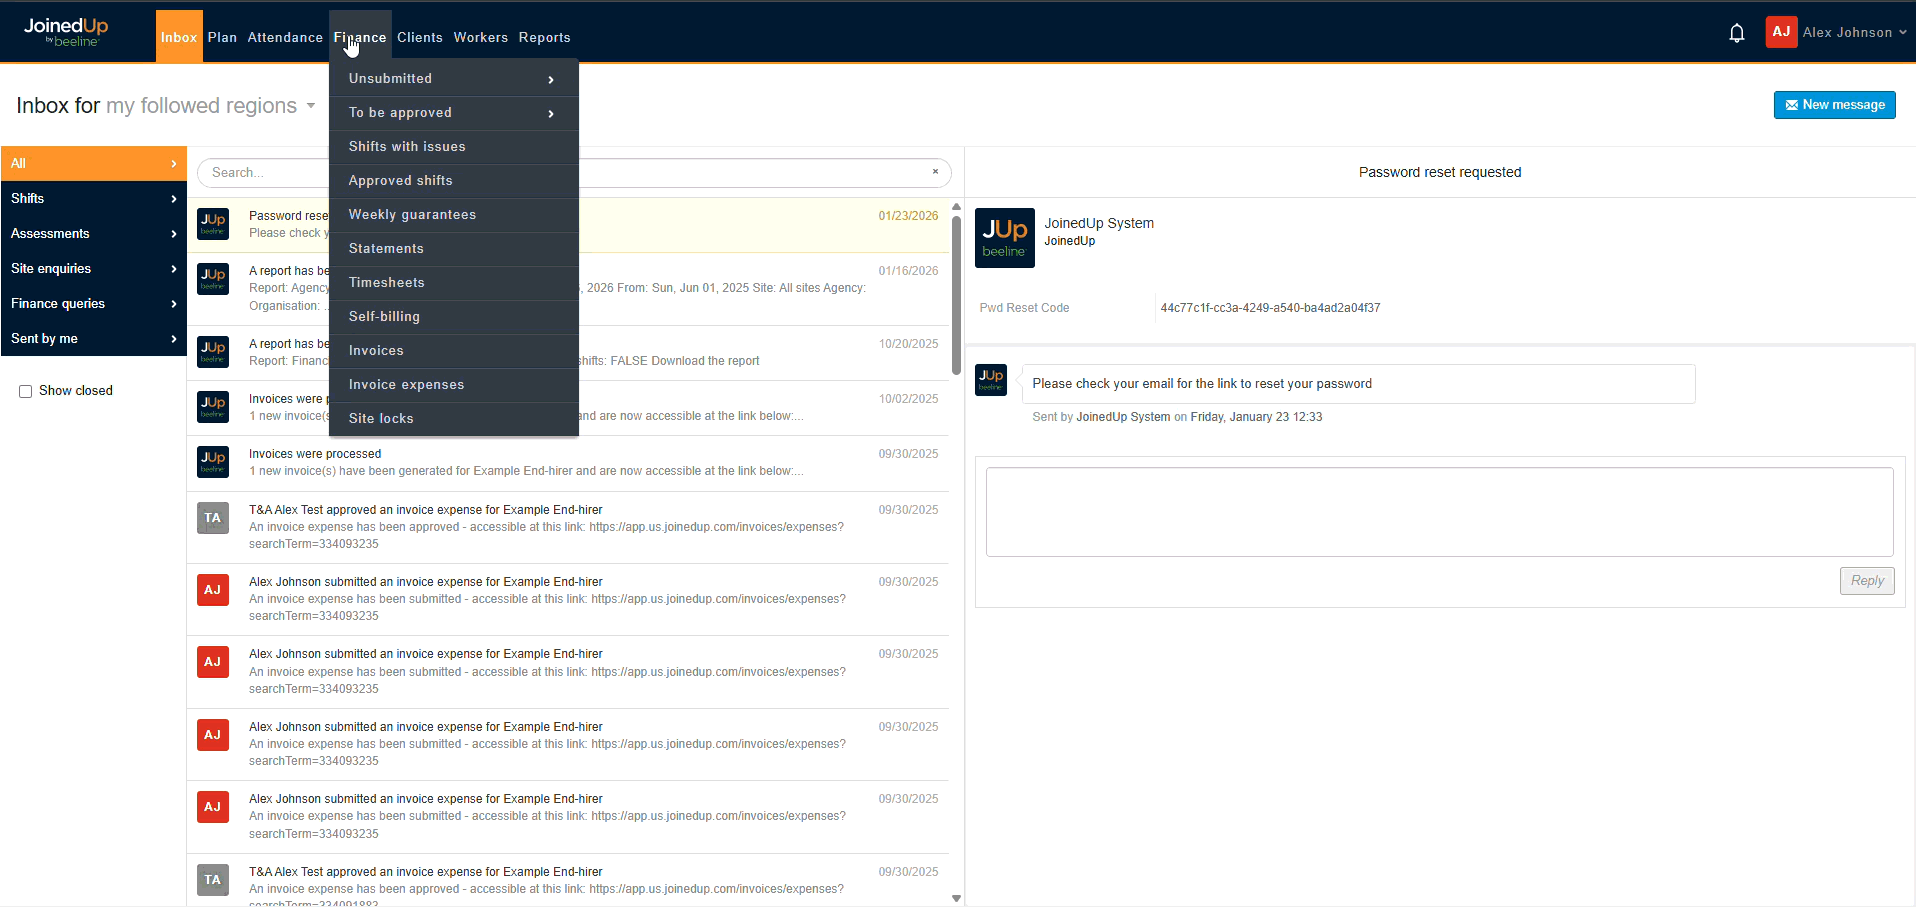
The navigation menu includes new Unsubmitted and To Be Approved sections
-
Dedicated screens for Shifts and Adjustments & Expenses are available under each section.
New Shift Template Settings
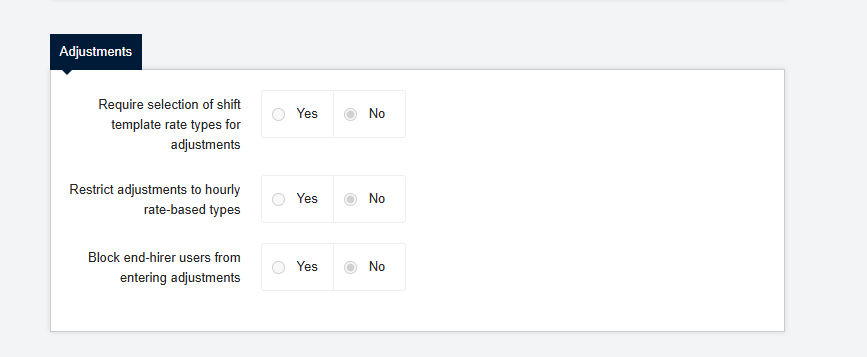
When this feature is enabled by an End-Hirer, you will notice a new read-only section in the Shift Templates, Advanced Settings section.
-
Require selection of shift template rate types for adjustments - this option requires you to select a rate type in your shift template you would like adjust.
-
Restrict adjustments to hourly rate-based types - this option restricts the entering of cash values, you will be limited to only selecting hourly adjustments.
-
Block end-hirer users from entering adjustments - this option restricts End-Hirers from creating adjustments & expenses.
Depending on the options selected above by your End-Hirer, your Adjustments and Expenses modal may differ.
Accessing Adjustments and Expenses
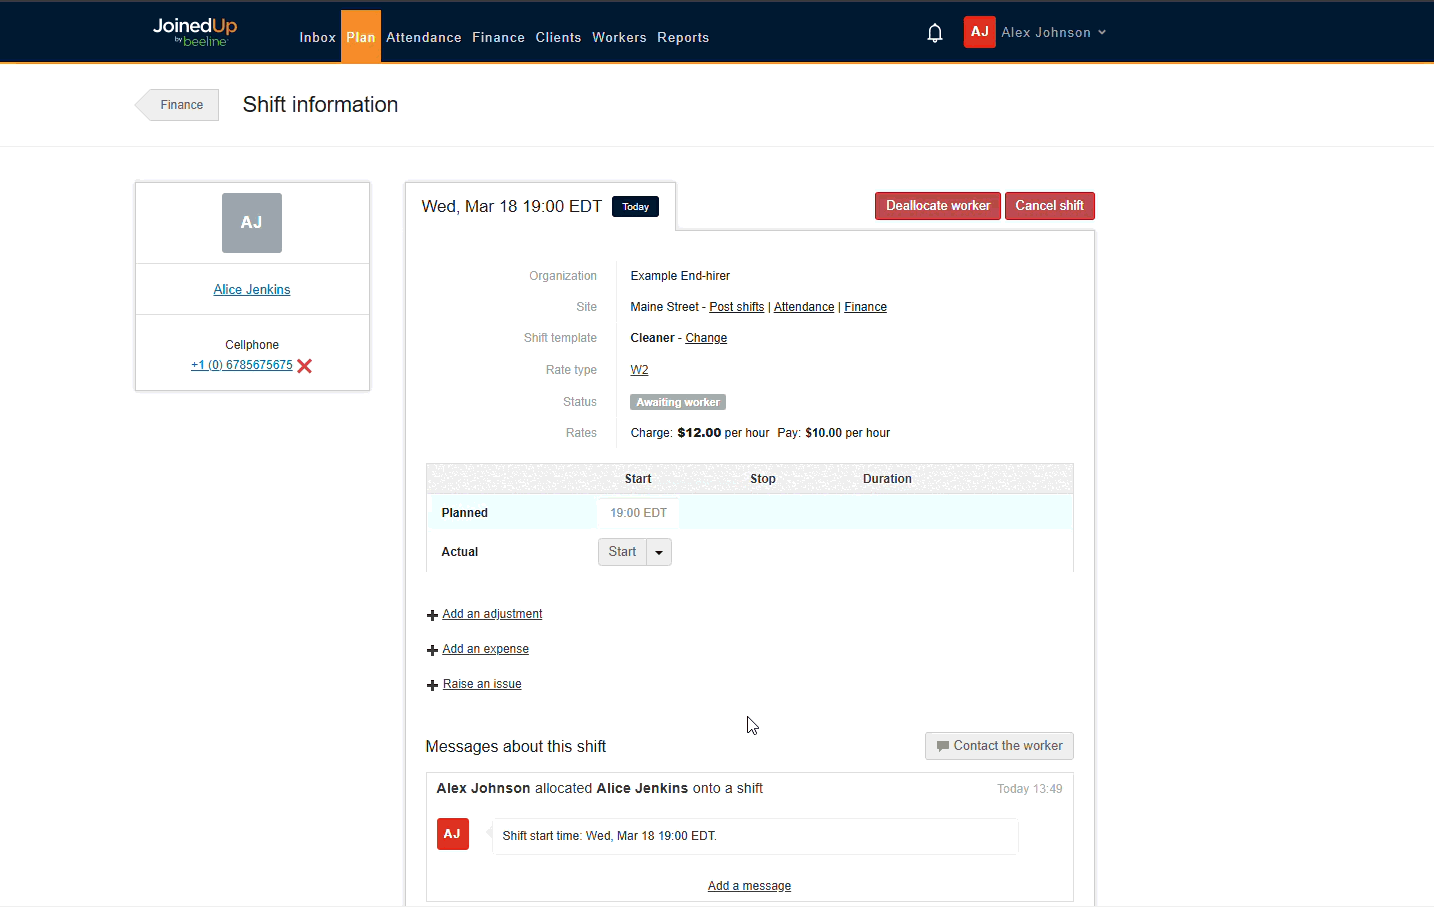
To begin, you must navigate to the Shift Details of the specific shift you wish to add an adjustment or expense to.
This can be accessed in two ways:
-
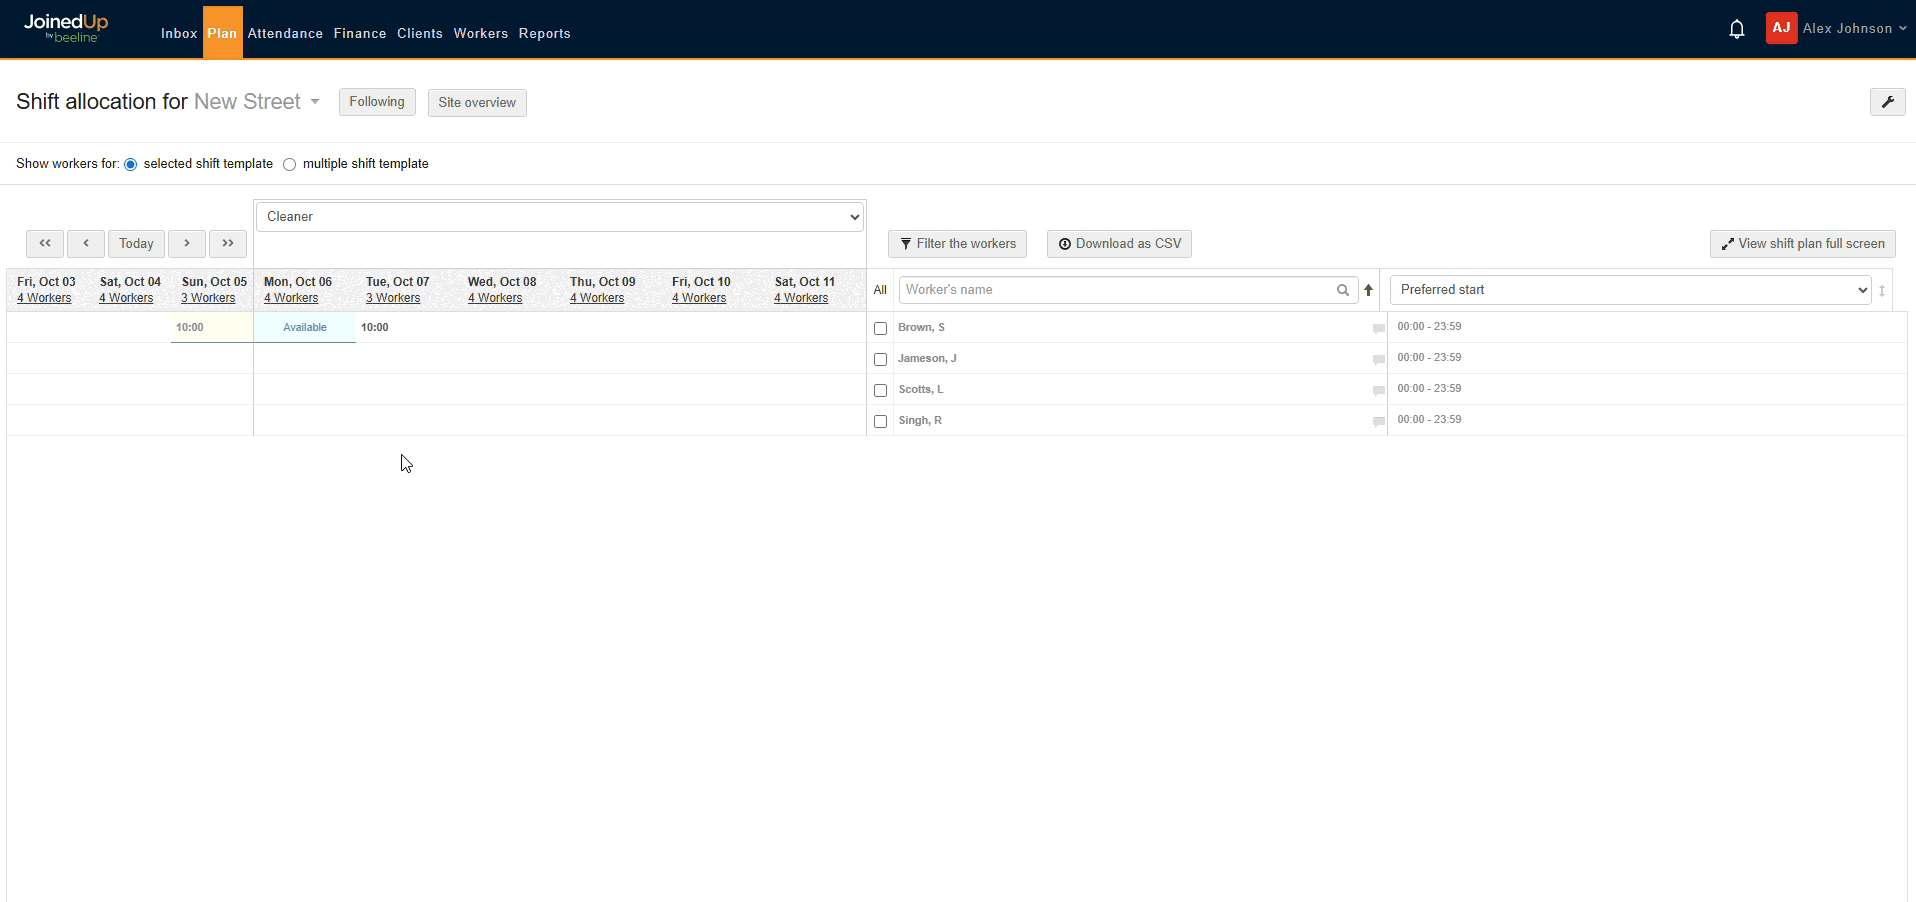
Via the Plan tab by selecting Shift Allocation (On-Site).
-
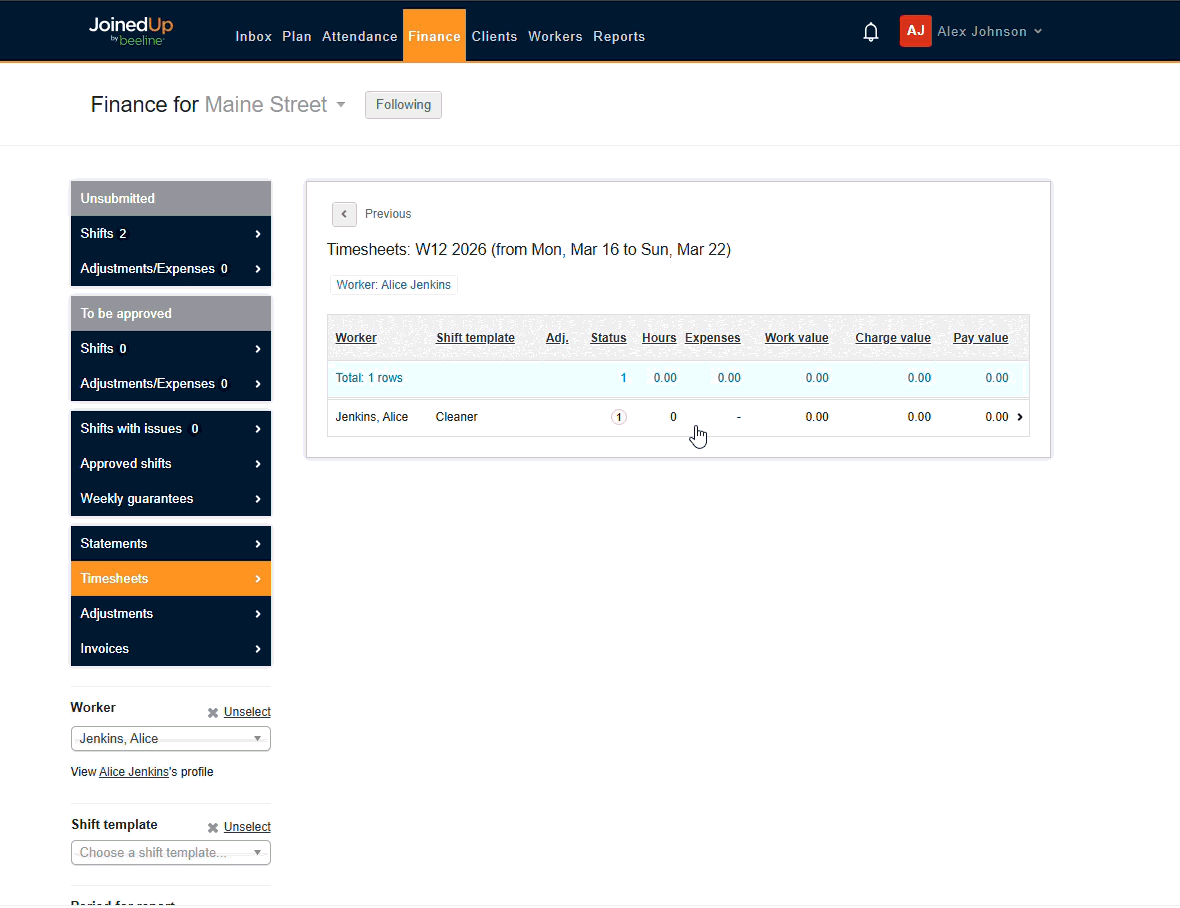
Via the Finance tab by selecting Timesheets.
Adding an Adjustment
Where the below settings are enabled:
-
Require selection of shift template rate types for adjustments
-
Restrict adjustments to hourly rate-based types
-
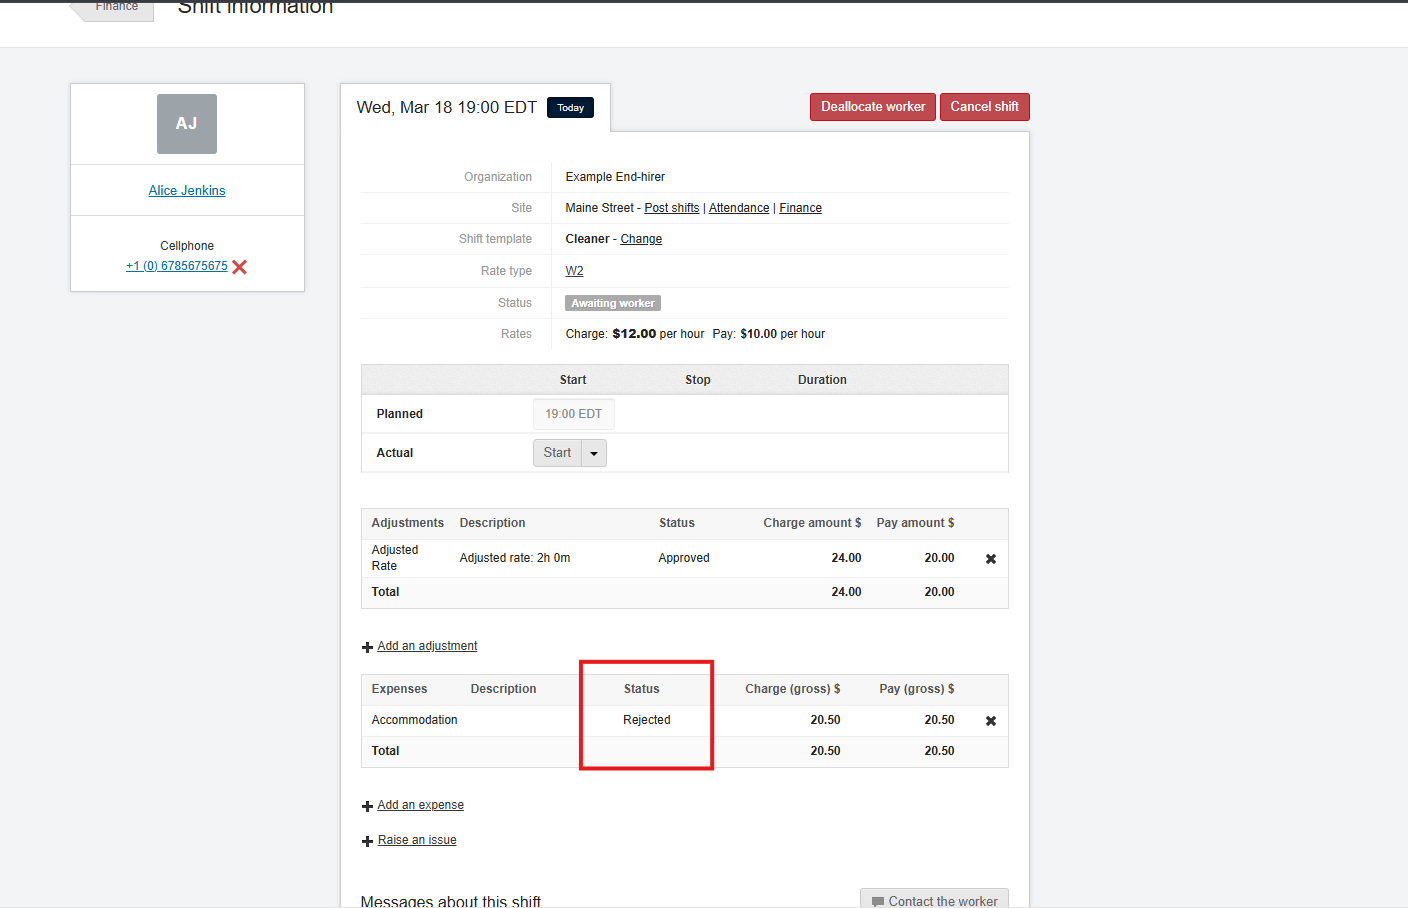
On the Shift Details screen, click the Add an adjustment button.
-
In the adjustment modal, select the appropriate Rate type.
-
The charge and pay rates will automatically populate based on the selected rate type.
-
Enter the duration in the Adjustment length field (hours and minutes).
-
Include a Description if necessary and click Add adjustment to save.
-
A line will appear under your shift details with your unsubmitted adjustment.
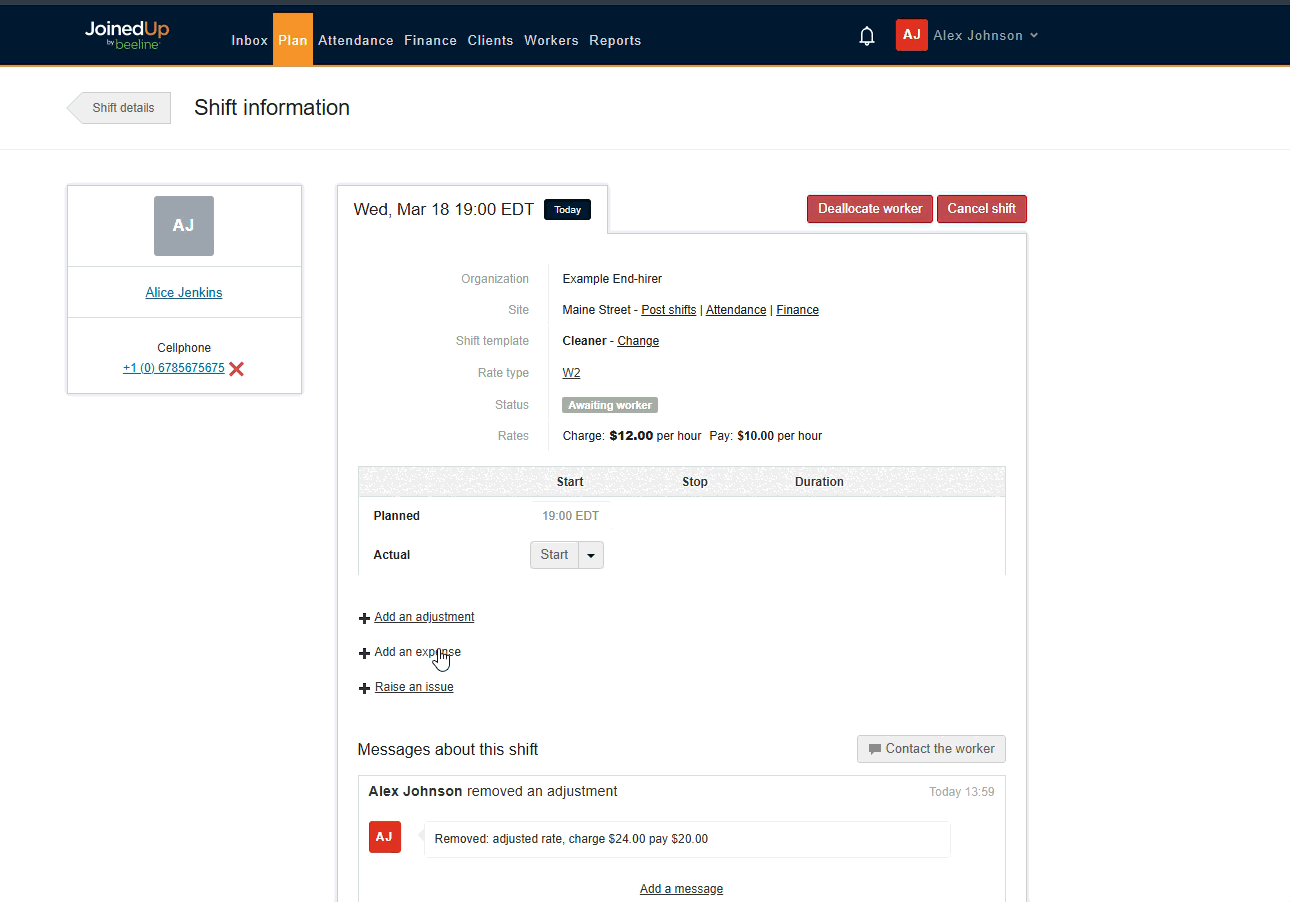
Adding an Expense
-
On the Shift Details screen, click Add an expense.
-
Select the Type of expense from the dropdown menu (e.g., Accommodation).
-
Enter the total value in the Amount section. You can enter a charge and pay value if needed.
-
Provide a Description if necessary and click Add expense.
A line will appear under your shift details with your unsubmitted expense.
Submitting for Approval
To submit your adjustments and expenses:
-
Navigate to the Finance tab.
-
Select the Unsubmitted section under Adjustments/Expenses.
-
You may submit items individually or use the bulk selection checkbox to submit multiple items at once.
| A shift cannot be submitted for final approval until all associated adjustments and expenses have been approved. |
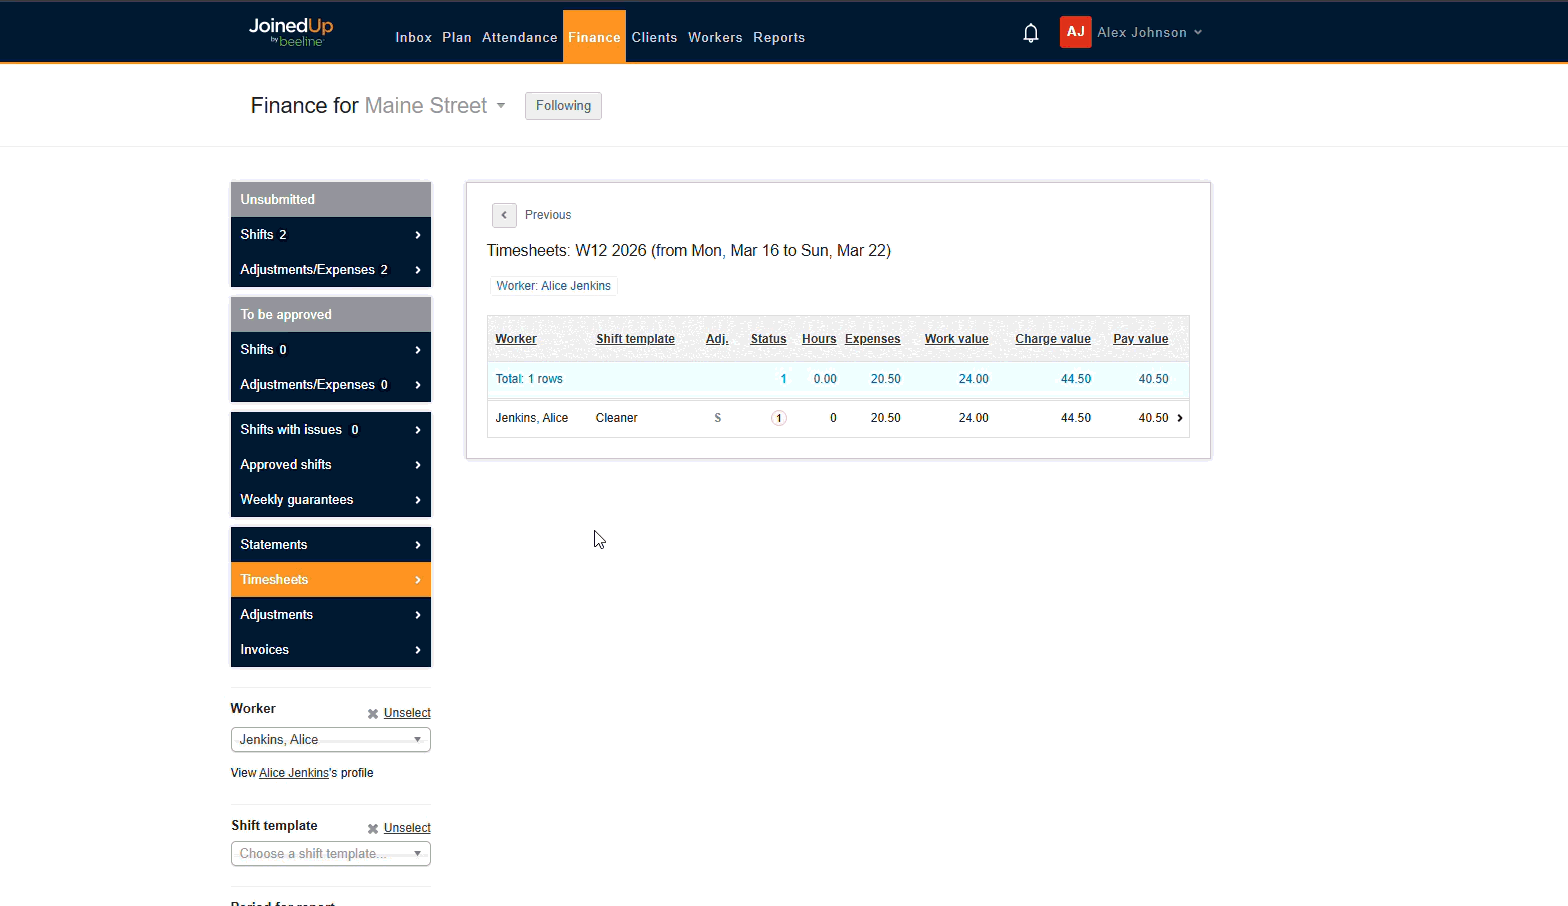
Monitoring Status
-
To be approved: Items currently waiting for review will appear in this section

-
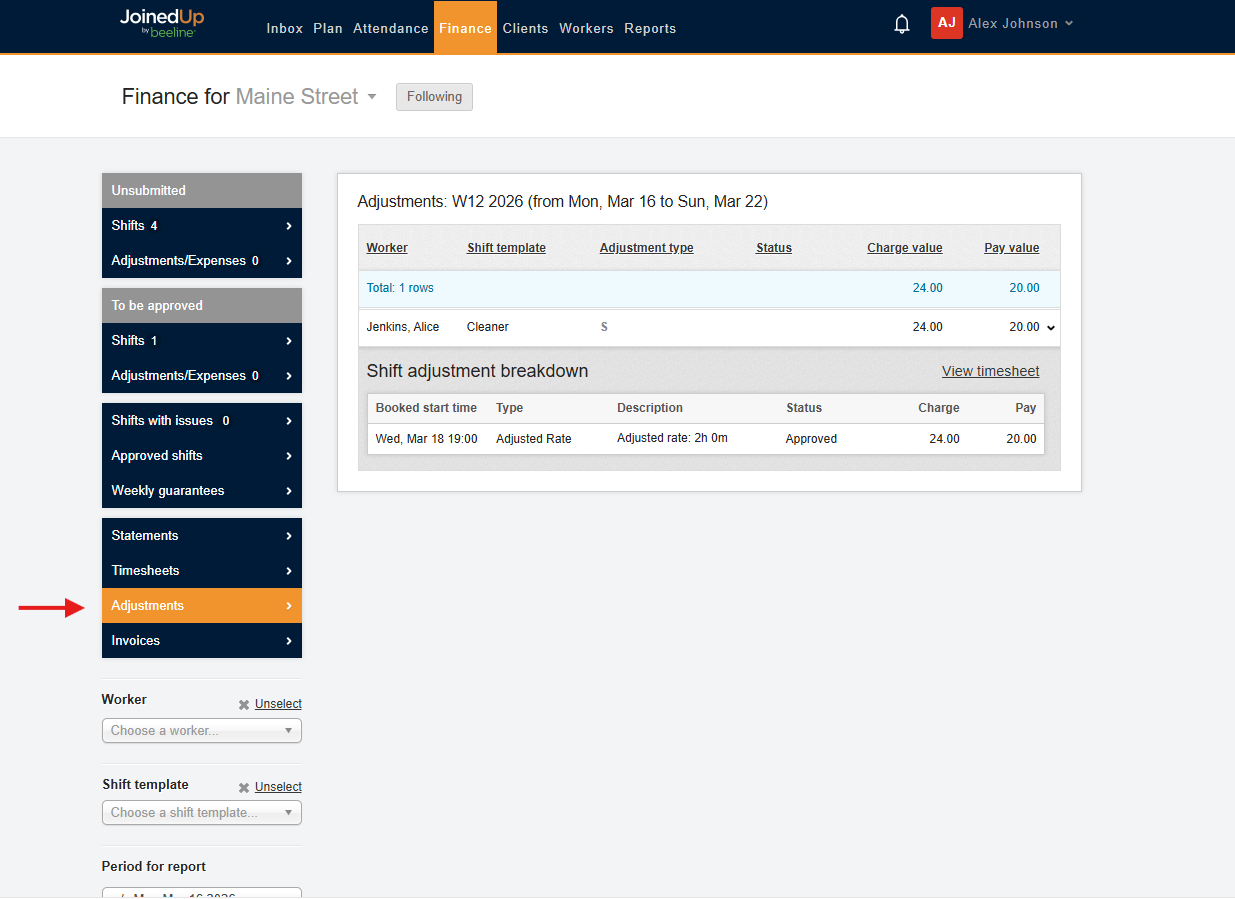
Approved: Once approved, items move to the Approved section and will be reflected on the relevant timesheet. You can view the status of your adjustments in the Adjustments within the Finance screen.
-
Rejected: If an item is rejected, the status will revert to Unsubmitted. You must remove the rejected entry, re-enter the correct details, and resubmit it for approval.
Timesheet Adjustments
To add an adjustment directly to a timesheet rather than a specific shift:
-
Go to Finance, then Timesheets.
-
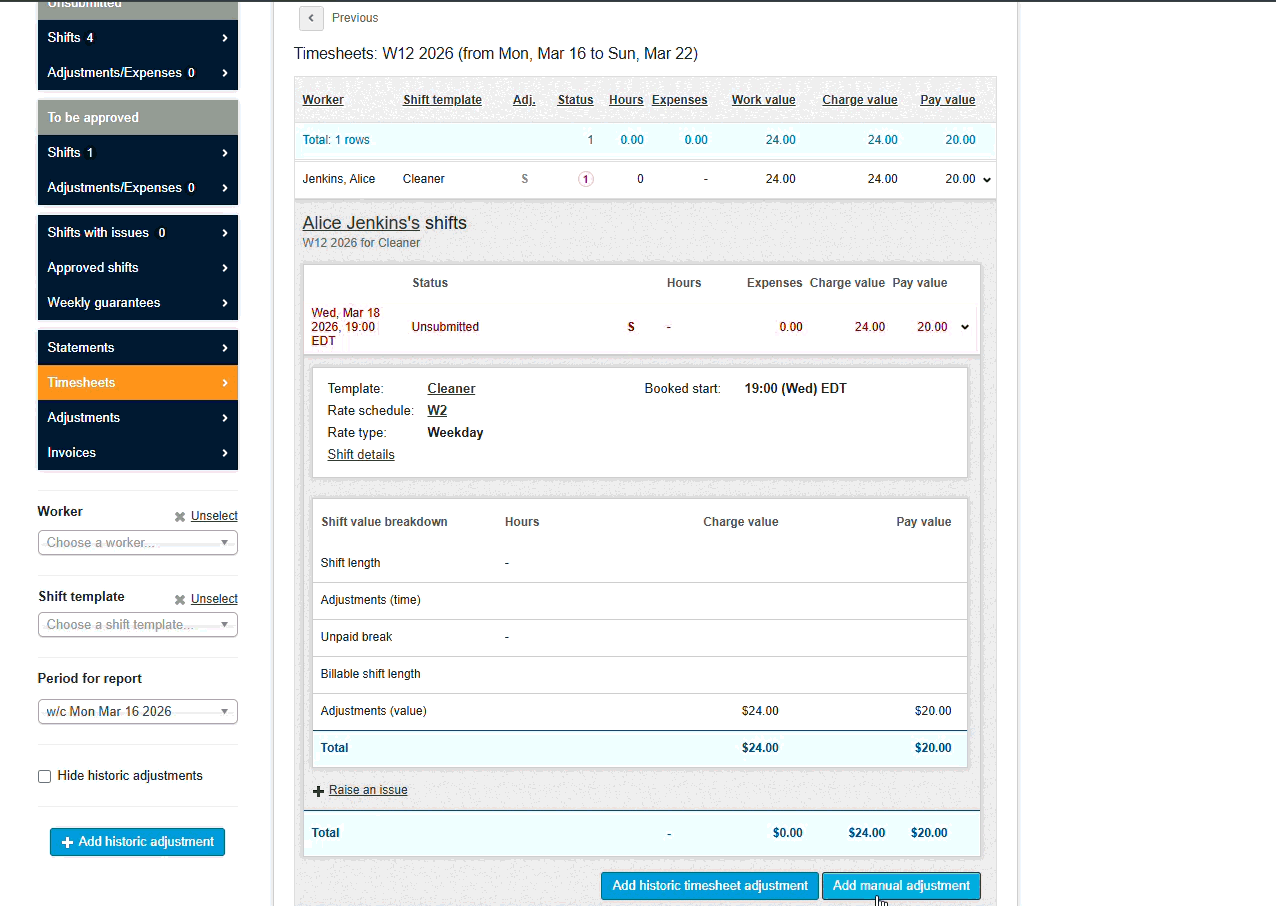
Select the worker’s timesheet.
-
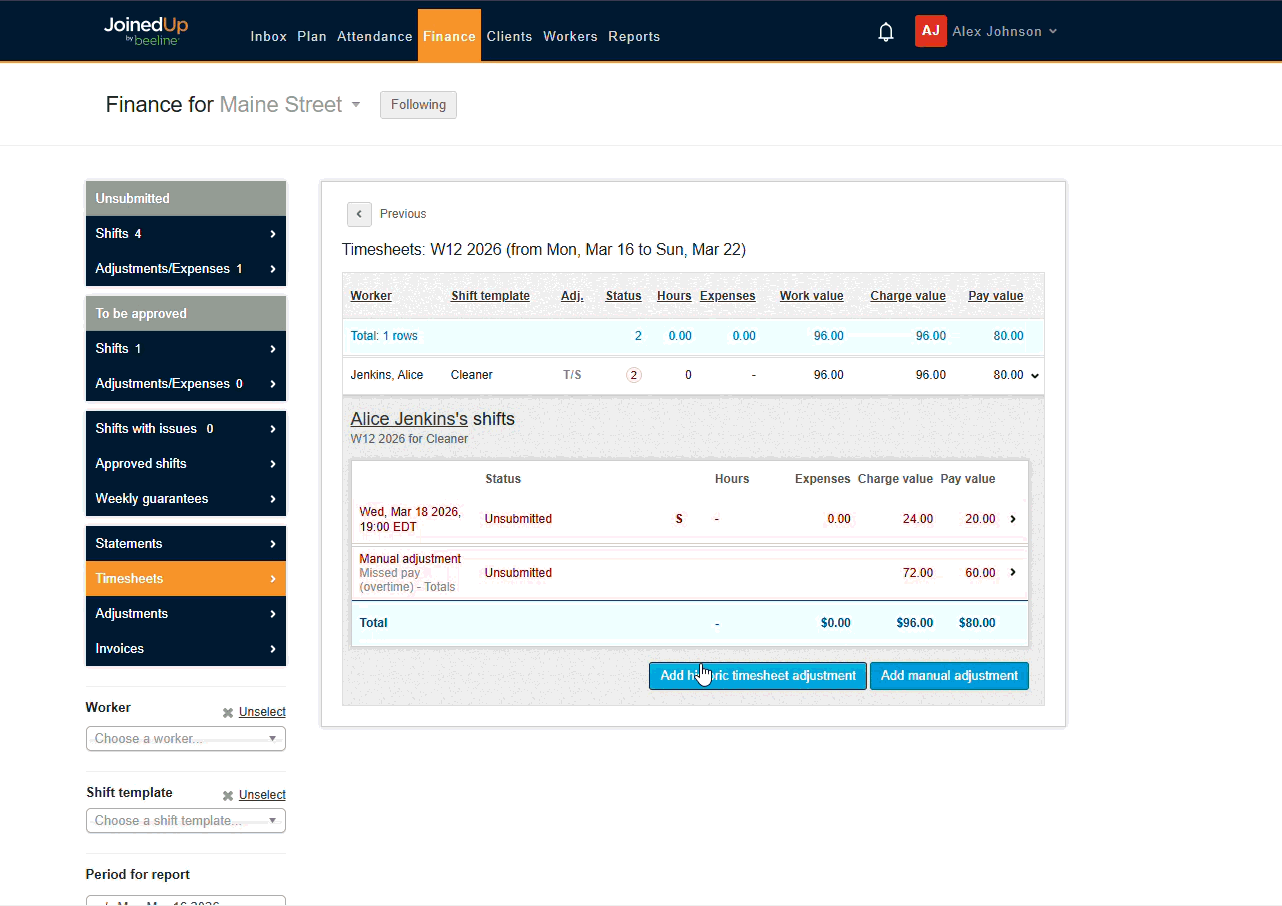
Click Add manual adjustment.
-
In the adjustment modal, select the appropriate Rate type.
-
The charge and pay rates will automatically populate based on the selected rate type.
-
Enter the duration in the Adjustment length field (hours and minutes).
-
Include a Description if necessary and click Add adjustment to save.
A line will appear under your timesheet details with your unsubmitted adjustment.
| Once your timesheets adjustment has been added you will need to follow the submitting for approval process. |
Historic Adjustments
For adjustments relating to past period:
-
Select the specific historic timesheet.
-
Click Add historic timesheet adjustment.
-
Select the relevant historic week.
-
Select Add rate band.
-
Select the relevant Rate Type.
-
Enter the duration in the Adjustment length field (hours and minutes).
| These must also be submitted through the Finance tab for approval. |
See more: