Timesheet Adjustment Importer
Overview
The Timesheet Adjustment Importer allows End Hirer users to bulk upload timesheet adjustments directly, without needing to rely on manual entry or supplier-side processes. This feature enables efficient management of adjustments at scale across your workforce.
|
If you do not see the Timesheet Adjustment Importer in your Spreadsheet upload page, please contact your Customer Operations Specialist to enable. |
Who Can Use This Feature
The Timesheet Adjustment Importer is available to:
-
End Hirer users with access to the relevant site(s)
-
Supplier users (existing functionality — behaviour unchanged)
As an End Hirer, you can upload adjustments for workers who have a timesheet on a site that you own. Worker lookup is aligned with the Managed Workers screen — if you can see a worker there, you can include them in an adjustment import.
How to Access the Importer
Navigate to Attendance > Spreadsheet Upload. Click Import CSV files, then select Shift adjustments uploader from the drop-down list.
|
Download a blank CSV template directly from this screen by clicking Download Template (CSV). This gives you all the correct column headers in the right order. |
CSV File Format
Column Reference
Your CSV must include the following columns in this order. Column headers must match exactly as shown.
| Column name | Required? | When to populate | Description |
|---|---|---|---|
|
Required |
Always |
The unique ID of the timesheet the adjustment applies to. |
|
Required |
Always |
Adjustment type. Must be one of: |
|
Required |
Always |
Free-text description of the adjustment for your records. |
|
Conditional |
MISSED PAY types only |
Number of hours missed. Leave blank for SHIFT BONUS or OTHER. Multiplied by the charge/pay rate to calculate totals. |
|
Required |
Always |
Charge amount. For MISSED PAY types, enter the hourly charge rate. For SHIFT BONUS or OTHER, enter the total charge value. |
|
Required |
Always |
Pay amount. For MISSED PAY types, enter the hourly pay rate. For SHIFT BONUS or OTHER, enter the total pay value. |
|
Required |
Always |
The week number the adjustment relates to (e.g. 20). |
|
Required |
Always |
The four-digit year the adjustment relates to (e.g. 2026). |
|
Required |
Always |
The unique ID of the shift template associated with the timesheet. |
|
Required |
Always |
The name of the site where the shift took place. |
|
Required |
Always |
The client name associated with the site. |
|
Required |
Always |
The unique identifier for the worker in Beeline. |
|
Optional |
Leave blank if not used |
An optional external reference for the worker. Can be left blank. |
|
Optional |
Leave blank if unknown |
Worker’s email address. No longer required — uploads will process successfully without it. |
|
Required |
Always |
Worker’s first name. |
|
Required |
Always |
Worker’s surname. |
Adjustment Types
| Type value | When to use |
|---|---|
|
Adjust for missed regular (non-overtime) hours. Populate |
|
Adjust for missed overtime hours. Populate |
|
Add a shift bonus. Enter total amounts in |
|
Any other adjustment such as a deduction. Enter total amounts in |
How to Import Timesheet Adjustments
Follow the steps below to successfully upload your timesheet adjustments.
-
Prepare your file
Using the required and optional fields listed above, build your adjustment file in CSV format. Ensure Worker IDs and dates are correctly formatted.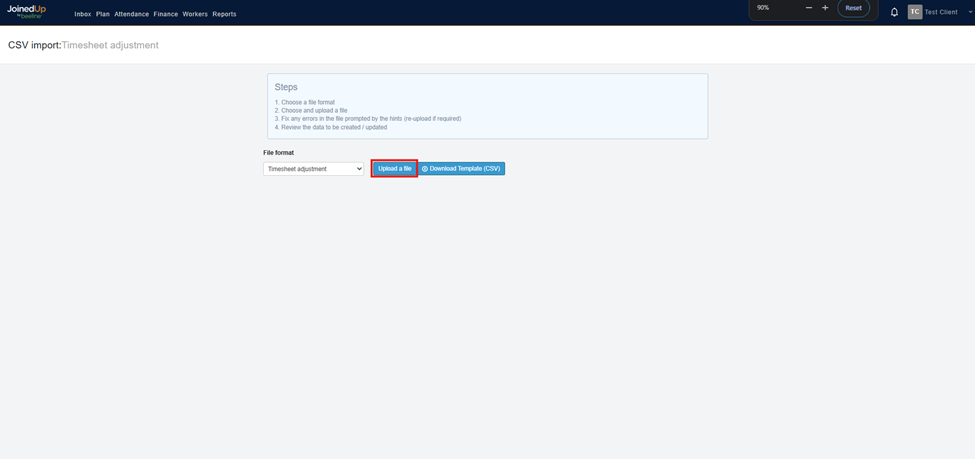
-
Navigate to the Importer
Navigate to the Timesheet Adjustment Importer by going to the Attendance tab, then Spreadsheet Upload. You can also download the CSV template from this page.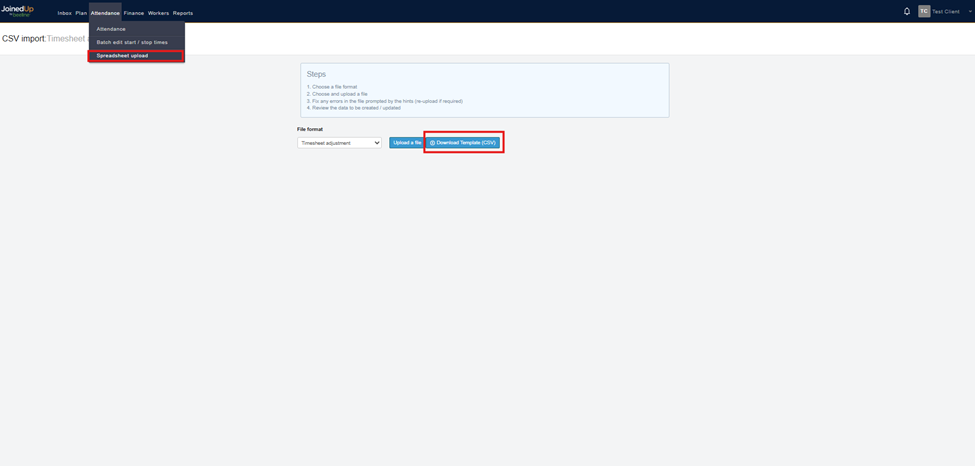
-
Upload your file
Download a template to populate, or click Upload a file and select your prepared import file from your computer.
-
Review and confirm
The importer will validate your file. Review any warnings or errors highlighted before proceeding.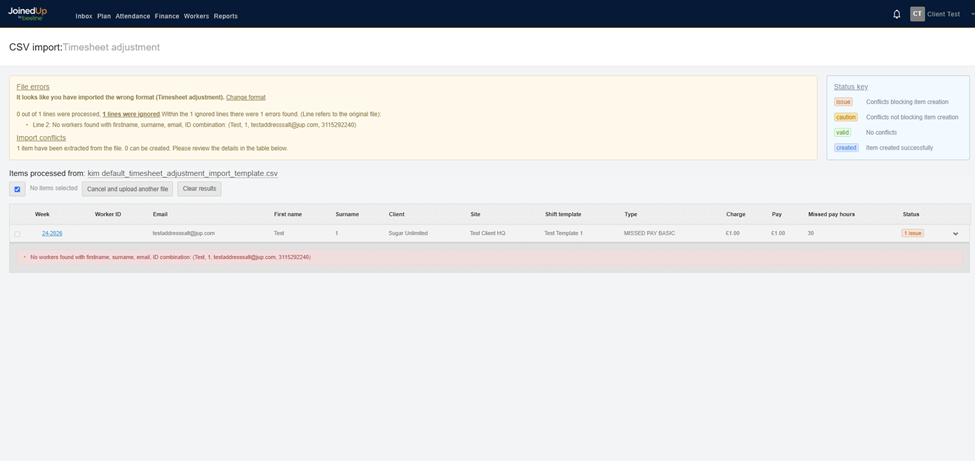
-
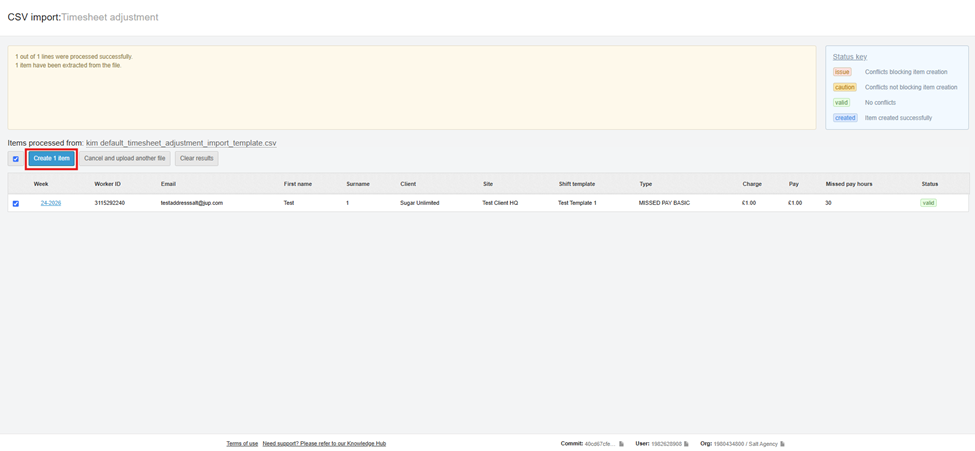
Submit the import
Once validation passes, click Create items to process the adjustments. The system will match each row to the correct worker based on Worker ID and name.Successful Validation will look like this:
-
Check results
Once processing is complete, you will see a summary of successfully imported adjustments and any rows that could not be processed.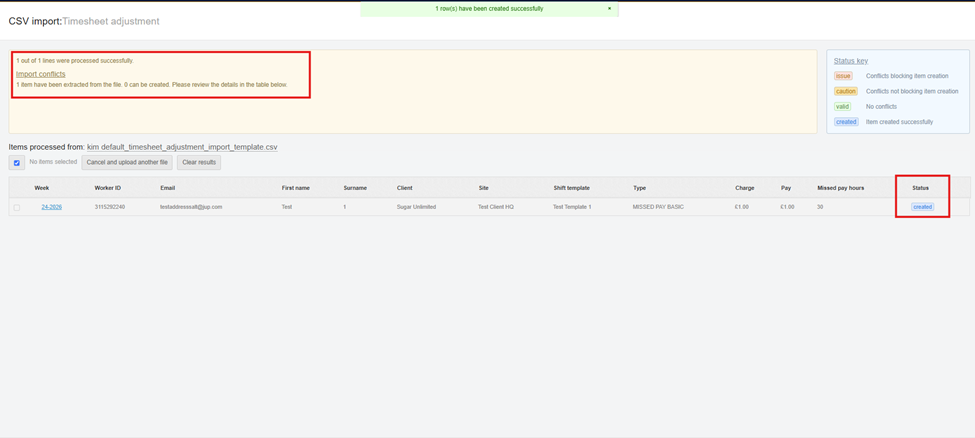
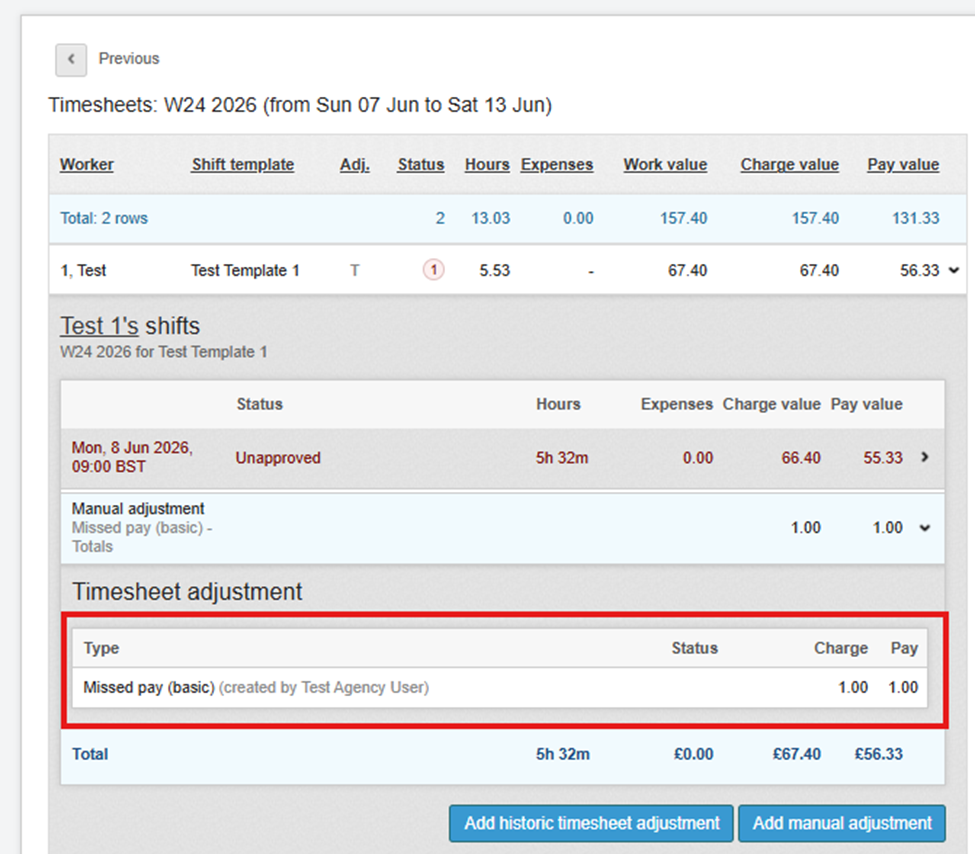
You can also check the Timesheet screen to confirm the changes are reflected.
|
If you process adjustments weekly, you can submit a single row per worker with the total weekly adjustment value rather than one row per shift. The system will attach it to one shift worked that week. |
Adjustments and Expense Approvals
If your organisation has the Adjustments and Expense Approvals feature enabled, adjustments imported via the Timesheet Adjustment Importer will be created in Submitted status.
This means that as an End Hirer, imported adjustments will still need to go through the standard approval flow before they are finalised — the same process as manually created adjustments.
|
If you are unsure whether your organisation has Adjustments and Expense Approvals enabled, or if you have questions about your approval workflow, please contact your Customer Operations Specialist. |
How Workers Are Matched
When you submit an import file as an End Hirer, the system identifies the correct worker using the same logic as the Managed Workers screen:
-
A worker will be matched if they have a timesheet on a site that your organisation owns.
-
Worker lookup uses Worker ID and name — email address is not required for matching.
-
If a worker cannot be found (for example, they have no timesheet on one of your sites), that row will be flagged with an error and skipped.
|
If you see a 'worker not found' error for a worker you expect to manage, verify that the worker has an existing timesheet on a site owned by your organisation. |
Troubleshooting Common Errors
| Error | What to do |
|---|---|
Incorrect Type |
Check the |
Worker or timesheet not found |
Verify the |
Submitted or approved shift |
Adjustments cannot be added to already-submitted or approved shifts. Un-approve or un-submit the shift via the Finance screens first, then re-upload. |
File format not accepted |
Ensure the file is saved as |
Upload completes but adjustments are missing |
Check the results summary for any rows that were skipped. Skipped rows will include a reason. Correct those rows and re-upload them separately. |
Additional Notes
-
Supplier users are not affected by this update — existing supplier importer behaivour remains unchanged.
-
Delete any rows from the file that have no adjustment values before uploading.
-
Large bulk uploads are supported. If you experience slow processing for very large files, allow additional time for the import to complete.