Shifts and Availability Plan Uploader
The Shift & Availability Plan Uploader enables you to update workers' availability in bulk, providing a faster and more efficient alternative to making individual changes. This guide walks you through the setup process and outlines the required format to help ensure your upload is completed successfully without errors.
|
Please reach out to your COS to enable this feature. |
Accessing the Uploader
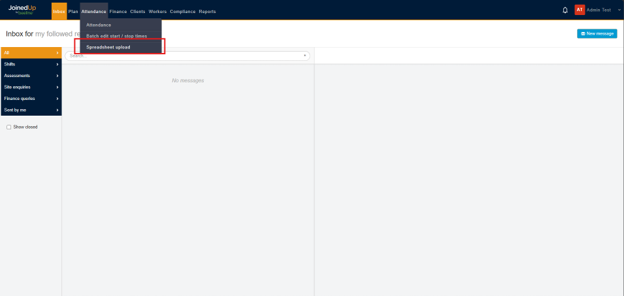
You can access this by navigating through the Attendance Tab, then selecting Spreadsheet Upload.
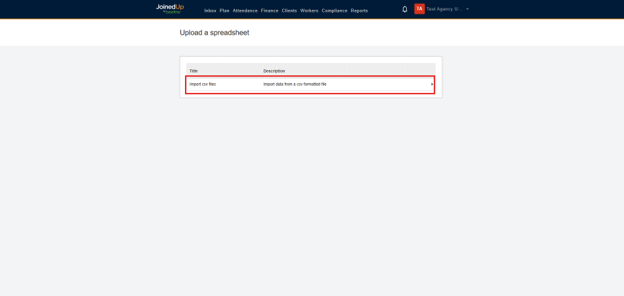
Select Import CSV files.
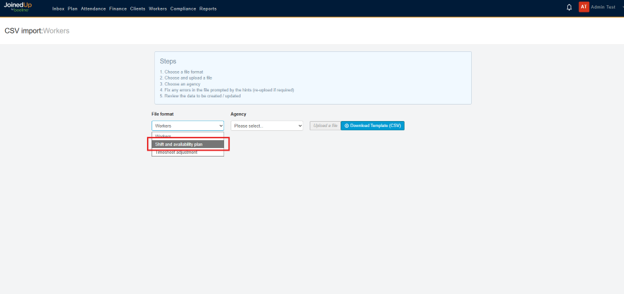
On the File Format drop-down menu, select Shift and Availability Plan.
|
Download the template from this page to ensure you are using the correct format before making any changes or uploading your file. |
Uploader Fields
The following fields are found in the Uploader.
| Field Name | Input | Is Required? |
|---|---|---|
JoinedUp ID |
Worker ID found on the worker’s profile |
Yes |
Email Address |
Registered Email Address of the worker found on the worker’s profile |
No |
Worker Name |
Worker’s Name |
Yes |
Client |
Client Name as registered in JoinedUp |
Yes |
Site |
Site Name as registered in JoinedUp |
Yes |
Day and Date Columns
For the column that indicates the Days and the Date, you can put the days in any order. It is not locked to Monday – Sunday like in the screenshot below.
For example, you can input Saturday to Sunday or Wednesday to Tuesday as long as the dates are in the correct chronological order.
The format for the date is DD/MM/YYYY.


Uploading the File
Once you are done setting up and validating the file, you can upload it. A successful upload should show a valid status.
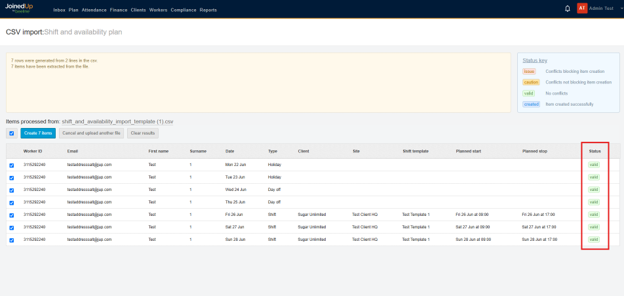
Click the blue Create Items button.
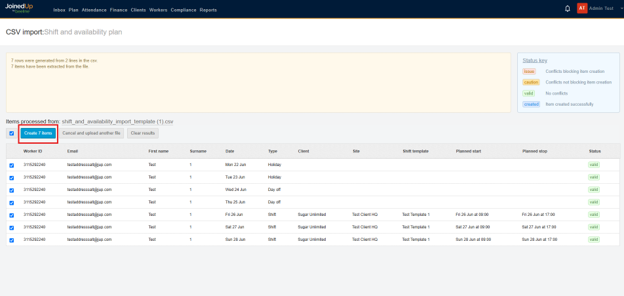
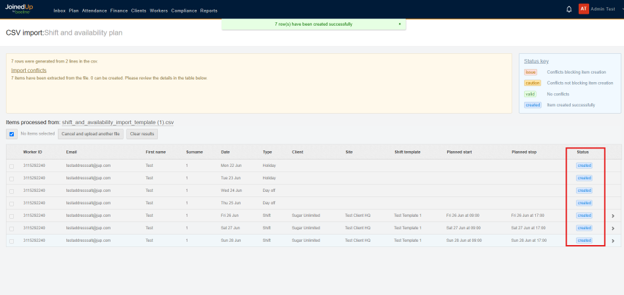
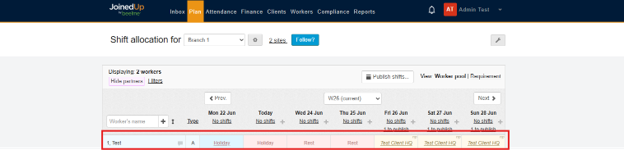
Once successfully created, the status on the right for valid items will change to created.

Error Messages
In some cases, you may encounter error messages when uploading the file. These will be indicated in the status column on the right. You can view the issue by clicking the corresponding row.
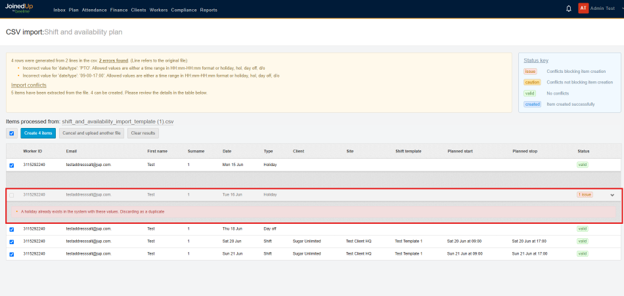
There are also instances where error messages appear in a yellow box at the top. This usually means that data in the uploader cannot be created due to an incorrect format or incorrect input value.

You can upload the file again once it has been updated with the correct format and information.